Sunday, February 19, 2017
How to Install Android 6 0 1 Marshmallow Tekcafe v5 3 v30A ROM on AT T LG G3 D850
How to Install Android 6 0 1 Marshmallow Tekcafe v5 3 v30A ROM on AT T LG G3 D850
According to XDA member Truongthevinh, Android 6.0.1 Marshmallow Tekcafe v5.3 [ v30A] ROM is now released for AT&T LG G3 D850.

÷ ROM Info:
Android 6.0 (MRA58K) + some 6.0.1 patches
Based on LG v30A build 16052016
Updated Google security patches to May, 2016
Add supersu v2.76
Full UX 5.0 from latest LG G5 v10d base
Multi-ariants support
Battery life, performance and memory improvements.


÷ Changelog:
Changelog V5.3:
- Marshmallow 6.0 D855 V30A 16/05/2016
- Fixes and stability improvements, more battery life
- Updated Full app with latest LG G5 v10d base
- Added QSlide and QRemote quick toggles
- Added LED quick toggle
- Added SuperSU 2.76
- Added Play 360 VR Video G5
- Added LG Remote Call G5
- Added Smart Doctor from LG G5
- Added Mirror Link with car from G5
Changelog V5.2:
- Update Marshmallow 6.0 D855 V30A 16/05/2016
- Patch Security Android: 01/05/2016
- Added Xposed v85 in Aroma
- Updated some latest LG G5 apps
- New stock boot for D855(30K), F400(30G),D850(30K), D852(30D), VS985(47A)
- New kernel port for D851,us990, ls990
- Added Apn setting
- Fix copy Clip Tray
- Fix Qmemo
- Netfix: OK (for USA user)
- More Stable System
Changelog V5.1:
- Update Marshmallow 6.0 D855 V30K (26/04/2016)
- Updated and synced with latest LG G5 v10c base
- New stock boot for D855 (30K), D851 (30D)
- New kernel for all variants
- Fix thermal
Changelog V5.0:
- Update Marshmallow 6.0 D855 V30F
- Full LG G5 UX 5.0 and LG G5 Apps
- New stock boot for D855, D851, F400, D852, VS985
- New kernel for all variants
- New root - SuperSU 2.65
- Add ViPER4Android FX Audio Mod in Aroma
- Call Recorder in Aroma
- Navibar 32 dpi in Aroma
- Weather deodex for Support Install Xposed v80
- LG G3 LS990, US990: bug: NFC...
÷ Prerequisites:
•This tutorial is only for installing Android 6.0.1 Marshmallow Tekcafe v5.3 [ v30A] ROM on AT&T LG G3 D850.Please do not try on any other LG G3 Variants.
•Your phone should have a custom recovery installed in order to install this NanoROM ROM on your phone.
•We will be using TWRP Recovery for this tutorial.
•This tutorial will wipe out all your data. Make sure you backup all your data in your phone before proceeding.
•Perform a Dalvik Cache wipe before proceeding from the Recovery Mode.
*Disclaimer:
Android Custom ROM fix ® provide various Firmware Updates and Rooting process along with Custom ROM,Modes,file are all belong to their owners/developers. The autor of this site or the developers are not responsible, if you damage or brick your device.Do it on your own risk and follow the instruction properly.
* Important:
Backup important files stored on your device before proceeding with the steps below, so that in case something goes wrong you’ll have backup of all your important files.


You can find out how to apply it right now via XDA.
For More LG G3 Updates Keep Checking Android custom ROM Fix ™®
That’s all. We hope this guide serves you well. If there’s anything you’d like to be added/changed on this page, PLZ Use the comment box below to contribute more ideas & Suggestions .
Like this post? PLZ Hit the share buttons below to share this article with your friends on Facebook, Google + and Twitter.
Want the latest Updates Sign up for our newsletters!
PLZ Follow Us On Flipboard 4 More Latest Updates.
Best Regards.™
Available link for download

Friday, February 17, 2017
Flash W10M on Lumia 920
Flash W10M on Lumia 920
I was having battery issues with my W10M install on my Lumia 920 so I decided to reflash it using the Windows Device Recovery Tool. Stupid thing installed WP8 and now I cant seem to get W10M back through insider previews.
Is it still possible to get W10M on my device? I am willing to do anything.
I am a bit of a noob, so a step-by-step guide would be appreciated :)
Device info:
App-version- 1.4.0.1
OS-version- 8.10.12393.890
Branch- WPMAIN
OEM - NOKIA
Model - RM-821_eu_netherlands_315
FW-versie - 3051.50009.1424.0005
from xda-developers http://ift.tt/2akz4tE
via IFTTT
Available link for download
Thursday, February 16, 2017
How to Install CM13 0 Nightly Android 6 0 1 Marshmallow on AT T Galaxy S4 jflteatt
How to Install CM13 0 Nightly Android 6 0 1 Marshmallow on AT T Galaxy S4 jflteatt
If you are looking to install a new custom ROM on your AT&T Galaxy S4 ( jflteatt) then we have here as usual the best Custom ROMs for you.

CyanogenMod 13 [CM13.0] Nightly ROM latest build cm-13.0-20160629-NIGHTLY-jflteatt.zip is released for AT&T Galaxy S4 ( jflteatt).
CM13.0 will let AT&T Galaxy S4 users taste the sweetness of Marshmallow 6.0.1 such as the battery saving ‘doze’ functionality and new permissions model, alongside the CM features you’d expect.
Follow our guide below to download the Unofficial CM13.0 Nightly and install it yourself.
÷ Prerequisites:
•This tutorial is only for installing CyanogenMod 13 AT&T Galaxy S4 ( jflteatt) Please do not try on any other Samsung Galaxy S4 variants.
•Your phone should be rooted and haveClockworkMod recovery installed from before.
•This tutorial will wipe out all your data.Proceed at your own risk.Perform a Dalvik Cache wipe before proceeding from the recovery mode.
•Make sure you backup all your data in your phone before proceeding.
•Samsung KIES will NOT detect your phone after installing this ROM because it is a custom firmware.
*Disclaimer:
Android Custom ROM fix ® provide various Firmware Updates and Rooting process along with Custom ROM,Modes,file are all belong to their owners/developers. The autor of this site or the developers are not responsible, if you damage or brick your device.Do it on your own risk and follow the instruction properly.
* Important:
Backup important files stored on your device before proceeding with the steps below, so that in case something goes wrong you’ll have backup of all your important files.

÷ How to Install CM13.0 Nightly Android 6.0.1 Marshmallow on AT&T Galaxy S4 ( jflteatt)
Step 1 – Download CM13.0 Android 6.0.1 Marshmallow and Google Apps for your AT&T Samsung Galaxy S4 to your computer.
Step 2 – Connect and mount your Galaxy S4 ( jflteatt) USB memory on your computer using the USB cable.
Step 3 – Now copy/paste the downloaded Android 6.0.1 ROM zip file and Google Appszip files to your SD card. Make sure the files are in the SD card root (not in any folder).
Step 4 – Then turn OFF your phone and disconnect from the USB cable.
Step 5 – Now to get in the Recovery Mode. Switch ON the phone while pressing and holding Volume Up + Home + Power buttons together
Step 6 – Once you are in ClockworkModRecovery, select perform a full data wipe by selecting “wipe data/factory reset”. Use the Power button to select everything while in the Recovery Mode.
Step 7 – Then, perform a cache wipe by selecting “wipe cache partition” .
Step 8 – Now this is optional, but it is recommended to perform a wipe of your dalvik cache as well. You will not get into boot loops or any other errors. From CWM recovery, go to ‘advanced’ and then select “wipe dalvik cache”.
Step 9 – Then go back to the main recovery screen and select “install zip from SD card”.
Step 10 – Now select “choose zip from sdcard”. Using your volume keys, navigate to the Android 6.0.1 ROM zip file that you copied to your SD card and select it using the Power button. Confirm the installation on the next screen and the installation procedure should start now.
Google Apps: Repeat the above step for the Gapps zip file as well and install it on your phone.
Step 11 – After the installation completes, go to “+++++Go Back+++++” and reboot the phone by selecting “reboot system now” from the recovery menu.

Your AT&T Galaxy S4 ( jflteatt) will boot now and it might take about 5 minutes to boot on your first time. So, please wait.
That’s it Your Samsung Galaxy S4 should now have CM13.0 Nightly Android 6.0.1 Marshmallow latest build installed on your phone! Go to Settings > About phone to verify.
For More AT&T Galaxy S4 Brand New Firmware & Custom ROM keep checking AndroidCustomROM Fix ™®
Like this post? PLZ Hit the share buttons below to share this article with your friends on Facebook, Google + and Twitter.
PLZ Follow Us On Flipboard 4 More latest custom ROM fix.
PLZ Use the comment box below to contribute more ideas & Suggestions .
Best Regards.
Available link for download
Improvements for smaller app downloads on Google Play
Improvements for smaller app downloads on Google Play
Posted by Anthony Morris, SWE Google Play
Google Play continues to grow rapidly, as Android users installed over 65 billion apps in the last year from the Google Play Store. We’re also seeing developers move to update their apps more frequently to push great new content, patch security vulnerabilities, and iterate quickly on user feedback.
However, many users are sensitive to the amount of data they use, especially if they are not on Wi-Fi. Google Play is investing in improvements to reduce the data that needs to be transferred for app installs and updates, while making data cost more transparent to users.
Read on to understand the updates and learn some tips for ways to optimize the size of your APK.
New Delta algorithm to reduce the size of app updates
For approximately 98% of app updates from the Play Store, only changes (deltas) to APK files are downloaded and merged with the existing files, reducing the size of updates. We recently rolled out a delta algorithm, bsdiff, that further reduces patches by up to 50% or more compared to the previous algorithm. Bsdiff is specifically targeted to produce more efficient deltas of native libraries by taking advantage of the specific ways in which compiled native code changes between versions. To be most effective, native libraries should be stored uncompressed (compression interferes with delta algorithms).
An example from Chrome:
| Patch Description | Previous patch size | Bsdiff Size |
| M46 to M47 major update | 22.8 MB | 12.9 MB |
| M47 minor update | 15.3 MB | 3.6 MB |
Apps that don’t have uncompressed native libraries can see a 5% decrease in size on average, compared to the previous delta algorithm.
Applying the delta algorithm to APK Expansion Files to further reduce update size
APK Expansion Files allow you to include additional large files up to 2GB in size (e.g. high resolution graphics or media files) with your app, which is especially popular with games. We have recently expanded our delta and compression algorithms to apply to these APK Expansion Files in addition to APKs, reducing the download size of initial installs by 12%, and updates by 65% on average.
Clearer size information in the Play Store
Alongside the improvements to reduce download size, we also made information displayed about data used and download sizes in the Play Store clearer. You can now see actual download sizes, not the APK file size, in the Play Store. If you already have an app, you will only see the update size. These changes are rolling out now.


Tips to reduce your download sizes
1. Optimize for the right size measurements: Users care about download size (i.e. how many bytes are transferred when installing/updating an app), and they care about disk size (i.e. how much space the app takes up on disk). It’s important to note that neither of these are the same as the original APK file size nor necessarily correlated.
Chrome example:
| Compressed Native Library | Uncompressed Native Library | |
| APK Size | 39MB | 52MB (+25%) |
| Download size (install) | 29MB | 29MB (no change) |
| Download size (update) | 29MB | 21MB (-29%) |
| Disk size | 71MB | 52MB (-26%) |
Chrome found that initial download size remained the same by not compressing the native library in their APK, while the APK size increased, because Google Play already performs compression for downloads. They also found that the update size decreased, as deltas are more effective with uncompressed files, and disk size decreased as you no longer need an compressed copy of the native library:
2. Reduce your APK size: Remove unnecessary data from the APK like unused resources and code.
3. Optimize parts of your APK to make them smaller: Using more efficient file formats, for example by using WebP instead of JPEG, or by using Proguard to remove unused code.
Available link for download
Monday, February 13, 2017
How to Install Android 6 0 1 Marshmallow Nexify ROM V3 on T Mobile Galaxy Note 5 SM N920T
How to Install Android 6 0 1 Marshmallow Nexify ROM V3 on T Mobile Galaxy Note 5 SM N920T
According to XDA Member TechGuy081, Android 6.0.1 Marshmallow Nexify ROM V3 Available now for T-Mobile Samsung Galaxy Note 5 SM- N920T.

Nexify Rom Its Made To Make Your Note 5 Close To Stock Android MM Keep In Mind This Wont Make Your Device Be Stock Android I Just Removed Apps (Like Bloatware) From Samsung So You Can Download Google Apps To Replace Stock Apps, Like Clock App, Calculator With Googles Or Your Own!
•Rom Features
- Based on N920TUVU2DPD1 Firmware
- Deodexed all Apps
- Rooted with SuperSU 2.74
- Auto Wipe Cache, Dalvik Cache and Format System
- System Optimization
- Tweaks in Build.prop
- Removed Knox
- Removed As Many Apps As Possible
- Removed Safe Volume Warning
- Ad Away
- Private Mode Working
- 5 Reboot Menu
- Added Dolby Atmos
- Ultra Data Saving Working
- Battery Tweaks
- App Lock
- Gray Status Bar Removed
- Stock MM Emojis.

Change Log:
• June 16
-Initial Release V1
• June 26
- V2
-Special Thanks To @Battlehero
- Reboot Menu Fixed
- Gray Status Bar Removed
- Updated some apps
- Fixed Bugs
- Samsung keyboard Replaced By Googles
- Added Stock MM Emojis
• July 7
- Fixed alot of bugs you asked for
- Nfc And Payment, VPN functionality , Live Walpaper Picker, Hardware Buttons Fixed, Auto Brightness Fixed
- Removed Emergency From power Menu
- Removed Some More Bloat
- Removed Carrier Text In Lock-screen
- Removed Slide To Unlock in Lock-screen
- App Signature Check Removed Now You Can Install Old Apps Over New Versions
- Touchlight Key Enabled In Settings
- Animation Set to 0.25
- OutdoorMode
- Knox Removed
- All Apps In Multiwindow Mode
- And More!
÷ Prerequisites:
•This tutorial is only for installing Android 6.0.1 Marshmallow Nexify ROM V3 on T-Mobile Samsung Galaxy Note 5 SM- N920T.Please do not try on any other Galaxy Note 5 Variants.
•Your phone should have a custom recovery installed in order to install this NanoROM ROM on your phone.
•We will be using TWRP Recovery for this tutorial.
•This tutorial will wipe out all your data. Make sure you backup all your data in your phone before proceeding.
•Samsung KIES will NOT detect your phone after installing this ROM because it is a custom firmware
•Perform a Dalvik Cache wipe before proceeding from the Recovery Mode.
*Disclaimer:
Android Custom ROM fix ® provide various Firmware Updates and Rooting process along with Custom ROM,Modes,file are all belong to their owners/developers. The autor of this site or the developers are not responsible, if you damage or brick your device.Do it on your own risk and follow the instruction properly.
* Important:
Backup important files stored on your device before proceeding with the steps below, so that in case something goes wrong you’ll have backup of all your important files.
You can find out how to apply it right now via XDA.

For More Samsung Galaxy Note 5 Updates Keep Checking Android custom ROM Fix ™®
That’s all. We hope this guide serves you well. If there’s anything you’d like to be added/changed on this page, PLZ Use the comment box below to contribute more ideas & Suggestions .
Like this post? PLZ Hit the share buttons below to share this article with your friends on Facebook, Google + and Twitter.
Want the latest Updates Sign up for our newsletters!
PLZ Follow Us On Flipboard 4 More Latest Updates.
Best Regards.™
Available link for download
Sunday, February 12, 2017
Iterate faster on Google Play with improved beta testing
Iterate faster on Google Play with improved beta testing
Posted by Ellie Powers, Product Manager, Google Play
Today, Google Play is making it easier for you to manage beta tests and get your users to join them. Since we launched beta testing two years ago, developers have told us that it’s become a critical part of their workflow in testing ideas, gathering rapid feedback, and improving their apps. In fact, we’ve found that 80 percent of developers with popular apps routinely run beta tests as part of their workflow.
Improvements to managing a beta test in the Developer Console
Currently, the Google Play Developer Console lets developers release early versions of their app to selected users as an alpha or beta test before pushing updates to full production. The select user group downloads the app on Google Play as normal, but can’t review or rate it on the store. This gives you time to address bugs and other issues without negatively impacting your app listing.
Based on your feedback, we’re launching new features to more effectively manage your beta tests, and enable users to join with one click.
- NEW! Open beta – Use an open beta when you want any user who has the link to be able to join your beta with just one click. One of the advantages of an open beta is that it allows you to scale to a large number of testers. However, you can also limit the maximum number of users who can join.
- NEW! Closed beta using email addresses – If you want to restrict which users can access your beta, you have a new option: you can now set up a closed beta using lists of individual email addresses which you can add individually or upload as a .csv file. These users will be able to join your beta via a one-click opt-in link.
- Closed beta with Google+ community or Google Group – This is the option that you’ve been using today, and you can continue to use betas with Google+ communities or Google Groups. You will also be able to move to an open beta while maintaining your existing testers.
How developers are finding success with beta testing
Beta testing is one of the fast iteration features of Google Play and Android that help drive success for developers like Wooga, the creators of hit games Diamond Dash, Jelly Splash, and Agent Alice. Find out more about how Wooga iterates on Android first from Sebastian Kriese, Head of Partnerships, and Pal Tamas Feher, Head of Engineering.
Kabam is a global leader in AAA quality mobile games developed in partnership with Hollywood studios for such franchises such as Fast & Furious, Marvel, Star Wars and The Hobbit. Beta testing helps Kabam engineers perfect the gameplay for Android devices before launch. “The ability to receive pointed feedback and rapidly reiterate via alpha/beta testing on Google Play has been extremely beneficial to our worldwide launches,” said Kabam VP Rob Oshima.
Matt Small, Co-Founder of Vector Unit recently told us how they’ve been using beta testing extensively to improve Beach Buggy Racing and uncover issues they may not have found otherwise. You can read Matt’s blog post about beta testing on Google Play on Gamasutra to hear about their experience. We’ve picked a few of Matt’s tips and shared them below:
- Limit more sensitive builds to a closed beta where you invite individual testers via email addresses. Once glaring problems are ironed out, publish your app to an open beta to gather feedback from a wider audience before going to production.
- Set expectations early. Let users know about the risks of beta testing (e.g. the software may not be stable) and tell them what you’re looking for in their feedback.
- Encourage critical feedback. Thank people when their criticisms are thoughtful and clearly explained and try to steer less-helpful feedback in a more productive direction.
- Respond quickly. The more people see actual responses from the game developer, the more encouraged they are to participate.
- Enable Google Play game services. To let testers access features like Achievements and Leaderboards before they are published, go into the Google Play game services testing panel and enable them.
We hope this update to beta testing makes it easier for you to test your app and gather valuable feedback and that these tips help you conduct successful tests. Visit the Developer Console Help Center to find out more about setting up beta testing for your app.
+Android Developers

Available link for download
Tuesday, February 7, 2017
How to Get Android Nougat Notification Shade on Galaxy S6 S7 and Edge variants
How to Get Android Nougat Notification Shade on Galaxy S6 S7 and Edge variants
Welcome to the guide on how to enable soft keys and get the Nougat notification shade on Samsung Marshmallow ROMs.

If you don’t like Samsung S6 or S7 TouchWiz, Samsung’s custom UI, a lot, then we don’t blame you , in fact, we share the feeling with ya. The cool thing with Android and its myriad of hacks is that customization is endless. A trick shared below will allow you to replace the look of notification shade to make it more like Android Nougat!
With root, it’s possible to get some of Android Nougat looks on your Galaxy S6 and S7, including the Edge variants of them both. But know that this requires root access. If you don’t have root, then you better look to root your device first.

You can also enable and disable the soft keys, or on-screen keys if you prefer. While, if you wish to disable the capacitive keys — which is a good thing to do when you got soft keys up and running — then that’s possible too.
For the guide, please visit here by galaxyYtester, where you will find some basic guidance on how to achieve this.
For More Samsung Galaxy S6, S7 Updates Keep Checking Android Custom ROM Fix
That’s all. We hope this guide serves you well. If there’s anything you’d like to be added/changed on this page, PLZ Use the comment box below to contribute more ideas & Suggestions .
Like this post? PLZ Hit the share buttons below to share this article with your friends on Facebook, Google + and Twitter.
Want the latest Updates Sign up for our newsletters!
PLZ Follow Us On Flipboard 4 More Latest Updates.
Best Regards.™
Available link for download
Monday, February 6, 2017
Android Developer Story Peak Games generates majority of global revenue for popular game ‘Spades’ on Android
Android Developer Story Peak Games generates majority of global revenue for popular game ‘Spades’ on Android
Posted by Lily Sheringham, Google Play team
Founded in 2010, Turkish mobile games developer Peak Games started developing games targeted to the local market and is now scaling globally. Their game ‘Spades Plus’ is growing in the US and the game generates over 70% of its mobile revenue from Android.
Watch Erdem ?nan, Business Intelligence and Marketing Director, and ?lkin Ula? Balkanay, Head of Android Development, explain how Peak Games improved user engagement and increased installs with Google Play Store Listing experiments and app promotion right from within the Developer Console.
Find out more about how to use run tests on your Store Listing to increase your installs and how to promote your app or game with Universal App Campaigns from the Google Play Developer Console.
Available link for download
Saturday, February 4, 2017
Android Developer Story StoryToys finds success in the ‘Family’ section on Google Play
Android Developer Story StoryToys finds success in the ‘Family’ section on Google Play
Posted by Lily Sheringham, Google Play team
Based in Dublin, Ireland, StoryToys is a leading publisher of interactive books and games for children. Like most kids’ app developers, they faced the challenges of engaging with the right audiences to get their content discovered. Since the launch of the Family section on Google Play, StoryToys has experienced an uplift of 270% in revenue and an increase of 1300% in downloads.
Hear Emmet O’Neill, Chief Product Officer, and Gavin Barrett, Commercial Director, discuss how the Family section creates a trusted and creative space for families to find new content. Also hear how beta testing, localized pricing and more, has allowed StoryToy’s flagship app, My Very Hungry Caterpillar, to significantly increase engagement and revenue.
Learn more about Google Play for Families and get the Playbook for Developers app to stay up-to-date with more features and best practices that will help you grow a successful business on Google Play.
Available link for download
How to Install TWRP Image on OnePlus 3
How to Install TWRP Image on OnePlus 3

OnePlus 3 was released on June 14th, 2016.The phone sports all the high-end features and specification but has a very budget friendly price tag which definitely attracts buyers.Now OnePlus 3 has a full metal body and one of the most important updates is RAM.OnePlus 3 now has 6GB of RAM which is unbelievable
Thanks to XDA Developer "Naman Bhalla" for sharing the recovery file.Now users can easily flash the TWRP recovery file using fastboot commands.Then they can flash the latest SuperSu root file to get root access on OnePlus 3.Donot worry we are going to share step by step guide on How to Install TWRP Recovery on OnePlus 3.
÷ Prerequisites:
•Make sure bootloader of OnePlus 3 is unlocked
•Warranty may be void of your device if you follow the procedures given on this page. You only are responsible for your device. We won’t be liable if any damage occurs to your device and/or its components.
•Make sure your device has more than 50% battery life
•The TWRP version is not tested yet.

*Disclaimer:
Android Custom ROM fix ® provide various Firmware Updates and Rooting process along with Custom ROM,Modes,file are all belong to their owners/developers. The autor of this site or the developers are not responsible, if you damage or brick your device.Do it on your own risk and follow the instruction properly.
* Important:
Backup important files stored on your device before proceeding with the steps below, so that in case something goes wrong you’ll have backup of all your important files.
÷ How to Install TWRP Image on OnePlus 3:
1- First Download a TWRP recovery .img file for your for OnePlus 3.
2- Setup ADB and Fastboot on your PC.
3- Enable USB debugging on your device.
4- Open the folder where your TWRP Recovery .img file is saved.
5- Now open a command window inside that folder. To do that, “Shift + Right click” on any empty white space inside the folder and then select “Open command window here” from the context menu.
6- Connect your device to the PC. And type the following into the command window we opened in step 4 above to boot your device into bootloader/fastboot mode:
adb reboot bootloader
? If your asks for permission to “Allow USB debugging”, tap OK.
7- Once your device boots into bootloader mode, issue the following command into command window to flash the TWRP recovery .img file:
fastboot flash recovery twrp-2.8.x.x-xxx.img
? Here modify twrp.img with the name of your TWRP recovery .img file, OR change your TWRP recovery filename to twrp.img and use the ]
command above.
8- Once TWRP is successfully flashed on your device, issue the following command to reboot:
fastboot reboot
Done!!! Now you have TWRP on your OnePlus 3.
For More OnePlus 3 Updates Keep Checking Android Custom ROM Fix ™®
That’s all. We hope this guide serves you well. If there’s anything you’d like to be added/changed on this page, PLZ Use the comment box below to contribute more ideas & Suggestions .
Like this post? PLZ Hit the share buttons below to share this article with your friends on Facebook, Google + and Twitter.
Want the latest Updates Sign up for our newsletters!
PLZ Follow Us On Flipboard 4 More Latest Updates.
Best Regards.™
Available link for download
Friday, February 3, 2017
How to Root Verizon LG G3 on 47A Marshmallow Update
How to Root Verizon LG G3 on 47A Marshmallow Update
Thanks to the folks over at xda, we (at-least) still have a way to root Verizon LG G3 even on the latest 47A Marshmallow update. Cheers!
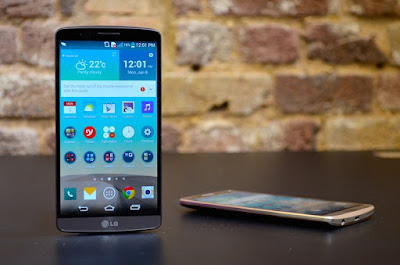
You can have root access on the Verizon G3’s latest update with software version 47a, but the procedure isn’t a pretty one. Rooting 47A firmware requires downgrading back to 10B first, then achieve root using Stump and then install TWRP and flash the bootstack from version 35B, and then finally flash a 47A stock ROM (or any custom 47A ROM) from TWRP.
÷ Prerequisites:
This tutorial is only for Rooting Verizon G3 on latest 47A Marshmallow update Please do not try on any other LG G3 variants.
*Disclaimer:
Android Custom ROM fix ® provide various Firmware Updates and Rooting process along with Custom ROM,Modes,file are all belong to their owners/developers. The autor of this site or the developers are not responsible, if you damage or brick your device.Do it on your own risk and follow the instruction properly.
* Important:
Backup important files stored on your device before proceeding with the steps below, so that in case something goes wrong you’ll have backup of all your important files.
÷ How to Root Verizon LG G3 on 47A Marshmallow Update:
1- Flash 10B firmware:
Step1- Download the Verizon G3 10B KDZ firmware file to your PC from the downloads section above.
Step2- Flash the 10B firmware KDZ to your Verizon G3.
For help, follow our detailed guide ? How to Flash KDZ firmware on LG Devices.
2- Root 10B firmware using StumpRoot: Once you’re on 10B firmware, do the following:
Step 3- Download the StumpRoot apk from the links above and install it on your Verizon G3.
Step 4- Open the app and tap the Grind button to execute root exploit.
Step5- Restart your G3 when prompted.
3- Install SuperSU and TWRP Recovery:
Step 5- Once you’ve successfully rooted your Verizon G3 on 10B firmware, install the SuperSU app from Play Store to manage superuser permission and TWRP Manager app to download/install TWRP recovery.
Step 6- Now download/transfer the 35B Bootstack zip file and 47A firmware zip file to your Verizon G3’s internal storage.
Step 7- Boot into TWRP recovery and perform a simple factory reset.
Step 8- Install/Flash the 35B Bootstack zip file from TWRP recovery.
Step 9- Perform a wipe data/cache from within the recovery.
Step 10- Install/Flash the 47A firmware zip file from TWRP recovery.
Step 11- Reboot device.
? If TWRP asks to install SuperSU, DENY IT.
That’s all. Your Verizon G3 should be rooted now, running on firmware 47A.
For More LG G3 Updates Keep Checking Android Custom ROM Fix ™®
That’s all. We hope this guide serves you well. If there’s anything you’d like to be added/changed on this page, PLZ Use the comment box below to contribute more ideas & Suggestions .
Like this post? PLZ Hit the share buttons below to share this article with your friends on Facebook, Google + and Twitter.
Want the latest Updates Sign up for our newsletters!
PLZ Follow Us On Flipboard 4 More Latest Updates.
Best Regards.™
Available link for download
Android Developer Story Vietnamese games developer Divmob finds more users with localized pricing on Google Play
Android Developer Story Vietnamese games developer Divmob finds more users with localized pricing on Google Play
Posted by Lily Sheringham, Google Play team
Based in Ho Chi Minh City in Vietnam, games developer Divmob has grown quickly from an original team of five people to 40 employees since it was founded three years ago. Divmob now has over 40 million downloads across its various titles, including the popular game, Epic Heroes War.
Watch Ngo Van Luyen, CEO & Founder at Divmob, and his team explain how introducing sub-dollar pricing in various markets resulted in a 300% increase in daily transactions, and increased the number of paying users threefold.
Find out more about local pricing models on Google Play
We recently introduced new features in the Google Play Developer Console to help you meet local expectations when setting prices, to make purchases more attractive to your users. The Developer Console will now automatically round pricing to local conventions in each market, and you can also set up pricing templates to manage pricing across multiple currencies more efficiently, and easily make bulk changes to the prices of multiple apps and in-app products in a single click. Learn more about the improved local pricing tools.
Available link for download
Wednesday, February 1, 2017
How to Install Android 6 0 1 Marshmallow Slim6 ROM on HTC One M9
How to Install Android 6 0 1 Marshmallow Slim6 ROM on HTC One M9

Don’t worry we are going to share step by step guide to safely Install Android 6.0.1 Marshmallow Slim6 ROM on your HTC One (M9).
÷ Prerequisites:
•This tutorial is only for installing Android 6.0.1 Slim6 ROM on HTC One M9. Please do not try on any other One M9 variants.
•Your phone should have a custom recovery installed in order to install this Slim6 ROM on your phone.
•We will be using TWRP Recovery for this tutorial.
•Bootloader should be unlocked.
•This tutorial will wipe out all your data. Make sure you backup all your data in your phone before proceeding.
•Perform a Dalvik Cache wipe before proceeding from the Recovery Mode.
*Disclaimer:
Android Custom ROM fix ® provide various Firmware Updates and Rooting process along with Custom ROM,Modes,file are all belong to their owners/developers. The autor of this site or the developers are not responsible, if you damage or brick your device.Do it on your own risk and follow the instruction properly.
* Important:
Backup important files stored on your device before proceeding with the steps below, so that in case something goes wrong you’ll have backup of all your important files.

÷ How to Install Android 6.0.1 Marshmallow Slim6 ROM on HTC One (M9)
Step 1 – Download Android 6.0.1 Slim6 ROM for One M9 to your computer and extract boot.img from the zip file separately.
Step 2 – Connect and mount your One M9 USB memory to your computer using the USB cable.
Step 3 – Now copy/paste the downloaded Android 6.0.1 ROM zip file to your phone memory / SD card. Make sure the file is in the phone memory / SD card root (not in any folder).
Step 4 – Copy/paste the boot.img file to android-sdk-windowsplatform-tools directory.
Step 5 – Then turn OFF your phone and disconnect from the USB cable.
Step 6 – Now to get in the Bootloader/Fastboot Mode. Turn ON the phone while pressing and holding the Volume Down + Power buttons.
Step 7 – Once in the Fastboot mode (on your phone), navigate to android-sdk-windowsplatform-tools directory (on your computer) and open Command Prompt (Shift + Right-click > Open Command Prompt).
Step 8 – Type the following command and press Enter.
fastboot flash boot boot.img
Step 9 – Then, type the following command and press Enter.
fastboot reboot
Step 10 – Follow the navigation instructions on the screen. Select BOOTLOADER and then go to RECOVERY.
Step 11 – Once you are in TWRP Recovery, perform a full data wipe by tapping on the ‘Wipe’ button. Then swipe on the “Swipe to Factory Reset” option at the bottom.
Step 12 – Now go back to the main menu and then tap on the ‘Install’ button. From the list, choose the ZIP file that you copied to your phone memory in Step 3.
Step 13 – Confirm installation on the next screen by swiping on the “Swipe to Confirm Flash” option. The installation procedure should start now.
Step 14 – Once the installation is completed.
Step 15 – Tap on the “Wipe cache/dalvik” button if you get into any boot loops or other issues.
Step 16 – You can now reboot your phone by selecting the “Reboot System” button.
Your HTC One M9 will boot now and it might take about 5 minutes to boot on your first time after flashing a new ROM. So, please wait.

For More HTC One M9 latest updates Keep Checking Android Custom ROM Fix …
That’s all. We hope this guide serves you well. If there’s anything you’d like to be added/changed on this page, PLZ Use the comment box below to contribute more ideas & Suggestions .
Like this post? PLZ Hit the share buttons below to share this article with your friends on Facebook, Google + and Twitter.
Want the latest Updates Sign up for our newsletters!
PLZ Follow Us On Flipboard 4 More Latest Updates.
Best Regards.™
Available link for download
Monday, January 30, 2017
Alcatel Idol 4 launching at Cricket on August 5 with VR goggles 199 99 price
Alcatel Idol 4 launching at Cricket on August 5 with VR goggles 199 99 price

After launching the Idol 3 last year, Cricket is once again teaming with Alcatel to offer the Idol 4.

from PhoneDog.com - Latest videos, reviews, articles, news and posts http://ift.tt/29Rs7Ra
via IFTTT
Available link for download
Cannot unlock bootloader on Z5P
Cannot unlock bootloader on Z5P
Im using the E6853 on 6.0.1 MM
I have made sure OEM unlock is enabled and that stays enabled after reset, the fastboot drivers are installed, and Ive tried flashing a custom kernel with an error writing to boot, any help? :crying:
from xda-developers http://ift.tt/2asPKib
via IFTTT
Available link for download
Tuesday, January 24, 2017
Hands on review UPDATED Moto Z Force
Hands on review UPDATED Moto Z Force

Update: Expect Moto Z Force release date and price information this week at Motorolas launch event. It happens Thursday, and well be able to update this to a definitive full review soon after. Heres what we think so far of the Android phone with modular accessories.
Raise your hand if you dropped a phone before. Did you drop a phone just now in an effort to raise your hand? Good news, you can upgrade to the Moto Z Force soon.
Its Motorolas more practical modular phone that adds a bit of thickness compared to the Moto Z in exchange for a shatterproof screen and bigger battery, though still no headphone jack.
The Moto Z Force camera also comes ready to take higher resolution photos that I can wait to test out further now that I got my hands on the nearly final phone.

Theres just one catch: the Moto Z Force release date. It may not come out at all, unless youre on Verizon and live in the US. Its limited to the carrier and States at this point.
Well find out the exact release date and Moto Z Force price at this weeks Motorola launch event in New York City. The first (almost) modular phone is finally coming together.
Design
The Moto Z Force isnt the worlds thinnest phone, but its a still-reasonable 155.9 x 75.8 x 6.99mm and 163g. It just feels thick after handling the Moto X, which does happen to be the worlds thinnest phone.

Like its slimmer Z sibling, the Force is an all-metal smartphone and uses modular accessories that latch onto the back.
Yes, this makes the Moto Z comparable to the LG G5, but its better in keys ways. It doesnt require restarting the phone and it magnetically fastens into place.
There are also more Moto Z and Moto Z Force modules at the ready (and more promised), from an obvious battery case to the standout mini projector.

There is already more potential behind the Moto Z modular future than anything weve seen except for Project Ara, and thats a little more experimental and further out compared to whats here.
Youll also find a fingerprint sensor on the front, with a large chin dedicated to it - large when you consider this phone still uses on-screen buttons, too (the fingerprint button is not a home button, no matter how many times my brain told me to press it).

What you wont find is a normal headphone jack - you options are USB C headphones or Bluetooth here. Apple is rumored to be axing the same 3.5mm jack in the name of thinness in the iPhone 7.
Motorola beat Apple to the punch and its a dubious prize for consumers who prefer wired, but effortless and battery-free audio solutions to listen to music from their phones.
There are three Moto Z Force colors: black, gold and rose gold, the last of which is exclusive to the Force. The regular Moto Z has just gold and black.

Dont worry too much about the two colors when it comes to the backs, because I found the "style shells" (what Moto calls the magnetically snapped-on cases) to add to the color options in post. Theres wood, leather and plastic to choose from at the moment.
Moto Z Force modules
The Moto Z Force uses all of the same modules as the Moto Z, meaning you youre getting to add cases and at least three creative accessories
I found the Moto Z projector, dubbed Moto Instant Share, to be a the most novel, even if it ends up being a niche product that a majority of eventual owners will never use.

It was easy enough to snap and demo the projector that made the frame much thicker, but shined a 70-inch version of the phone screen into a nearby wall.
The speaker system add-on slaps an entire JBL speaker to the back of the phone and even sets the music up to blast the right direction with a cool kickstand. Its metal and feels sturdy to prop up.

The Moto Z battery case modules arent anything too out the ordinary in design, so Motorola made sure to partner with big brands like fashion designer Kate Spade and luggage company Tumi to delivery both style and power
I felt like each module was securely locked into place thanks to four unseen magnets hidden on the phone side and the accessory side. Its easy to snap things on, yet painless to peel them off with a fingernail; no tools or reboots required.
Specs and software
This is where Moto Z Force is a little more ordinary. It uses a lot of the same internal specs we see in todays best phones For 2016.
Theres a Qualcomm Snapdragon 820 processor, 4GB of RAM and an embedded Adreno 530 GPU. Like most of todays phone, it switches over to a USB-C connection on the bottom.

Internal storage consists of 32GB and 64GB options, and while there is no 128GB version, it does come with a microSD card slot (which can turn into a second card slot) and I can just imagine a future add-on that combines battery power with laptop-like extra storage space.
Its nice to see the Moto Z Force specs dont fall behind the competition even with its modular focus. Its able to pull off the exact same internals as the LG G5, HTC 10, ZTE Azon 7 and the US versions of the Samsung Galaxy S7 and Galaxy S7 Edge. Basically every phone is becoming the same on the inside. Asus Zenfone 3 Deluxe is the only one upgrading to a Snapdragon 821 chip so far.
This is another Android 6.0.1 Marshmallow phone too and while thats the mobile operating system of the box, this is a Motorola phone. It shouldnt have any trouble upgrading to Android Nougat when it arrives in the summer.

The former Google-owned company also runs a near stock version of Android and its policy wont change now that its under the Lenovo umbrella.
It also limits its own apps in the app drawer to useful things, though as a Verizon phone it does come with some carrier related bloat ware and repeat apps Google already makes (and makes more efficiently - I dont need VZW Navigator, thanks).
What I really like about the Moto Z Force software is hay it uses the IR sensors for Active Display to wake the display without touching it, just like past Moto X phones, and custom voice commands return to the ecosystem. Despite the Z Force name, its really the Moto X 2016.
Camera and battery life
The Moto Z Force camera is 21MP in the back, which makes its a higher resolution than what I found on the 13MP Moto Z. But that doesnt mean everything in todays phones.

It really all about their post-processing software, as we have seen with the stellar Samsung Galaxy S7 Edge and S7 Edge, which have 12MP, but are stunning in lowlight.
The Z Force still promises the same grandiose results with a F/1.8 aperture, optical Image Stabilization (OIS), laser autofocus and phase Detection Autofocus (PDAF).

The Moto Z camera is 13MP with larger-sized 1.12um pixels, and includes a f/1.8 aperture with optical image stabilization and laser autofocus. The front-facing camera is 5MP and with an f/2.2 aperture and 1.4um big pixels for better low light.
Theres supposed to be zero shutter lag, but I have to take this one out of the demo room to get a better idea of how this performs in normal conditions. Ill update this hands on review when that happens this summer.
However, I can tell right now that I like the default Moto Z camera app better. Previous Moto Z cameras included a clutter-free design that hid options and made it for casual users.

I can now adjust the camera easier on this new phone and even found a Professional mode to fine-tune my snapshots manually.
Battery life is the other aspect thats going to need more time for me to check out, but I can tell you right now that this phone contains only a 2,600mAh battery,
The thinner design also comes at the expensive of a serious camera bump. All of a sudden the battery case mods make convincing arguments.
Here the good news: Motorola says that Moto Z battery life is rated for 30 hours of mixed use, with the ability to TurboPower with a USB-C cable and last 8 hours after just 15 minutes of charging.
Early verdict
Moto Z Force is technically the better of the two new Android phones from Motorola. It better a bigger battery and a shatterproof screen in exchange for a little more heft.

Thats okay, because its compatible with all of the same awesome accessories that I played with minutes prior with the Moto Z Force. Its already better than what used with the LG G5.
It has a much better snap-on design that doesnt and the ideas are more creative: a loud JBL speaker, mini projector and fashionable battery backs.
Its not as thin as its all-metal counterpart and still contains that very noticeable camera bump. But its just as powerful as todays smartphones with a Snapdragon 820 processor. Its only big issues, and these will be a deal breaker for a lot of people, is that its a US only phone that is glued to Verizon and theres no normal 3.5mm headphone jack.
Well have more on the Moto Z Force when we get more hands on time with the phone. Until then, please, see what the more global-friendly Moto Z can do.

from TechRadar: Technology reviews http://ift.tt/1RZ191S
Available link for download
Thursday, January 19, 2017
How To Unlock Remove Pattern Lock On Android Tablet OR Phone
How To Unlock Remove Pattern Lock On Android Tablet OR Phone
- Power On your phone by pressing Power key
- Then you will need to release the buttons when your android phone is power on
- Now scroll using your volume keys until you will find the factory data reset option
- Click On Factory "Data Reset Option"
- Your phone will restored in its original settings

Available link for download
Wednesday, January 18, 2017
Hands on review HP PageWide 352dw
Hands on review HP PageWide 352dw

Its hard to believe that HPs PageWide technology is four-years-old already. The new print head – which as its name implies covers the whole width of a page – helped HP grab the world record for the fastest desktop printer.
The Officejet Pro X576dw (and its predecessor, the X551dw) managed to print a whopping 70 colour pages per minute when clocked by Guinness World Records, which is faster than most, if not all competing laser printers on the market, including HPs own.
Fast forward to 2016 and the technology is mature enough for HP to introduce it to a mainstream audience. Enter the PageWide 352dw which loses the Officejet Pro moniker and prints just 30 pages per minute, but also costs less than half the price of its 70ppm bigger brothers.
(Note that our review sample of this printer was provided by online retailer eBuyer where it costs £169 – around $220, AU$295 – a price including delivery.)

It has some tough competition in the 30ppm space arena: Ricohs Aficio SG-2100N does 25 pages per minute and costs only £30 (around $40, AU$53) while the Epson WorkForce WF-2510WF is rated at 34ppm for black and costs under £50 (around $65, AU$88) – although truth be told, they wont come near these figures under normal circumstances.
Compared to the Aficio printer, this one is an altogether different beast with a rated colour/black print speed of 30 pages per minute. HP claims that the first page can be out in as little as seven seconds.
What makes this printer faster than most colour laser printers in this price range is a combination of a vast amount of memory (512MB) and HPs PageWide tech, the aforementioned fixed print bar that improves reliability and has fewer moving parts.

The PageWide 352dw boasts a monthly duty cycle of 40,000 pages (recommended is 3,000, though) and a resolution of 600 x 600 dpi (the printer settings states a maximum of 1200 x 1200 optimised dpi for black and 2400 x 1200 dpi for colour).
It is massive, heavy, and is more of a workgroup printer than a desktop one (unless you have a massive desk). At more than 16kg, it is transportable but definitely not mobile and occupies a footprint slightly smaller than two A3 sheets stuck together.
Note that there are no USB cables bundled. You will have to use an existing cable or buy a new one if you decide to avoid using wireless connectivity.
The printer is backed by a one-year onsite warranty which removes the hassle of having to deal with packing and sending back the device should you hit a snag (or if you no longer have the original box).

Take it out of the box, plug the power cable in and youre ready to go. Well, almost. After plugging in the cartridges (which look like no other inkjet consumables you have seen before – check out the above image), you will have to go through the initial setup process which altogether took more than 20 minutes.
That includes spewing out a few test pages, entering the SSID and password for your network and setting the time. Nothing mind-boggling, but try doing that on a tiny screen (50mm diagonal) with only two control buttons (left and right) and it quickly becomes a pain.
A full set of four replacement cartridges (HP 913A) actually cost more than the printer itself (more than £220 – thats around $290, AU$385) with the colour ones having a page yield of 3,000 pages, and the black being good for 3,500 pages.
We suspect that the printer comes with a starter kit as the update sheet showed that it had around 1,200 pages remaining, around a third of what was expected.

Other than USB and wireless connectivity (including Wi-Fi Direct), the 352dw also offers Ethernet, USB host compatibility and a number of printing options (ePrint, AirPrint, Cloud Print and NFC touch-to-print).
One of the reasons why HP engineers chose to make this printer so imposing is because of its paper handling capabilities. It uses the same chassis as its faster siblings which forced some design decisions especially when it came to opting for a generous output tray.
The 352dw has a 500-sheet input tray (which can be doubled), and a maximum output capacity of up to 300 sheets, plus automatic duplex printing.

HP also quotes superior power consumption as being one of the reasons why its offerings are better than their laser counterparts. HP quotes an average printing power consumption of 70W, dropping down to just under 10W when in ready mode and half that in sleep mode.
When it comes to printing, it is a solid performer. We printed an 18-page document (single side, colour text and graphics, PDF format) in 70 seconds which translates to a speed of nearly 17 pages per minute.

That included a 23-second spooling time with the first page out 10 seconds later. Excluding the processing time, the 352dw printed 18 pages in 40 seconds or 27 pages per minute. Thats closer to what we expected from it.
We printed out copies on 80gsm paper to reflect the business focus of the device which produced respectable results. The ink dried quickly despite the rapid churn and it performed well on the dreaded solid background test. Even size 5 text was clearly readable on a solid blue background (see the image below).

Early verdict
The 352dw is a decent all-rounder with excellent print speeds and features along with above average printing capabilities. Clearly, this is no photo-printer but it is more than adequate for most business printing jobs.
At £169 (around $220, AU$295), it is keenly priced for a non-MFP device that offers colour capabilities and functionalities usually found on more expensive printers. But is it the best printer of its category?
Its probably one of the better ones out there but then its bigger brother, the PageWide Pro 452dw is an even better option as it costs £165 (around $216, AU$290) at the time of writing (including a time-limited cashback of £80) and offers almost twice the printing speed, better management options, but a lower resolution.
Others may also consider a multifunction version of the 352dw (which is the 377dw) or the 477dw. The latter, despite being the more enticing alternative, is actually cheaper at £227 (around $300, AU$400) after an £80 cashback, and even better suited for workgroups.
- Check out our 15 top inkjet and laser printers

from TechRadar: Technology reviews http://ift.tt/29XZcp4
Available link for download