Showing posts with label galaxy. Show all posts
Showing posts with label galaxy. Show all posts
Thursday, February 16, 2017
How to Install CM13 0 Nightly Android 6 0 1 Marshmallow on AT T Galaxy S4 jflteatt
How to Install CM13 0 Nightly Android 6 0 1 Marshmallow on AT T Galaxy S4 jflteatt
If you are looking to install a new custom ROM on your AT&T Galaxy S4 ( jflteatt) then we have here as usual the best Custom ROMs for you.

CyanogenMod 13 [CM13.0] Nightly ROM latest build cm-13.0-20160629-NIGHTLY-jflteatt.zip is released for AT&T Galaxy S4 ( jflteatt).
CM13.0 will let AT&T Galaxy S4 users taste the sweetness of Marshmallow 6.0.1 such as the battery saving ‘doze’ functionality and new permissions model, alongside the CM features you’d expect.
Follow our guide below to download the Unofficial CM13.0 Nightly and install it yourself.
View my Flipboard Magazine.
÷ Prerequisites:
•This tutorial is only for installing CyanogenMod 13 AT&T Galaxy S4 ( jflteatt) Please do not try on any other Samsung Galaxy S4 variants.
•Your phone should be rooted and haveClockworkMod recovery installed from before.
•This tutorial will wipe out all your data.Proceed at your own risk.Perform a Dalvik Cache wipe before proceeding from the recovery mode.
•Make sure you backup all your data in your phone before proceeding.
•Samsung KIES will NOT detect your phone after installing this ROM because it is a custom firmware.
*Disclaimer:
Android Custom ROM fix ® provide various Firmware Updates and Rooting process along with Custom ROM,Modes,file are all belong to their owners/developers. The autor of this site or the developers are not responsible, if you damage or brick your device.Do it on your own risk and follow the instruction properly.
* Important:
Backup important files stored on your device before proceeding with the steps below, so that in case something goes wrong you’ll have backup of all your important files.

÷ How to Install CM13.0 Nightly Android 6.0.1 Marshmallow on AT&T Galaxy S4 ( jflteatt)
Step 1 – Download CM13.0 Android 6.0.1 Marshmallow and Google Apps for your AT&T Samsung Galaxy S4 to your computer.
Step 2 – Connect and mount your Galaxy S4 ( jflteatt) USB memory on your computer using the USB cable.
Step 3 – Now copy/paste the downloaded Android 6.0.1 ROM zip file and Google Appszip files to your SD card. Make sure the files are in the SD card root (not in any folder).
Step 4 – Then turn OFF your phone and disconnect from the USB cable.
Step 5 – Now to get in the Recovery Mode. Switch ON the phone while pressing and holding Volume Up + Home + Power buttons together
Step 6 – Once you are in ClockworkModRecovery, select perform a full data wipe by selecting “wipe data/factory reset”. Use the Power button to select everything while in the Recovery Mode.
Step 7 – Then, perform a cache wipe by selecting “wipe cache partition” .
Step 8 – Now this is optional, but it is recommended to perform a wipe of your dalvik cache as well. You will not get into boot loops or any other errors. From CWM recovery, go to ‘advanced’ and then select “wipe dalvik cache”.
Step 9 – Then go back to the main recovery screen and select “install zip from SD card”.
Step 10 – Now select “choose zip from sdcard”. Using your volume keys, navigate to the Android 6.0.1 ROM zip file that you copied to your SD card and select it using the Power button. Confirm the installation on the next screen and the installation procedure should start now.
Google Apps: Repeat the above step for the Gapps zip file as well and install it on your phone.
Step 11 – After the installation completes, go to “+++++Go Back+++++” and reboot the phone by selecting “reboot system now” from the recovery menu.

Your AT&T Galaxy S4 ( jflteatt) will boot now and it might take about 5 minutes to boot on your first time. So, please wait.
That’s it Your Samsung Galaxy S4 should now have CM13.0 Nightly Android 6.0.1 Marshmallow latest build installed on your phone! Go to Settings > About phone to verify.
For More AT&T Galaxy S4 Brand New Firmware & Custom ROM keep checking AndroidCustomROM Fix ™®
Like this post? PLZ Hit the share buttons below to share this article with your friends on Facebook, Google + and Twitter.
PLZ Follow Us On Flipboard 4 More latest custom ROM fix.
PLZ Use the comment box below to contribute more ideas & Suggestions .
Best Regards.
÷ Prerequisites:
•This tutorial is only for installing CyanogenMod 13 AT&T Galaxy S4 ( jflteatt) Please do not try on any other Samsung Galaxy S4 variants.
•Your phone should be rooted and haveClockworkMod recovery installed from before.
•This tutorial will wipe out all your data.Proceed at your own risk.Perform a Dalvik Cache wipe before proceeding from the recovery mode.
•Make sure you backup all your data in your phone before proceeding.
•Samsung KIES will NOT detect your phone after installing this ROM because it is a custom firmware.
*Disclaimer:
Android Custom ROM fix ® provide various Firmware Updates and Rooting process along with Custom ROM,Modes,file are all belong to their owners/developers. The autor of this site or the developers are not responsible, if you damage or brick your device.Do it on your own risk and follow the instruction properly.
* Important:
Backup important files stored on your device before proceeding with the steps below, so that in case something goes wrong you’ll have backup of all your important files.
÷ How to Install CM13.0 Nightly Android 6.0.1 Marshmallow on AT&T Galaxy S4 ( jflteatt)
Step 1 – Download CM13.0 Android 6.0.1 Marshmallow and Google Apps for your AT&T Samsung Galaxy S4 to your computer.
Step 2 – Connect and mount your Galaxy S4 ( jflteatt) USB memory on your computer using the USB cable.
Step 3 – Now copy/paste the downloaded Android 6.0.1 ROM zip file and Google Appszip files to your SD card. Make sure the files are in the SD card root (not in any folder).
Step 4 – Then turn OFF your phone and disconnect from the USB cable.
Step 5 – Now to get in the Recovery Mode. Switch ON the phone while pressing and holding Volume Up + Home + Power buttons together
Step 6 – Once you are in ClockworkModRecovery, select perform a full data wipe by selecting “wipe data/factory reset”. Use the Power button to select everything while in the Recovery Mode.
Step 7 – Then, perform a cache wipe by selecting “wipe cache partition” .
Step 8 – Now this is optional, but it is recommended to perform a wipe of your dalvik cache as well. You will not get into boot loops or any other errors. From CWM recovery, go to ‘advanced’ and then select “wipe dalvik cache”.
Step 9 – Then go back to the main recovery screen and select “install zip from SD card”.
Step 10 – Now select “choose zip from sdcard”. Using your volume keys, navigate to the Android 6.0.1 ROM zip file that you copied to your SD card and select it using the Power button. Confirm the installation on the next screen and the installation procedure should start now.
Google Apps: Repeat the above step for the Gapps zip file as well and install it on your phone.
Step 11 – After the installation completes, go to “+++++Go Back+++++” and reboot the phone by selecting “reboot system now” from the recovery menu.
Your AT&T Galaxy S4 ( jflteatt) will boot now and it might take about 5 minutes to boot on your first time. So, please wait.
That’s it Your Samsung Galaxy S4 should now have CM13.0 Nightly Android 6.0.1 Marshmallow latest build installed on your phone! Go to Settings > About phone to verify.
For More AT&T Galaxy S4 Brand New Firmware & Custom ROM keep checking AndroidCustomROM Fix ™®
Like this post? PLZ Hit the share buttons below to share this article with your friends on Facebook, Google + and Twitter.
PLZ Follow Us On Flipboard 4 More latest custom ROM fix.
PLZ Use the comment box below to contribute more ideas & Suggestions .
Best Regards.
Available link for download

Monday, February 13, 2017
How to Install Android 6 0 1 Marshmallow Nexify ROM V3 on T Mobile Galaxy Note 5 SM N920T
How to Install Android 6 0 1 Marshmallow Nexify ROM V3 on T Mobile Galaxy Note 5 SM N920T
According to XDA Member TechGuy081, Android 6.0.1 Marshmallow Nexify ROM V3 Available now for T-Mobile Samsung Galaxy Note 5 SM- N920T.

Nexify Rom Its Made To Make Your Note 5 Close To Stock Android MM Keep In Mind This Wont Make Your Device Be Stock Android I Just Removed Apps (Like Bloatware) From Samsung So You Can Download Google Apps To Replace Stock Apps, Like Clock App, Calculator With Googles Or Your Own!
•Rom Features
- Based on N920TUVU2DPD1 Firmware
- Deodexed all Apps
- Rooted with SuperSU 2.74
- Auto Wipe Cache, Dalvik Cache and Format System
- System Optimization
- Tweaks in Build.prop
- Removed Knox
- Removed As Many Apps As Possible
- Removed Safe Volume Warning
- Ad Away
- Private Mode Working
- 5 Reboot Menu
- Added Dolby Atmos
- Ultra Data Saving Working
- Battery Tweaks
- App Lock
- Gray Status Bar Removed
- Stock MM Emojis.

Change Log:
• June 16
-Initial Release V1
• June 26
- V2
-Special Thanks To @Battlehero
- Reboot Menu Fixed
- Gray Status Bar Removed
- Updated some apps
- Fixed Bugs
- Samsung keyboard Replaced By Googles
- Added Stock MM Emojis
• July 7
- Fixed alot of bugs you asked for
- Nfc And Payment, VPN functionality , Live Walpaper Picker, Hardware Buttons Fixed, Auto Brightness Fixed
- Removed Emergency From power Menu
- Removed Some More Bloat
- Removed Carrier Text In Lock-screen
- Removed Slide To Unlock in Lock-screen
- App Signature Check Removed Now You Can Install Old Apps Over New Versions
- Touchlight Key Enabled In Settings
- Animation Set to 0.25
- OutdoorMode
- Knox Removed
- All Apps In Multiwindow Mode
- And More!
View my Flipboard Magazine.
÷ Prerequisites:
•This tutorial is only for installing Android 6.0.1 Marshmallow Nexify ROM V3 on T-Mobile Samsung Galaxy Note 5 SM- N920T.Please do not try on any other Galaxy Note 5 Variants.
•Your phone should have a custom recovery installed in order to install this NanoROM ROM on your phone.
•We will be using TWRP Recovery for this tutorial.
•This tutorial will wipe out all your data. Make sure you backup all your data in your phone before proceeding.
•Samsung KIES will NOT detect your phone after installing this ROM because it is a custom firmware
•Perform a Dalvik Cache wipe before proceeding from the Recovery Mode.
*Disclaimer:
Android Custom ROM fix ® provide various Firmware Updates and Rooting process along with Custom ROM,Modes,file are all belong to their owners/developers. The autor of this site or the developers are not responsible, if you damage or brick your device.Do it on your own risk and follow the instruction properly.
* Important:
Backup important files stored on your device before proceeding with the steps below, so that in case something goes wrong you’ll have backup of all your important files.
You can find out how to apply it right now via XDA.

For More Samsung Galaxy Note 5 Updates Keep Checking Android custom ROM Fix ™®
That’s all. We hope this guide serves you well. If there’s anything you’d like to be added/changed on this page, PLZ Use the comment box below to contribute more ideas & Suggestions .
Like this post? PLZ Hit the share buttons below to share this article with your friends on Facebook, Google + and Twitter.
Want the latest Updates Sign up for our newsletters!
PLZ Follow Us On Flipboard 4 More Latest Updates.
Best Regards.™
÷ Prerequisites:
•This tutorial is only for installing Android 6.0.1 Marshmallow Nexify ROM V3 on T-Mobile Samsung Galaxy Note 5 SM- N920T.Please do not try on any other Galaxy Note 5 Variants.
•Your phone should have a custom recovery installed in order to install this NanoROM ROM on your phone.
•We will be using TWRP Recovery for this tutorial.
•This tutorial will wipe out all your data. Make sure you backup all your data in your phone before proceeding.
•Samsung KIES will NOT detect your phone after installing this ROM because it is a custom firmware
•Perform a Dalvik Cache wipe before proceeding from the Recovery Mode.
*Disclaimer:
Android Custom ROM fix ® provide various Firmware Updates and Rooting process along with Custom ROM,Modes,file are all belong to their owners/developers. The autor of this site or the developers are not responsible, if you damage or brick your device.Do it on your own risk and follow the instruction properly.
* Important:
Backup important files stored on your device before proceeding with the steps below, so that in case something goes wrong you’ll have backup of all your important files.
You can find out how to apply it right now via XDA.
For More Samsung Galaxy Note 5 Updates Keep Checking Android custom ROM Fix ™®
That’s all. We hope this guide serves you well. If there’s anything you’d like to be added/changed on this page, PLZ Use the comment box below to contribute more ideas & Suggestions .
Like this post? PLZ Hit the share buttons below to share this article with your friends on Facebook, Google + and Twitter.
Want the latest Updates Sign up for our newsletters!
PLZ Follow Us On Flipboard 4 More Latest Updates.
Best Regards.™
Available link for download
Tuesday, February 7, 2017
How to Get Android Nougat Notification Shade on Galaxy S6 S7 and Edge variants
How to Get Android Nougat Notification Shade on Galaxy S6 S7 and Edge variants
Welcome to the guide on how to enable soft keys and get the Nougat notification shade on Samsung Marshmallow ROMs.

If you don’t like Samsung S6 or S7 TouchWiz, Samsung’s custom UI, a lot, then we don’t blame you , in fact, we share the feeling with ya. The cool thing with Android and its myriad of hacks is that customization is endless. A trick shared below will allow you to replace the look of notification shade to make it more like Android Nougat!
View my Flipboard Magazine.
With root, it’s possible to get some of Android Nougat looks on your Galaxy S6 and S7, including the Edge variants of them both. But know that this requires root access. If you don’t have root, then you better look to root your device first.

You can also enable and disable the soft keys, or on-screen keys if you prefer. While, if you wish to disable the capacitive keys — which is a good thing to do when you got soft keys up and running — then that’s possible too.
For the guide, please visit here by galaxyYtester, where you will find some basic guidance on how to achieve this.
For More Samsung Galaxy S6, S7 Updates Keep Checking Android Custom ROM Fix
That’s all. We hope this guide serves you well. If there’s anything you’d like to be added/changed on this page, PLZ Use the comment box below to contribute more ideas & Suggestions .
Like this post? PLZ Hit the share buttons below to share this article with your friends on Facebook, Google + and Twitter.
Want the latest Updates Sign up for our newsletters!
PLZ Follow Us On Flipboard 4 More Latest Updates.
Best Regards.™
With root, it’s possible to get some of Android Nougat looks on your Galaxy S6 and S7, including the Edge variants of them both. But know that this requires root access. If you don’t have root, then you better look to root your device first.
You can also enable and disable the soft keys, or on-screen keys if you prefer. While, if you wish to disable the capacitive keys — which is a good thing to do when you got soft keys up and running — then that’s possible too.
For the guide, please visit here by galaxyYtester, where you will find some basic guidance on how to achieve this.
For More Samsung Galaxy S6, S7 Updates Keep Checking Android Custom ROM Fix
That’s all. We hope this guide serves you well. If there’s anything you’d like to be added/changed on this page, PLZ Use the comment box below to contribute more ideas & Suggestions .
Like this post? PLZ Hit the share buttons below to share this article with your friends on Facebook, Google + and Twitter.
Want the latest Updates Sign up for our newsletters!
PLZ Follow Us On Flipboard 4 More Latest Updates.
Best Regards.™
Available link for download
Monday, February 6, 2017
Como Instalar Rom Galaxy Note 5 Duos N920CD Marshmallow
Como Instalar Rom Galaxy Note 5 Duos N920CD Marshmallow

- ARCHIVOS NECESARIOS :
- Controlador USB [DESCARGAR] o Kies [DESCARGAR]
- Odin v3 [DESCARGAR]
- Rom, Firmware Samsung Galaxy Note 5 Duos N920C / N920CD [DESCARGAR]
- Bateria por lo menos al 50%
- PASOS A SEGUIR :
- Instale el controlador USB de Samsung o Kies en su ordenador
- Extraer el firmware Samsung Galaxy con rar victoria para encontrar el archivo .md5
- Apagar el celular
- Pasos a seguir (Download mode). Tener el dispositivo completamente apagado Mantener presionado durante 5 segundo Volumen Abajo + Home + Power Aparecerá un mensaje de Warning (pero no se alarmen), presionar Volumen Arriba para ingresar a Download Mode, con Volumen Abajo el Young booteará normal
- Abrir Odin (el que descargaron arriba)
- Ver que la opción Re-Partition NO esté seleccionada
- Conectar por cable USB el Galaxy Note 5 Duos N920C a la computadora, Odin debe reconocer al dispositivo, nos daremos cuenta porque abajo de donde dice ID:CON aparecerá el cuadro sombreado de amarillo.
- Click en el botón PDA y seleccionar PDA_XXXXX.md5
- Ver que la opción Re-Partition NO esté seleccionada
- Click en Start
- Esperar a que salga PASS en fondo verde en Odin
- Listo!
Si por algún motivo se te queda booteando en el logo de Samsung, apaga el celular, reinicia en Recovery Mode Galaxy y realiza un wipe data y wipe cache.
Tutorial: Qué es y cómo usar Odin
Available link for download
Monday, January 23, 2017
How to Update T Mobile Galaxy S6 Edge G925T to Android 6 0 1 Marshmallow Sick as Hell ROM
How to Update T Mobile Galaxy S6 Edge G925T to Android 6 0 1 Marshmallow Sick as Hell ROM
T-Mobile Samsung Galaxy S6 Edge G925T Sick as Hell custom ROM comes with tons of new features and is based on Android 6.0.1 Marshmallow.

Sick as Hell custom ROM is basically a stock ROM with some performance and battery optimisations that makes your device run faster and smoother. Other than that it is a simple TouchWiz ROM and the developer claims that it runs faster than the stock firmware.
Don’t worry we are going to share step by step guide to safely Install Android 6.0.1 Marshmallow Sick as Hell ROM on your T-Mobile Galaxy S6 Edge G925T.
Sick as Hell custom ROM is basically a stock ROM with some performance and battery optimisations that makes your device run faster and smoother. Other than that it is a simple TouchWiz ROM and the developer claims that it runs faster than the stock firmware.
Don’t worry we are going to share step by step guide to safely Install Android 6.0.1 Marshmallow Sick as Hell ROM on your T-Mobile Galaxy S6 Edge G925T.
View my Flipboard Magazine.
÷ Prerequisites:
•This tutorial is only for installing Android 6.0.1 Sick as Hell ROM on T-Mobile Galaxy S6 Edge G925T. Please do not try on any other Galaxy S6 Edge variants.
•Your phone should have a custom recovery installed in order to install this Sick as Hell ROM on your phone.
•We will be using TWRP Recovery for this tutorial.
•This tutorial will wipe out all your data. Make sure you backup all your data in your phone before proceeding.
•Perform a Dalvik Cache wipe before proceeding from the Recovery Mode.
*Disclaimer:
Android Custom ROM fix ® provide various Firmware Updates and Rooting process along with Custom ROM,Modes,file are all belong to their owners/developers. The autor of this site or the developers are not responsible, if you damage or brick your device.Do it on your own risk and follow the instruction properly.
* Important:
Backup important files stored on your device before proceeding with the steps below, so that in case something goes wrong you’ll have backup of all your important files.

÷ How to Update T-Mobile Galaxy S6 Edge G925T to Android 6.0.1 Marshmallow Sick as Hell ROM:
Step 1 – Download Android 6.0.1 Sick as Hell ROM for Galaxy S6 Edge to your computer.
Step 2 – Connect and mount your Galaxy S6 Edge USB memory to your computer using the USB cable.
Step 3 – Now copy/paste the downloaded Android 6.0.1 ROM zip file to your phone memory / SD card. Make sure the file is in the phone memory / SD card root (not in any folder).
Step 4 – Then turn OFF your phone and disconnect from the USB cable.
Step 5 – Now to get in the Recovery Mode. Switch ON the phone while pressing and holding Volume Up + Home + Power buttons together.
Step 6 – Once you are in TWRP Recovery, perform a full data wipe by tapping on the ‘Wipe’ button. Then swipe on the “Swipe to Factory Reset” option at the bottom.
Step 7 – Now go back to the main menu and then tap on the ‘Install’ button. From the list, choose the ZIP file that you copied to your phone memory in Step 3.
Step 8 – Confirm installation on the next screen by swiping on the “Swipe to Confirm Flash” option. The installation procedure should start now.
Step 9 – Once the installation is completed.
Step 10 – Tap on the “Wipe cache/dalvik” button if you get into any boot loops or other issues.
Step 11 – You can now reboot your phone by selecting the “Reboot System” button.
Your T-Mobile Galaxy S6 Edge will boot now and it might take about 5 minutes to boot on your first time after flashing a new ROM. So, please wait.
 That’s it! Your T-Mobile Samsung Galaxy S6 Edge should now have Android 6.0.1 Sick as Hell Marshmallow custom ROM installed on your phone! Go to Settings > About phone to verify.
For More Samsung Galaxy S6 Edge Updates Keep Checking Android Custom ROM Fix ™®
That’s all. We hope this guide serves you well. If there’s anything you’d like to be added/changed on this page, PLZ Use the comment box below to contribute more ideas & Suggestions .
Like this post? PLZ Hit the share buttons below to share this article with your friends on Facebook, Google + and Twitter.
Want the latest Updates Sign up for our newsletters!
PLZ Follow Us On Flipboard 4 More Latest Updates.
Best Regards.™
÷ Prerequisites:
•This tutorial is only for installing Android 6.0.1 Sick as Hell ROM on T-Mobile Galaxy S6 Edge G925T. Please do not try on any other Galaxy S6 Edge variants.
•Your phone should have a custom recovery installed in order to install this Sick as Hell ROM on your phone.
•We will be using TWRP Recovery for this tutorial.
•This tutorial will wipe out all your data. Make sure you backup all your data in your phone before proceeding.
•Perform a Dalvik Cache wipe before proceeding from the Recovery Mode.
*Disclaimer:
Android Custom ROM fix ® provide various Firmware Updates and Rooting process along with Custom ROM,Modes,file are all belong to their owners/developers. The autor of this site or the developers are not responsible, if you damage or brick your device.Do it on your own risk and follow the instruction properly.
* Important:
Backup important files stored on your device before proceeding with the steps below, so that in case something goes wrong you’ll have backup of all your important files.
÷ How to Update T-Mobile Galaxy S6 Edge G925T to Android 6.0.1 Marshmallow Sick as Hell ROM:
Step 1 – Download Android 6.0.1 Sick as Hell ROM for Galaxy S6 Edge to your computer.
Step 2 – Connect and mount your Galaxy S6 Edge USB memory to your computer using the USB cable.
Step 3 – Now copy/paste the downloaded Android 6.0.1 ROM zip file to your phone memory / SD card. Make sure the file is in the phone memory / SD card root (not in any folder).
Step 4 – Then turn OFF your phone and disconnect from the USB cable.
Step 5 – Now to get in the Recovery Mode. Switch ON the phone while pressing and holding Volume Up + Home + Power buttons together.
Step 6 – Once you are in TWRP Recovery, perform a full data wipe by tapping on the ‘Wipe’ button. Then swipe on the “Swipe to Factory Reset” option at the bottom.
Step 7 – Now go back to the main menu and then tap on the ‘Install’ button. From the list, choose the ZIP file that you copied to your phone memory in Step 3.
Step 8 – Confirm installation on the next screen by swiping on the “Swipe to Confirm Flash” option. The installation procedure should start now.
Step 9 – Once the installation is completed.
Step 10 – Tap on the “Wipe cache/dalvik” button if you get into any boot loops or other issues.
Step 11 – You can now reboot your phone by selecting the “Reboot System” button.
Your T-Mobile Galaxy S6 Edge will boot now and it might take about 5 minutes to boot on your first time after flashing a new ROM. So, please wait.
For More Samsung Galaxy S6 Edge Updates Keep Checking Android Custom ROM Fix ™®
That’s all. We hope this guide serves you well. If there’s anything you’d like to be added/changed on this page, PLZ Use the comment box below to contribute more ideas & Suggestions .
Like this post? PLZ Hit the share buttons below to share this article with your friends on Facebook, Google + and Twitter.
Want the latest Updates Sign up for our newsletters!
PLZ Follow Us On Flipboard 4 More Latest Updates.
Best Regards.™
Available link for download
Tuesday, January 17, 2017
How to Update Galaxy S4 LTE I9505 to Android 6 0 1 Marshmallow BeanStalk ROM
How to Update Galaxy S4 LTE I9505 to Android 6 0 1 Marshmallow BeanStalk ROM
Samsung Galaxy S4 LTE I9505 BeanStalk custom ROM comes with tons of new features and is based on Android 6.0.1 Marshmallow. A quick list of the main features in BeanStalk is given below and we are sure you’d love to use this on your Galaxy S4 LTE I9505:

CyanogenMod 13 based
PIE
Built in Task Manager switcher
OnTheGo Mode
App Circle bar
System UI Tuner
Quicker system animations
Trimmed down fat and excess bloat
Option to enable all widgets
Numerous extra lockscreen options
LCD Density
Custom original BeanStalk Wallpapers by skyliner33v
Custom BeanStalk bootanimation by skyliner33v
3-minit battery support
Clock and date options
Contextual Header – Original and Polygraphic
Battery styles – Includes specific colors and styles. Also includes battery bar
Do not disturb option
Show notification count
Recent screen options
Customizable navigation bar
Use Omniswitch as default recents
Built-in screen record
Toast animations
App Circle bar
Gesture Anywhere
Disable FC warnings
Disable Immersive message
Force expanded Notifications
Configure scrolling cache
Build.prop MOD options to enable/disable tweaks as preferred
Less frequent Notification sounds options
CRT screen off/on options to specify how the animation shows
Enable/disable wake up on charge option
Superuser fully embedded into the build and accessed from settings menu
CM Performance options and features
Hide superuser icon
Developer options and advanced reboot enabled by default
Numerous cherry-picks and improvements throughout the build.. baked into the
awesomeness of existing CM layout.
Numerous other options hidding throughout the build....
You can find out how to apply it right now via this easy tutorial
CyanogenMod 13 based
PIE
Built in Task Manager switcher
OnTheGo Mode
App Circle bar
System UI Tuner
Quicker system animations
Trimmed down fat and excess bloat
Option to enable all widgets
Numerous extra lockscreen options
LCD Density
Custom original BeanStalk Wallpapers by skyliner33v
Custom BeanStalk bootanimation by skyliner33v
3-minit battery support
Clock and date options
Contextual Header – Original and Polygraphic
Battery styles – Includes specific colors and styles. Also includes battery bar
Do not disturb option
Show notification count
Recent screen options
Customizable navigation bar
Use Omniswitch as default recents
Built-in screen record
Toast animations
App Circle bar
Gesture Anywhere
Disable FC warnings
Disable Immersive message
Force expanded Notifications
Configure scrolling cache
Build.prop MOD options to enable/disable tweaks as preferred
Less frequent Notification sounds options
CRT screen off/on options to specify how the animation shows
Enable/disable wake up on charge option
Superuser fully embedded into the build and accessed from settings menu
CM Performance options and features
Hide superuser icon
Developer options and advanced reboot enabled by default
Numerous cherry-picks and improvements throughout the build.. baked into the
awesomeness of existing CM layout.
Numerous other options hidding throughout the build....
You can find out how to apply it right now via this easy tutorial
View my Flipboard Magazine.
÷ Prerequisites:
•This tutorial is only for installing Android 6.0.1 BeanStalk ROM on Samsung Galaxy S4 LTE I9505. Please do not try on any other Galaxy S4 variants.
•Your phone should be rooted and have ClockworkMod recovery installed from before.
•This tutorial will wipe out all your data. Proceed at your own risk.
•Perform a Dalvik Cache wipe before proceeding from the recovery mode.
•Samsung KIES will NOT detect your phone after installing this ROM because it is a custom firmware.
•Make sure you backup all your data in your phone before proceeding.
*Disclaimer:
Android Custom ROM fix ® provide various Firmware Updates and Rooting process along with Custom ROM,Modes,file are all belong to their owners/developers. The autor of this site or the developers are not responsible, if you damage or brick your device.Do it on your own risk and follow the instruction properly.
* Important:
Backup important files stored on your device before proceeding with the steps below, so that in case something goes wrong you’ll have backup of all your important files.

÷ How to Update Galaxy S4 LTE I9505 to Android 6.0.1 Marshmallow BeanStalk ROM:
Step 1 – Download Android 6.0.1 BeanStalk ROM and Google Apps for Galaxy S4 to your computer.
Step 2 – Connect and mount your Galaxy S4 USB memory on your computer using the USB cable.
Step 3 – Now copy/paste the downloaded Android 6.0.1 ROM zip and Google Apps zip files to your SD card. Make sure the files are in the SD card root (not in any folder).
Step 4 – Then turn OFF your phone and disconnect from the USB cable.
Step 5 – Now to get in the Recovery Mode. Switch ON the phone while pressing and holding Volume Up + Home + Power buttons together.
Step 6 – Once you are in ClockworkMod Recovery, select perform a full data wipe by selecting “wipe data/factory reset” . Use the Power button to select everything while in the Recovery Mode.
Step 7 – Then, perform a cache wipe by selecting “wipe cache partition”.
Step 8 – Now this is optional, but it is recommended to perform a wipe of your dalvik cache as well. You will not get into boot loops or any other errors. From CWM recovery, go to ‘advanced’ and then select “wipe dalvik cache”.
Step 9 – Then go back to the main recovery screen and select “install zip from SD card”.
Step 10 – Now select “choose zip from sdcard”. Using your volume keys, navigate to the Android 6.0.1 ROM zip file that you copied to your SD card and select it using the Power button. Confirm the installation on the next screen and the installation procedure should start now.
Google Apps: Repeat the above step for the Gapps zip file as well and install it on your phone.
Step 11 – After the installation completes, go to “+++++Go Back+++++” and reboot the phone by selecting “reboot system now” from the recovery menu .
Your Galaxy S4 LTE I9505 will boot now and it might take about 5 minutes to boot on your first time. So, please wait.

That’s it! Your Galaxy S4 should now have Android 6.0.1 BeanStalk Marshmallow custom ROM installed on your phone! Go to Settings > About phone to verify.
For More Samsung Galaxy S4 Updates Keep Checking Android Custom ROM Fix ™®
That’s all. We hope this guide serves you well. If there’s anything you’d like to be added/changed on this page, PLZ Use the comment box below to contribute more ideas & Suggestions .
Like this post? PLZ Hit the share buttons below to share this article with your friends on Facebook, Google + and Twitter.
Want the latest Updates Sign up for our newsletters!
PLZ Follow Us On Flipboard 4 More Latest Updates.
Best Regards.™
÷ Prerequisites:
•This tutorial is only for installing Android 6.0.1 BeanStalk ROM on Samsung Galaxy S4 LTE I9505. Please do not try on any other Galaxy S4 variants.
•Your phone should be rooted and have ClockworkMod recovery installed from before.
•This tutorial will wipe out all your data. Proceed at your own risk.
•Perform a Dalvik Cache wipe before proceeding from the recovery mode.
•Samsung KIES will NOT detect your phone after installing this ROM because it is a custom firmware.
•Make sure you backup all your data in your phone before proceeding.
*Disclaimer:
Android Custom ROM fix ® provide various Firmware Updates and Rooting process along with Custom ROM,Modes,file are all belong to their owners/developers. The autor of this site or the developers are not responsible, if you damage or brick your device.Do it on your own risk and follow the instruction properly.
* Important:
Backup important files stored on your device before proceeding with the steps below, so that in case something goes wrong you’ll have backup of all your important files.
÷ How to Update Galaxy S4 LTE I9505 to Android 6.0.1 Marshmallow BeanStalk ROM:
Step 1 – Download Android 6.0.1 BeanStalk ROM and Google Apps for Galaxy S4 to your computer.
Step 2 – Connect and mount your Galaxy S4 USB memory on your computer using the USB cable.
Step 3 – Now copy/paste the downloaded Android 6.0.1 ROM zip and Google Apps zip files to your SD card. Make sure the files are in the SD card root (not in any folder).
Step 4 – Then turn OFF your phone and disconnect from the USB cable.
Step 5 – Now to get in the Recovery Mode. Switch ON the phone while pressing and holding Volume Up + Home + Power buttons together.
Step 6 – Once you are in ClockworkMod Recovery, select perform a full data wipe by selecting “wipe data/factory reset” . Use the Power button to select everything while in the Recovery Mode.
Step 7 – Then, perform a cache wipe by selecting “wipe cache partition”.
Step 8 – Now this is optional, but it is recommended to perform a wipe of your dalvik cache as well. You will not get into boot loops or any other errors. From CWM recovery, go to ‘advanced’ and then select “wipe dalvik cache”.
Step 9 – Then go back to the main recovery screen and select “install zip from SD card”.
Step 10 – Now select “choose zip from sdcard”. Using your volume keys, navigate to the Android 6.0.1 ROM zip file that you copied to your SD card and select it using the Power button. Confirm the installation on the next screen and the installation procedure should start now.
Google Apps: Repeat the above step for the Gapps zip file as well and install it on your phone.
Step 11 – After the installation completes, go to “+++++Go Back+++++” and reboot the phone by selecting “reboot system now” from the recovery menu .
Your Galaxy S4 LTE I9505 will boot now and it might take about 5 minutes to boot on your first time. So, please wait.
That’s it! Your Galaxy S4 should now have Android 6.0.1 BeanStalk Marshmallow custom ROM installed on your phone! Go to Settings > About phone to verify.
For More Samsung Galaxy S4 Updates Keep Checking Android Custom ROM Fix ™®
That’s all. We hope this guide serves you well. If there’s anything you’d like to be added/changed on this page, PLZ Use the comment box below to contribute more ideas & Suggestions .
Like this post? PLZ Hit the share buttons below to share this article with your friends on Facebook, Google + and Twitter.
Want the latest Updates Sign up for our newsletters!
PLZ Follow Us On Flipboard 4 More Latest Updates.
Best Regards.™
Available link for download
Monday, January 16, 2017
How to Root Verizon Galaxy S7 SM G930V Easily
How to Root Verizon Galaxy S7 SM G930V Easily
Great news for Verizon Samsung Galaxy s7 SM- G930V owners as now they can root the device Easily.

According to XDA member JAYNO20 he has successfully rooted Verizon Galaxy S7 SM- G930V using the method discovered by XDA Member princecomsy and chainfire to root AT&T Galaxy S7 SM- G930A.
According to XDA member JAYNO20 he has successfully rooted Verizon Galaxy S7 SM- G930V using the method discovered by XDA Member princecomsy and chainfire to root AT&T Galaxy S7 SM- G930A.
View my Flipboard Magazine.
* Warning:
This is engboot, meaning its not made to be used on day to day basis you may run into some issues. Hopefully we can fix them as we go!
Also do not update supersu through playstore untill we are for sure that it wont mess anything up.
*Disclaimer:
Android Custom ROM fix ® provide various Firmware Updates and Rooting process along with Custom ROM,Modes,file are all belong to their owners/developers. The autor of this site or the developers are not responsible, if you damage or brick your device.Do it on your own risk and follow the instruction properly.
* Important:
Backup important files stored on your device before proceeding with the steps below, so that in case something goes wrong you’ll have backup of all your important files.

You can find out how to Root your Verizon Samsung Galaxy S7 SM- G930V via XDA.
For MoreVerizon Samsung Galaxy S7 Updates Keep Checking Android custom ROM Fix ™®
That’s all. We hope this guide serves you well. If there’s anything you’d like to be added/changed on this page, PLZ Use the comment box below to contribute more ideas & Suggestions .
Like this post? PLZ Hit the share buttons below to share this article with your friends on Facebook, Google + and Twitter.
Want the latest Updates Sign up for our newsletters!
PLZ Follow Us On Flipboard 4 More Latest Updates.
Best Regards.™
* Warning:
This is engboot, meaning its not made to be used on day to day basis you may run into some issues. Hopefully we can fix them as we go!
Also do not update supersu through playstore untill we are for sure that it wont mess anything up.
*Disclaimer:
Android Custom ROM fix ® provide various Firmware Updates and Rooting process along with Custom ROM,Modes,file are all belong to their owners/developers. The autor of this site or the developers are not responsible, if you damage or brick your device.Do it on your own risk and follow the instruction properly.
* Important:
Backup important files stored on your device before proceeding with the steps below, so that in case something goes wrong you’ll have backup of all your important files.
You can find out how to Root your Verizon Samsung Galaxy S7 SM- G930V via XDA.
For MoreVerizon Samsung Galaxy S7 Updates Keep Checking Android custom ROM Fix ™®
That’s all. We hope this guide serves you well. If there’s anything you’d like to be added/changed on this page, PLZ Use the comment box below to contribute more ideas & Suggestions .
Like this post? PLZ Hit the share buttons below to share this article with your friends on Facebook, Google + and Twitter.
Want the latest Updates Sign up for our newsletters!
PLZ Follow Us On Flipboard 4 More Latest Updates.
Best Regards.™
Available link for download
Saturday, January 14, 2017
How to Install Android 6 0 1 Marshmallow Crisscross ROM V2 0 on Galaxy Note 5 SM N920I Pre rooted
How to Install Android 6 0 1 Marshmallow Crisscross ROM V2 0 on Galaxy Note 5 SM N920I Pre rooted
According to XDA member asc1977, Android 6.0.1 Marshmallow Crisscross ROM V2.0 [ 2ZPFB] is available now for Samsung Galaxy Note 5 SM- N920I.

÷ Rom Features:
Base: TW UX Beta firmware
Product code: SM-N920CZKASKC
PDA: N920SKSU2ZPFB
CSC: N920SSKC2ZPFB
Builddate: Wed Jun 29 19:54:40 KST 2016
Android version: 6.0.1
Kernel: 3.10.61-8273648
- Pre-rooted BETA-SuperSU-v2.76
- Knox removed
- Custom dev boot- and shutdownanimation
- Reboot recovery in MM reboot menue with a switch
- EmergencyMode in Reboot menue show/hide with a switch
- Removed confirm buttons in reboot menue
- Default animation scales set to 0,25x
- Removed high volume warning for headphones
- Disabled signature check
- App Lock option
- Shutter Sound option in camera settings
- Hidden Software Update Menue in About device
- Show NFC Icon if on in statusbar
- Call Recording Button
- Forced Enable Security Save in SmartManager
- Enabled Support Recent App Protection
- Show Data usage in expanded SystemUI near brightness auto check
- 3MinitBattery or StockBattery with a switch
- Left or Right Signal and Wifi with a switch
- Carrier Label on Statusbar with a switch and color option
- Power Saving Mode Ongoing Notification removeable with a switch
- Battery Bar in Statusbar with switch for show/hide
- Recemt Panel Lock (apps should not deleted if locked)
- Removed gray status bar when activated PowerSaveMode
- Removed Alpha Channel from status bar icons
- option to Increase Lock Screen visible notifications
- AdAway, OGGYouTubeDownloader and BetterBatteryStats in Rom
- Whitepages /identify unsaved numbers
- Colorize Lockscreen Clock & Date in real time with switch for seconds
- single swipe down right side for expanded quickpannel view with a switch
- next alarm on lockscreen(needs set one time alarm on/off to work right) with switch in RomControl for show/hide
- Gradient Statusbar (on first boot is black, set your own color or transparency)
- all apps multiwindow
- all notifications remoneable with switch on/off in RomControl app
- build.prop tweak for a faster boot- and shutdown animation
- build.prop tweak to remove ring delay
- build.prop tweak for power saving
- build.prop tweak to remove Knox from About Device info
- build.prop tweak to remove no sim card in phone message
- build.prop tweak to fix black screen after call
- build.prop tweak for google DNS
- build.prop tweak for 3G signal optimization
- build.prop tweak for internet speed enhancement
- build.prop tweak to fix app issues
- build.prop tweak to improve voice call clarity
- build.prop tweak to disable android device check in
- build.prop tweak for faster scrolling
- build.prop tweak for Wifi fix that dont forget passwort
- Quicklaunchpanel in recent apps with switch in RomControl app
- Custom image background for notification panel with settings in RomControl app
- Colorizer for Data Usage text in Expanded view in RomControl app
- Virtual lock, home and recent button for statusbar with on/off toggles in RomControl app
- support to colorize expanded view background in rom control app
- support to colorize notification background in rom control app
- USB Plug/Unplug wake up disabled
- Activated Installing app older versions over newer
- Disabled Signature Check.

÷ Aromamanager Menue options:
Run Rom Installation
-Wipe option
-Debloatmenue
-Option to remove boot- and shutdown sound
Kernel Chooser
-PF4 Kernel (Kernel is not seandroid enforcing)
-PFB Kernel
÷ RomControl App Menue options:
Reboot Menue Settings
--Hide/Show Reboot Recovery
--Hide/Show Emergency Mode
÷Systemui Settings:
-Signal Statusbar
--Signal Position left/right
-Battery Statusbar
--StockBattery show/hide
--3MinitBattery show/hide
--BatteryBar
----BatteryBar show/hide
----BatteryBar charging animation
----BatteryBar Style
----Thickness of BatteryBar
----Color of BatteryBar
-Carrier Label Statusbar
--Carrier Label Color
--Carrier Label Left of Wifi/Data
--Carier Label between Wifi and Data
--Carrier Label Right of Wifi/Data
-Notifications
--Ongoing Power save notifications show/hide
--Increase Lock Screen visible notifications
--Choose color of notification background
-Lockscreen
--Text Color hours
--Text Color minutes
--Text Color seconds
--Text Color date
--Show(hidde seconds
--Hide next alarm
--Color next alarm
-Expanded view
--Single swipe down right side for expanded quickpannel view
--All notifications remoneable on/off
---Expanded view colors
----Switch to enable color notification background
----Color of Data Usage text
----Switch to enable color expanded view background
----Choose color of expanded view background
--Custom Notification Panel Background
---Select image
---Image opacity
---Custom Background on/off
-Recent Panel options
--Show/hide Quicklaunchpanel
-Virtual Buttons
--Lock Button
---Right Side
---Left Side
---Center
--Home Button
---Right Side
---Left Side
---Center
--Recent Button
---Right Side
---Left Side
---Center
Set Theme
--Light/Dark Theme of RomControll App.

÷ Changelog V2.1:
- added switch in RomControl to show/hide next alarm on lockscreen
- added Quicklaunchpanel in recent apps
- added switch for Quichlaunchpanel in RomControl App
- added Custom image background for notification panel with RomControl
- added colorizer for Data Usage text in Expanded view
- added virtual lock, home and recent button for statusbar with on/off toggles in RomControl app
- fixed AppLock
- updated to newest SuperSu V2.76
- added SuperSu apk to system/priv-app
- Private mode fixed
- Photo editor fixed
- added support to colorize expanded view background in rom control app
- added support to colorize notification background in rom control app
- USB Plug/Unplug wake up disabled
- Activated Installing app older versions over newer
- Disabled Signature Check
- Added Kernel Chooser to Armoa (PF4 or PFB Kernel)...
View my Flipboard Magazine.
÷ Prerequisites:
•This tutorial is only for installing Android 6.0.1 Marshmallow Crisscross ROM V2.0 [ 2ZPFB] on Samsung Galaxy Note 5 SM- N920I.Please do not try on any other Galaxy Note 5 Variants.
•Your phone should have a custom recovery installed in order to install this NanoROM ROM on your phone.
•We will be using TWRP Recovery for this tutorial.
•This tutorial will wipe out all your data. Make sure you backup all your data in your phone before proceeding.
•Samsung KIES will NOT detect your phone after installing this ROM because it is a custom firmware
•Perform a Dalvik Cache wipe before proceeding from the Recovery Mode.
*Disclaimer:
Android Custom ROM fix ® provide various Firmware Updates and Rooting process along with Custom ROM,Modes,file are all belong to their owners/developers. The autor of this site or the developers are not responsible, if you damage or brick your device.Do it on your own risk and follow the instruction properly.
* Important:
Backup important files stored on your device before proceeding with the steps below, so that in case something goes wrong you’ll have backup of all your important files.
You can find out how to apply it right now via XDA.
For More Samsung Galaxy Note 5 Updates Keep Checking Android custom ROM Fix ™®
That’s all. We hope this guide serves you well. If there’s anything you’d like to be added/changed on this page, PLZ Use the comment box below to contribute more ideas & Suggestions .
Like this post? PLZ Hit the share buttons below to share this article with your friends on Facebook, Google + and Twitter.
Want the latest Updates Sign up for our newsletters!
PLZ Follow Us On Flipboard 4 More Latest Updates.
Best Regards.™
÷ Prerequisites:
•This tutorial is only for installing Android 6.0.1 Marshmallow Crisscross ROM V2.0 [ 2ZPFB] on Samsung Galaxy Note 5 SM- N920I.Please do not try on any other Galaxy Note 5 Variants.
•Your phone should have a custom recovery installed in order to install this NanoROM ROM on your phone.
•We will be using TWRP Recovery for this tutorial.
•This tutorial will wipe out all your data. Make sure you backup all your data in your phone before proceeding.
•Samsung KIES will NOT detect your phone after installing this ROM because it is a custom firmware
•Perform a Dalvik Cache wipe before proceeding from the Recovery Mode.
*Disclaimer:
Android Custom ROM fix ® provide various Firmware Updates and Rooting process along with Custom ROM,Modes,file are all belong to their owners/developers. The autor of this site or the developers are not responsible, if you damage or brick your device.Do it on your own risk and follow the instruction properly.
* Important:
Backup important files stored on your device before proceeding with the steps below, so that in case something goes wrong you’ll have backup of all your important files.
You can find out how to apply it right now via XDA.
For More Samsung Galaxy Note 5 Updates Keep Checking Android custom ROM Fix ™®
That’s all. We hope this guide serves you well. If there’s anything you’d like to be added/changed on this page, PLZ Use the comment box below to contribute more ideas & Suggestions .
Like this post? PLZ Hit the share buttons below to share this article with your friends on Facebook, Google + and Twitter.
Want the latest Updates Sign up for our newsletters!
PLZ Follow Us On Flipboard 4 More Latest Updates.
Best Regards.™
Available link for download
Sunday, January 8, 2017
How to Install Android 6 0 1 Marshmallow ViperROM MM on T Mobile Galaxy Note 5 SM N920T
How to Install Android 6 0 1 Marshmallow ViperROM MM on T Mobile Galaxy Note 5 SM N920T
According to XDA Member asif.malick, Android 6.0.1 Marshmallow ViperROM MM is a now released for T-Mobile Samsung Galaxy Note 5 SM- N920T.

÷ ROM Features:
Based on Latest N920CXXS2BPE4 Firmware
-Deodexed all Apps
-Rooted with BETA-SuperSU-v2.68
-BusyBox
-Auto Wipe Cache, Dalvik Cache and Format System
-System Optimization
-Removed Knox
-Removed Social Apps
-Speed meter
-Added Rounded recent apps windows
-Added Rounded Notifications
-Add quick launcher in recent app
-Advanced power menu
-Exit in Internet Explorer
- Xposed working
- S7 Edge Panel
- 3 virtual keys, right left, home
- quick connect added
- Microsoft Apps Removed
- Disable SMS to MMS converting
- Shutter Sound in camera settings
- Enable Camera During Call
- Call Recording
- Message notification popup
- Call and SMS blocking menu in settings
- Show Data usage in expanded SystemUI near brightness auto check
- Force Enable Security Save in SmartManager...
View my Flipboard Magazine.
÷ Prerequisites:
•This tutorial is only for installing Android 6.0.1 Marshmallow ViperROM MM for T-Mobile Samsung Galaxy Note 5 SM- N920T. Please do not try on any other Galaxy Note 5 Variants.
•Your phone should have a custom recovery installed in order to install this NanoROM ROM on your phone.
•We will be using TWRP Recovery for this tutorial.
•This tutorial will wipe out all your data. Make sure you backup all your data in your phone before proceeding.
•Samsung KIES will NOT detect your phone after installing this ROM because it is a custom firmware.
•Perform a Dalvik Cache wipe before proceeding from the Recovery Mode.
*Disclaimer:
Android Custom ROM fix ® provide various Firmware Updates and Rooting process along with Custom ROM,Modes,file are all belong to their owners/developers. The autor of this site or the developers are not responsible, if you damage or brick your device.Do it on your own risk and follow the instruction properly.
* Important:
Backup important files stored on your device before proceeding with the steps below, so that in case something goes wrong you’ll have backup of all your important files.

You can find out how to apply it right now via XDA.
For MoreVerizon Samsung Galaxy Note 5SM- N920T Updates Keep Checking Android custom ROM Fix ™®
That’s all. We hope this guide serves you well. If there’s anything you’d like to be added/changed on this page, PLZ Use the comment box below to contribute more ideas & Suggestions .
Like this post? PLZ Hit the share buttons below to share this article with your friends on Facebook, Google + and Twitter.
Want the latest Updates Sign up for our newsletters!
PLZ Follow Us On Flipboard 4 More Latest Updates.
Best Regards.™
÷ Prerequisites:
•This tutorial is only for installing Android 6.0.1 Marshmallow ViperROM MM for T-Mobile Samsung Galaxy Note 5 SM- N920T. Please do not try on any other Galaxy Note 5 Variants.
•Your phone should have a custom recovery installed in order to install this NanoROM ROM on your phone.
•We will be using TWRP Recovery for this tutorial.
•This tutorial will wipe out all your data. Make sure you backup all your data in your phone before proceeding.
•Samsung KIES will NOT detect your phone after installing this ROM because it is a custom firmware.
•Perform a Dalvik Cache wipe before proceeding from the Recovery Mode.
*Disclaimer:
Android Custom ROM fix ® provide various Firmware Updates and Rooting process along with Custom ROM,Modes,file are all belong to their owners/developers. The autor of this site or the developers are not responsible, if you damage or brick your device.Do it on your own risk and follow the instruction properly.
* Important:
Backup important files stored on your device before proceeding with the steps below, so that in case something goes wrong you’ll have backup of all your important files.
You can find out how to apply it right now via XDA.
For MoreVerizon Samsung Galaxy Note 5SM- N920T Updates Keep Checking Android custom ROM Fix ™®
That’s all. We hope this guide serves you well. If there’s anything you’d like to be added/changed on this page, PLZ Use the comment box below to contribute more ideas & Suggestions .
Like this post? PLZ Hit the share buttons below to share this article with your friends on Facebook, Google + and Twitter.
Want the latest Updates Sign up for our newsletters!
PLZ Follow Us On Flipboard 4 More Latest Updates.
Best Regards.™
Available link for download
Wednesday, January 4, 2017
Galaxy Note 4 show dm verity verification failed after stock rom flash
Galaxy Note 4 show dm verity verification failed after stock rom flash
Hi
Is there any one who can guide how to fix the dm verity verifiaction failed. i flashed the one with a new firmware 6.0.1 from sammobile, but still face the issue of phone stuck and rebooting at the samsung logo.
Thank you in advance for any assistance.
Is there any one who can guide how to fix the dm verity verifiaction failed. i flashed the one with a new firmware 6.0.1 from sammobile, but still face the issue of phone stuck and rebooting at the samsung logo.
Thank you in advance for any assistance.
from xda-developers http://ift.tt/2a5vQqc
via IFTTT
Available link for download
Thursday, December 29, 2016
How to Install Android 6 0 1 Marshmallow Jesse Kernel V1 2 ROM on Galaxy S7 Edge SM G935F
How to Install Android 6 0 1 Marshmallow Jesse Kernel V1 2 ROM on Galaxy S7 Edge SM G935F
According to XDA Member jesec, Android 6.0.1 Marshmallow Jesse Kernel V1.2 ROM is now available for Samsung Galaxy S7 Edge SM- G935F.

÷ ROM Features:
Compiled with Linaro 6.1 Toolchain.
Linaro Stable Kernel 15.09 Merged.
Latest Google Kernel-Common Merged.
Latest Linux Stable 3.18.y branch Merged.
MNGS: OC to 2x2.8GHz,UC to 0.5GHz; A53: OC to 1.8GHz
Exynos MP voltage control
Zen-Tune v4.5
Fading LED and LED Controls
Ofast Optimizations.
I/O scheduler improvements
Scheduler improvements
Linaros Power Efficient Workqueue.
DVFS improvements. (automatic reset to prevent cpufreq_(min,max)_limit getting stuck)
Binder Improvements.
CPUidle improvements.
Backport latest crypto algorithm.
Backport latest random driver....
÷ BUG:
NULL.
÷ ROM Features:
Compiled with Linaro 6.1 Toolchain.
Linaro Stable Kernel 15.09 Merged.
Latest Google Kernel-Common Merged.
Latest Linux Stable 3.18.y branch Merged.
MNGS: OC to 2x2.8GHz,UC to 0.5GHz; A53: OC to 1.8GHz
Exynos MP voltage control
Zen-Tune v4.5
Fading LED and LED Controls
Ofast Optimizations.
I/O scheduler improvements
Scheduler improvements
Linaros Power Efficient Workqueue.
DVFS improvements. (automatic reset to prevent cpufreq_(min,max)_limit getting stuck)
Binder Improvements.
CPUidle improvements.
Backport latest crypto algorithm.
Backport latest random driver....
÷ BUG:
NULL.
View my Flipboard Magazine.
÷ Prerequisites:
•This tutorial is only for installing Android 6.0.1 Marshmallow Jesse Kernel V1.2 ROM on Samsung Galaxy S7 Edge G935F. Please do not try on any other Galaxy S7 variants.
•Your phone should have a custom recovery installed in order to install this NanoROM ROM on your phone.
•We will be using TWRP Recovery for this tutorial.
•This tutorial will wipe out all your data. Make sure you backup all your data in your phone before proceeding.
•Samsung KIES will NOT detect your phone after installing this ROM because it is a custom firmware.
•Perform a Dalvik Cache wipe before proceeding from the Recovery Mode.
*Disclaimer:
Android Custom ROM fix ® provide various Firmware Updates and Rooting process along with Custom ROM,Modes,file are all belong to their owners/developers. The autor of this site or the developers are not responsible, if you damage or brick your device.Do it on your own risk and follow the instruction properly.
* Important:
Backup important files stored on your device before proceeding with the steps below, so that in case something goes wrong you’ll have backup of all your important files.

You can find out how to apply it right now via XDA.
For MoreVerizon Samsung Galaxy S7 Edge SM- G935F Updates Keep Checking Android custom ROM Fix ™®
That’s all. We hope this guide serves you well. If there’s anything you’d like to be added/changed on this page, PLZ Use the comment box below to contribute more ideas & Suggestions .
Like this post? PLZ Hit the share buttons below to share this article with your friends on Facebook, Google + and Twitter.
Want the latest Updates Sign up for our newsletters!
PLZ Follow Us On Flipboard 4 More Latest Updates.
Best Regards.™
÷ Prerequisites:
•This tutorial is only for installing Android 6.0.1 Marshmallow Jesse Kernel V1.2 ROM on Samsung Galaxy S7 Edge G935F. Please do not try on any other Galaxy S7 variants.
•Your phone should have a custom recovery installed in order to install this NanoROM ROM on your phone.
•We will be using TWRP Recovery for this tutorial.
•This tutorial will wipe out all your data. Make sure you backup all your data in your phone before proceeding.
•Samsung KIES will NOT detect your phone after installing this ROM because it is a custom firmware.
•Perform a Dalvik Cache wipe before proceeding from the Recovery Mode.
*Disclaimer:
Android Custom ROM fix ® provide various Firmware Updates and Rooting process along with Custom ROM,Modes,file are all belong to their owners/developers. The autor of this site or the developers are not responsible, if you damage or brick your device.Do it on your own risk and follow the instruction properly.
* Important:
Backup important files stored on your device before proceeding with the steps below, so that in case something goes wrong you’ll have backup of all your important files.
You can find out how to apply it right now via XDA.
For MoreVerizon Samsung Galaxy S7 Edge SM- G935F Updates Keep Checking Android custom ROM Fix ™®
That’s all. We hope this guide serves you well. If there’s anything you’d like to be added/changed on this page, PLZ Use the comment box below to contribute more ideas & Suggestions .
Like this post? PLZ Hit the share buttons below to share this article with your friends on Facebook, Google + and Twitter.
Want the latest Updates Sign up for our newsletters!
PLZ Follow Us On Flipboard 4 More Latest Updates.
Best Regards.™
Available link for download
How to Root Galaxy S6 Edge Plus SM G928R4 US Cellular
How to Root Galaxy S6 Edge Plus SM G928R4 US Cellular
Renowned root-star Chainfire has made sure that his CF Auto root tool which is used to root almost all of Samsung’s Android devices, also works with the US Cellular S6 Edge Plus variant.

Rooting with CF-Auto-Root is easy. All you need to do is download the CF Auto Root file for your Samsung device, boot into download mode and connect to PC, then run start CF Auto Root on PC.
View my Flipboard Magazine.
÷ Prerequisites:
This Tutorial is only for Rooting Samsung Galaxy S6 Edge Plus SM-G928R4 (US Cellular).please dont try it on other Galaxy S6 edge variants.
*Disclaimer:
Android Custom ROM fix ® provide various Firmware Updates and Rooting process along with Custom ROM,Modes,file are all belong to their owners/developers. The autor of this site or the developers are not responsible, if you damage or brick your device.Do it on your own risk and follow the instruction properly.
* Important:
Backup important files stored on your device before proceeding with the steps below, so that in case something goes wrong you’ll have backup of all your important files.
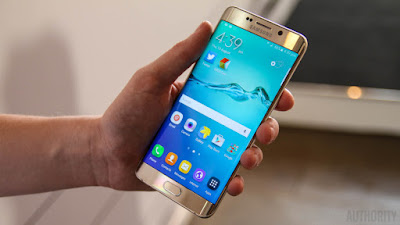
÷ How to Root Galaxy S6 Edge Plus SM-G928R4 (US Cellular).
1- Download CF Auto Root for US Cellular S6 Edge Plus G928R4.
2- Unzip the CF Auto Root .zip file that you downloaded for your device from the link above.
3- You’ll get Odin and CF Auto Root tar file and some more.
4- Run/open Odin3 v3.10.6.exe file from the extracted files on your PC.
5- (If applicable) Enable OEM unlock on your device:
6- Go to Settings » About phone » and tap “Build number” seven times to enable “Developer options”.
7- Go back to main Settings page, scroll to bottom and select “Developer options” from there.
8- Under Developer options, look for “Enable OEM unlock” checkbox/toggle and make sure you Check it or turn it ON.
9- Boot your device into Download mode:
Switch off your device.
10- Press and hold “Home + Power + Volume down” buttons for a few seconds until you see a warning screen.
11- Press Volume Up on the warning screen to accept it and boot into Download mode.
12- Once your device is in download mode, connect it to the PC with a USB cable. The Odin window on PC should detect the device and show an“Added!!” message.
13- Now click on the AP tab on Odin window and select the CF Auto Root .tar file.
14- Click the Start button on Odin and wait for it to finish the process. Once it has finished successfully, you’ll see a pass message on the Odin screen.
15- Your device will automatically reboot when Odin is done flashing, and the CF Auto Root script will be visible on your device, doing its magic.
? You can disconnect the device from PC at this stage.

That’s all. Once booted, your Samsung Galaxy device should be rooted. To verify, download/install any root checker app from the Play Store.
For More Samsung Galaxy S6 Edge Updates Keep Checking Android Custom ROM Fix ™®
That’s all. We hope this guide serves you well. If there’s anything you’d like to be added/changed on this page, PLZ Use the comment box below to contribute more ideas & Suggestions .
Like this post? PLZ Hit the share buttons below to share this article with your friends on Facebook, Google + and Twitter.
Want the latest Updates Sign up for our newsletters!
PLZ Follow Us On Flipboard 4 More Latest Updates.
Best Regards.™
÷ Prerequisites:
This Tutorial is only for Rooting Samsung Galaxy S6 Edge Plus SM-G928R4 (US Cellular).please dont try it on other Galaxy S6 edge variants.
*Disclaimer:
Android Custom ROM fix ® provide various Firmware Updates and Rooting process along with Custom ROM,Modes,file are all belong to their owners/developers. The autor of this site or the developers are not responsible, if you damage or brick your device.Do it on your own risk and follow the instruction properly.
* Important:
Backup important files stored on your device before proceeding with the steps below, so that in case something goes wrong you’ll have backup of all your important files.
÷ How to Root Galaxy S6 Edge Plus SM-G928R4 (US Cellular).
1- Download CF Auto Root for US Cellular S6 Edge Plus G928R4.
2- Unzip the CF Auto Root .zip file that you downloaded for your device from the link above.
3- You’ll get Odin and CF Auto Root tar file and some more.
4- Run/open Odin3 v3.10.6.exe file from the extracted files on your PC.
5- (If applicable) Enable OEM unlock on your device:
6- Go to Settings » About phone » and tap “Build number” seven times to enable “Developer options”.
7- Go back to main Settings page, scroll to bottom and select “Developer options” from there.
8- Under Developer options, look for “Enable OEM unlock” checkbox/toggle and make sure you Check it or turn it ON.
9- Boot your device into Download mode:
Switch off your device.
10- Press and hold “Home + Power + Volume down” buttons for a few seconds until you see a warning screen.
11- Press Volume Up on the warning screen to accept it and boot into Download mode.
12- Once your device is in download mode, connect it to the PC with a USB cable. The Odin window on PC should detect the device and show an“Added!!” message.
13- Now click on the AP tab on Odin window and select the CF Auto Root .tar file.
14- Click the Start button on Odin and wait for it to finish the process. Once it has finished successfully, you’ll see a pass message on the Odin screen.
15- Your device will automatically reboot when Odin is done flashing, and the CF Auto Root script will be visible on your device, doing its magic.
? You can disconnect the device from PC at this stage.
That’s all. Once booted, your Samsung Galaxy device should be rooted. To verify, download/install any root checker app from the Play Store.
For More Samsung Galaxy S6 Edge Updates Keep Checking Android Custom ROM Fix ™®
That’s all. We hope this guide serves you well. If there’s anything you’d like to be added/changed on this page, PLZ Use the comment box below to contribute more ideas & Suggestions .
Like this post? PLZ Hit the share buttons below to share this article with your friends on Facebook, Google + and Twitter.
Want the latest Updates Sign up for our newsletters!
PLZ Follow Us On Flipboard 4 More Latest Updates.
Best Regards.™
Available link for download
Sunday, December 25, 2016
Install Android 6 0 1 Marshmallow AICP 11 0 ROM on Verizon Samsung Galaxy S5 SM G900V
Install Android 6 0 1 Marshmallow AICP 11 0 ROM on Verizon Samsung Galaxy S5 SM G900V
According to XDA Member Beeko, Android 6.0.1 Marshmallow AICP 11.0 ROM is now released for Verizon Samsung Galaxy S5 SM- G900V [ kltevzw].

AICP is known by everyone as Ice Cold Project that started on Desire HD and since then evolved into a mature ROM with the BEST community you can find!!!
Until Lollipop, Rom has always been AOKP based. Unfortunately, since AOKP either stopped development or will make a comeback later this year, we changed our base to CM when it comes to hardware, drivers and some features.
If there are any bugs, either we will sort them or CM team if it concerns their modifications. This rom isnt CM supported so no need to report errors or bugs to them.
View my Flipboard Magazine.
÷ Prerequisites:
•This tutorial is only for installing Android 6.0.1 Marshmallow AICP 11.0 ROM on Verizon Samsung Galaxy S5 SM- G900V [ kltevzw] .Please do not try on any other Galaxy S5 Variants.
•Your phone should have a custom recovery installed in order to install this NanoROM ROM on your phone.
•We will be using TWRP Recovery for this tutorial.
•This tutorial will wipe out all your data. Make sure you backup all your data in your phone before proceeding.
•Samsung KIES will NOT detect your phone after installing this ROM because it is a custom firmware
•Perform a Dalvik Cache wipe before proceeding from the Recovery Mode.
*Disclaimer:
Android Custom ROM fix ® provide various Firmware Updates and Rooting process along with Custom ROM,Modes,file are all belong to their owners/developers. The autor of this site or the developers are not responsible, if you damage or brick your device.Do it on your own risk and follow the instruction properly.
* Important:
Backup important files stored on your device before proceeding with the steps below, so that in case something goes wrong you’ll have backup of all your important files.

You can find out how to apply it right now via XDA.
For More Samsung Galaxy Note 5 Updates Keep Checking Android custom ROM Fix ™®
That’s all. We hope this guide serves you well. If there’s anything you’d like to be added/changed on this page, PLZ Use the comment box below to contribute more ideas & Suggestions .
Like this post? PLZ Hit the share buttons below to share this article with your friends on Facebook, Google + and Twitter.
Want the latest Updates Sign up for our newsletters!
PLZ Follow Us On Flipboard 4 More Latest Updates.
Best Regards.™
÷ Prerequisites:
•This tutorial is only for installing Android 6.0.1 Marshmallow AICP 11.0 ROM on Verizon Samsung Galaxy S5 SM- G900V [ kltevzw] .Please do not try on any other Galaxy S5 Variants.
•Your phone should have a custom recovery installed in order to install this NanoROM ROM on your phone.
•We will be using TWRP Recovery for this tutorial.
•This tutorial will wipe out all your data. Make sure you backup all your data in your phone before proceeding.
•Samsung KIES will NOT detect your phone after installing this ROM because it is a custom firmware
•Perform a Dalvik Cache wipe before proceeding from the Recovery Mode.
*Disclaimer:
Android Custom ROM fix ® provide various Firmware Updates and Rooting process along with Custom ROM,Modes,file are all belong to their owners/developers. The autor of this site or the developers are not responsible, if you damage or brick your device.Do it on your own risk and follow the instruction properly.
* Important:
Backup important files stored on your device before proceeding with the steps below, so that in case something goes wrong you’ll have backup of all your important files.
You can find out how to apply it right now via XDA.
For More Samsung Galaxy Note 5 Updates Keep Checking Android custom ROM Fix ™®
That’s all. We hope this guide serves you well. If there’s anything you’d like to be added/changed on this page, PLZ Use the comment box below to contribute more ideas & Suggestions .
Like this post? PLZ Hit the share buttons below to share this article with your friends on Facebook, Google + and Twitter.
Want the latest Updates Sign up for our newsletters!
PLZ Follow Us On Flipboard 4 More Latest Updates.
Best Regards.™
Available link for download
How to Install Android 6 0 1 Marshmallow AICP ROM on Galaxy Note 2 N7100
How to Install Android 6 0 1 Marshmallow AICP ROM on Galaxy Note 2 N7100
Samsung Galaxy Note 2 N7100 AICP custom ROM comes with tons of new features and is based on Android 6.0.1 Marshmallow.
 Don’t worry we are going to share step by step guide to safely update your Samsung Galaxy Note 2 N7100 to Android 6.0.1 Marshmallow AICP ROM .
View my Flipboard Magazine.
÷ Prerequisites:
•This tutorial is only for installing AICP Android 6.0.1 ROM on Samsung Galaxy Note 2 N7100. Please do not try on any other Galaxy Note II variants.
•Your phone should be rooted and have ClockworkMod recovery installed from before.
•This tutorial will wipe out all your data. Proceed at your own risk.
•Perform a Dalvik Cache wipe before proceeding from the recovery mode.
•Samsung KIES will NOT detect your phone after installing this ROM because it is a custom firmware.
•Make sure you backup all your data in your phone before proceeding.
*Disclaimer:
Android Custom ROM fix ® provide various Firmware Updates and Rooting process along with Custom ROM,Modes,file are all belong to their owners/developers. The autor of this site or the developers are not responsible, if you damage or brick your device.Do it on your own risk and follow the instruction properly.
* Important:
Backup important files stored on your device before proceeding with the steps below, so that in case something goes wrong you’ll have backup of all your important files.

÷ How to Install Android 6.0.1 Marshmallow AICP ROM on Galaxy Note 2 N7100:
Step 1 – Download AICP Android 6.0.1 ROM for Galaxy Note II to your computer.
Step 2 – Connect and mount your Galaxy Note 2 USB memory on your computer using the USB cable.
Step 3 – Now copy/paste the downloaded Android 6.0.1 ROM zip file to your SD card. Make sure the file is in the SD card root (not in any folder).
Step 4 – Then turn OFF your phone and disconnect from the USB cable.
Step 5 – Now to get in the Recovery Mode. Switch ON the phone while pressing and holding Volume Up + Home + Power buttons together.
Step 6 – Once you are in ClockworkMod Recovery, select perform a full data wipe by selecting “wipe data/factory reset. Use the Power button to select everything while in the Recovery Mode.
Step 7 – Then, perform a cache wipe by selecting “wipe cache partition” .
Step 8 – Now this is optional, but it is recommended to perform a wipe of your dalvik cache as well. You will not get into boot loops or any other errors. From CWM recovery, go to ‘advanced’ and then select “wipe dalvik cache”.
Step 9 – Then go back to the main recovery screen and select “install zip from SD card”.
Step 10 – Now select “choose zip from sdcard”. Using your volume keys, navigate to the Android 6.0.1 ROM zip file that you copied to your SD card and select it using the Power button. Confirm the installation on the next screen and the installation procedure should start now.
Step 11 – After the installation completes, go to “+++++Go Back+++++” and reboot the phone by selecting “reboot system now” from the recovery menu.

Your Samsung Galaxy Note 2 N7100 will boot now and it might take about 5 minutes to boot on your first time. So, please wait.
That’s it! Your Galaxy Note 2 should now have AICP Android 6.0.1 Marshmallow custom ROM installed on your phone! Go to Settings > About phone to verify.
For More Galaxy Note 2 Updates Keep Checking Android Custom ROM Fix ™®
That’s all. We hope this guide serves you well. If there’s anything you’d like to be added/changed on this page, PLZ Use the comment box below to contribute more ideas & Suggestions .
Like this post? PLZ Hit the share buttons below to share this article with your friends on Facebook, Google + and Twitter.
Want the latest Updates Sign up for our newsletters!
PLZ Follow Us On Flipboard 4 More Latest Updates.
Best Regards.™
÷ Prerequisites:
•This tutorial is only for installing AICP Android 6.0.1 ROM on Samsung Galaxy Note 2 N7100. Please do not try on any other Galaxy Note II variants.
•Your phone should be rooted and have ClockworkMod recovery installed from before.
•This tutorial will wipe out all your data. Proceed at your own risk.
•Perform a Dalvik Cache wipe before proceeding from the recovery mode.
•Samsung KIES will NOT detect your phone after installing this ROM because it is a custom firmware.
•Make sure you backup all your data in your phone before proceeding.
*Disclaimer:
Android Custom ROM fix ® provide various Firmware Updates and Rooting process along with Custom ROM,Modes,file are all belong to their owners/developers. The autor of this site or the developers are not responsible, if you damage or brick your device.Do it on your own risk and follow the instruction properly.
* Important:
Backup important files stored on your device before proceeding with the steps below, so that in case something goes wrong you’ll have backup of all your important files.
÷ How to Install Android 6.0.1 Marshmallow AICP ROM on Galaxy Note 2 N7100:
Step 1 – Download AICP Android 6.0.1 ROM for Galaxy Note II to your computer.
Step 2 – Connect and mount your Galaxy Note 2 USB memory on your computer using the USB cable.
Step 3 – Now copy/paste the downloaded Android 6.0.1 ROM zip file to your SD card. Make sure the file is in the SD card root (not in any folder).
Step 4 – Then turn OFF your phone and disconnect from the USB cable.
Step 5 – Now to get in the Recovery Mode. Switch ON the phone while pressing and holding Volume Up + Home + Power buttons together.
Step 6 – Once you are in ClockworkMod Recovery, select perform a full data wipe by selecting “wipe data/factory reset. Use the Power button to select everything while in the Recovery Mode.
Step 7 – Then, perform a cache wipe by selecting “wipe cache partition” .
Step 8 – Now this is optional, but it is recommended to perform a wipe of your dalvik cache as well. You will not get into boot loops or any other errors. From CWM recovery, go to ‘advanced’ and then select “wipe dalvik cache”.
Step 9 – Then go back to the main recovery screen and select “install zip from SD card”.
Step 10 – Now select “choose zip from sdcard”. Using your volume keys, navigate to the Android 6.0.1 ROM zip file that you copied to your SD card and select it using the Power button. Confirm the installation on the next screen and the installation procedure should start now.
Step 11 – After the installation completes, go to “+++++Go Back+++++” and reboot the phone by selecting “reboot system now” from the recovery menu.
Your Samsung Galaxy Note 2 N7100 will boot now and it might take about 5 minutes to boot on your first time. So, please wait.
That’s it! Your Galaxy Note 2 should now have AICP Android 6.0.1 Marshmallow custom ROM installed on your phone! Go to Settings > About phone to verify.
For More Galaxy Note 2 Updates Keep Checking Android Custom ROM Fix ™®
That’s all. We hope this guide serves you well. If there’s anything you’d like to be added/changed on this page, PLZ Use the comment box below to contribute more ideas & Suggestions .
Like this post? PLZ Hit the share buttons below to share this article with your friends on Facebook, Google + and Twitter.
Want the latest Updates Sign up for our newsletters!
PLZ Follow Us On Flipboard 4 More Latest Updates.
Best Regards.™
Available link for download
Thursday, December 22, 2016
How to Install Android 6 0 1 Marshmallow SuperNexus Build 2 0 APFG ROM on Galaxy S7 SM G930F Deodexed
How to Install Android 6 0 1 Marshmallow SuperNexus Build 2 0 APFG ROM on Galaxy S7 SM G930F Deodexed
According to XDA member angelo27093, Android 6.0.1 Marshmallow SuperNexus Build 2.0[ APFG] ROM is released for Samsung Galaxy S7 SM- G930F.

÷ ROM Info:
•UperNexus Build 2.0 The Smallest Nexus ROM ONLY 946MB in size.
•Its Based on G930FXXU1APFG latest Stock Base •Fully Debloated and Deodexed Rom.
* Whole Download is 946MB in size [SLIM]
* Based off G930FXXU1APFG [Latest Base]
*Same day rebase [FAST UPDATES]
* OTA Updater
* Heavily Debloated
* System Optimizations
* Super-Su
* Deknoxed
* Advanced Reboot Menu
* All Apps Split Windows
*Data on the left side
* Nexus look and feel
÷Changelog For Build 2.0
-AFPG July security patch
-Xposed fixed
-good lock removed
-Aroma removed
-jesse kernel 1.3
-Optimalization
-private mode fix
-eqalizer fix
-AOD should work now
÷Changelog For Build 1.7.1
-Rebased to G935FXXU1APF9
-google dialer updated
-stock DPI
-good look added
÷Changelog For Build 1.7
-REBASE to new base G935FXXU1APF8
÷Changelog For Build 1.6
-Jesse kernel 1.2
-s7 flat boots now perfect
-speed tweaks...
÷ ROM Info:
•UperNexus Build 2.0 The Smallest Nexus ROM ONLY 946MB in size.
•Its Based on G930FXXU1APFG latest Stock Base •Fully Debloated and Deodexed Rom.
* Whole Download is 946MB in size [SLIM]
* Based off G930FXXU1APFG [Latest Base]
*Same day rebase [FAST UPDATES]
* OTA Updater
* Heavily Debloated
* System Optimizations
* Super-Su
* Deknoxed
* Advanced Reboot Menu
* All Apps Split Windows
*Data on the left side
* Nexus look and feel
÷Changelog For Build 2.0
-AFPG July security patch
-Xposed fixed
-good lock removed
-Aroma removed
-jesse kernel 1.3
-Optimalization
-private mode fix
-eqalizer fix
-AOD should work now
÷Changelog For Build 1.7.1
-Rebased to G935FXXU1APF9
-google dialer updated
-stock DPI
-good look added
÷Changelog For Build 1.7
-REBASE to new base G935FXXU1APF8
÷Changelog For Build 1.6
-Jesse kernel 1.2
-s7 flat boots now perfect
-speed tweaks...
View my Flipboard Magazine.
÷ Prerequisites:
•This tutorial is only for installing Android 6.0.1 Marshmallow Super Nexus Build 2.0 on Samsung Galaxy S7 SM-G930F.Please do not try on any other Galaxy S7 Variants.
•Your phone should have a custom recovery installed in order to install this NanoROM ROM on your phone.
•We will be using TWRP Recovery for this tutorial.
•This tutorial will wipe out all your data. Make sure you backup all your data in your phone before proceeding.
•Samsung KIES will NOT detect your phone after installing this ROM because it is a custom firmware
•Perform a Dalvik Cache wipe before proceeding from the Recovery Mode.
*Disclaimer:
Android Custom ROM fix ® provide various Firmware Updates and Rooting process along with Custom ROM,Modes,file are all belong to their owners/developers. The autor of this site or the developers are not responsible, if you damage or brick your device.Do it on your own risk and follow the instruction properly.
* Important:
Backup important files stored on your device before proceeding with the steps below, so that in case something goes wrong you’ll have backup of all your important files.

You can find out how to apply it right now via XDA.
For More Samsung Galaxy S7 Updates Keep Checking Android custom ROM Fix ™®
That’s all. We hope this guide serves you well. If there’s anything you’d like to be added/changed on this page, PLZ Use the comment box below to contribute more ideas & Suggestions .
Like this post? PLZ Hit the share buttons below to share this article with your friends on Facebook, Google + and Twitter.
Want the latest Updates Sign up for our newsletters!
PLZ Follow Us On Flipboard 4 More Latest Updates.
Best Regards.™
÷ Prerequisites:
•This tutorial is only for installing Android 6.0.1 Marshmallow Super Nexus Build 2.0 on Samsung Galaxy S7 SM-G930F.Please do not try on any other Galaxy S7 Variants.
•Your phone should have a custom recovery installed in order to install this NanoROM ROM on your phone.
•We will be using TWRP Recovery for this tutorial.
•This tutorial will wipe out all your data. Make sure you backup all your data in your phone before proceeding.
•Samsung KIES will NOT detect your phone after installing this ROM because it is a custom firmware
•Perform a Dalvik Cache wipe before proceeding from the Recovery Mode.
*Disclaimer:
Android Custom ROM fix ® provide various Firmware Updates and Rooting process along with Custom ROM,Modes,file are all belong to their owners/developers. The autor of this site or the developers are not responsible, if you damage or brick your device.Do it on your own risk and follow the instruction properly.
* Important:
Backup important files stored on your device before proceeding with the steps below, so that in case something goes wrong you’ll have backup of all your important files.
You can find out how to apply it right now via XDA.
For More Samsung Galaxy S7 Updates Keep Checking Android custom ROM Fix ™®
That’s all. We hope this guide serves you well. If there’s anything you’d like to be added/changed on this page, PLZ Use the comment box below to contribute more ideas & Suggestions .
Like this post? PLZ Hit the share buttons below to share this article with your friends on Facebook, Google + and Twitter.
Want the latest Updates Sign up for our newsletters!
PLZ Follow Us On Flipboard 4 More Latest Updates.
Best Regards.™
Available link for download
Subscribe to:
Posts (Atom)