Showing posts with label rooted. Show all posts
Showing posts with label rooted. Show all posts
Saturday, January 14, 2017
How to Install Android 6 0 1 Marshmallow Crisscross ROM V2 0 on Galaxy Note 5 SM N920I Pre rooted
How to Install Android 6 0 1 Marshmallow Crisscross ROM V2 0 on Galaxy Note 5 SM N920I Pre rooted
According to XDA member asc1977, Android 6.0.1 Marshmallow Crisscross ROM V2.0 [ 2ZPFB] is available now for Samsung Galaxy Note 5 SM- N920I.

÷ Rom Features:
Base: TW UX Beta firmware
Product code: SM-N920CZKASKC
PDA: N920SKSU2ZPFB
CSC: N920SSKC2ZPFB
Builddate: Wed Jun 29 19:54:40 KST 2016
Android version: 6.0.1
Kernel: 3.10.61-8273648
- Pre-rooted BETA-SuperSU-v2.76
- Knox removed
- Custom dev boot- and shutdownanimation
- Reboot recovery in MM reboot menue with a switch
- EmergencyMode in Reboot menue show/hide with a switch
- Removed confirm buttons in reboot menue
- Default animation scales set to 0,25x
- Removed high volume warning for headphones
- Disabled signature check
- App Lock option
- Shutter Sound option in camera settings
- Hidden Software Update Menue in About device
- Show NFC Icon if on in statusbar
- Call Recording Button
- Forced Enable Security Save in SmartManager
- Enabled Support Recent App Protection
- Show Data usage in expanded SystemUI near brightness auto check
- 3MinitBattery or StockBattery with a switch
- Left or Right Signal and Wifi with a switch
- Carrier Label on Statusbar with a switch and color option
- Power Saving Mode Ongoing Notification removeable with a switch
- Battery Bar in Statusbar with switch for show/hide
- Recemt Panel Lock (apps should not deleted if locked)
- Removed gray status bar when activated PowerSaveMode
- Removed Alpha Channel from status bar icons
- option to Increase Lock Screen visible notifications
- AdAway, OGGYouTubeDownloader and BetterBatteryStats in Rom
- Whitepages /identify unsaved numbers
- Colorize Lockscreen Clock & Date in real time with switch for seconds
- single swipe down right side for expanded quickpannel view with a switch
- next alarm on lockscreen(needs set one time alarm on/off to work right) with switch in RomControl for show/hide
- Gradient Statusbar (on first boot is black, set your own color or transparency)
- all apps multiwindow
- all notifications remoneable with switch on/off in RomControl app
- build.prop tweak for a faster boot- and shutdown animation
- build.prop tweak to remove ring delay
- build.prop tweak for power saving
- build.prop tweak to remove Knox from About Device info
- build.prop tweak to remove no sim card in phone message
- build.prop tweak to fix black screen after call
- build.prop tweak for google DNS
- build.prop tweak for 3G signal optimization
- build.prop tweak for internet speed enhancement
- build.prop tweak to fix app issues
- build.prop tweak to improve voice call clarity
- build.prop tweak to disable android device check in
- build.prop tweak for faster scrolling
- build.prop tweak for Wifi fix that dont forget passwort
- Quicklaunchpanel in recent apps with switch in RomControl app
- Custom image background for notification panel with settings in RomControl app
- Colorizer for Data Usage text in Expanded view in RomControl app
- Virtual lock, home and recent button for statusbar with on/off toggles in RomControl app
- support to colorize expanded view background in rom control app
- support to colorize notification background in rom control app
- USB Plug/Unplug wake up disabled
- Activated Installing app older versions over newer
- Disabled Signature Check.

÷ Aromamanager Menue options:
Run Rom Installation
-Wipe option
-Debloatmenue
-Option to remove boot- and shutdown sound
Kernel Chooser
-PF4 Kernel (Kernel is not seandroid enforcing)
-PFB Kernel
÷ RomControl App Menue options:
Reboot Menue Settings
--Hide/Show Reboot Recovery
--Hide/Show Emergency Mode
÷Systemui Settings:
-Signal Statusbar
--Signal Position left/right
-Battery Statusbar
--StockBattery show/hide
--3MinitBattery show/hide
--BatteryBar
----BatteryBar show/hide
----BatteryBar charging animation
----BatteryBar Style
----Thickness of BatteryBar
----Color of BatteryBar
-Carrier Label Statusbar
--Carrier Label Color
--Carrier Label Left of Wifi/Data
--Carier Label between Wifi and Data
--Carrier Label Right of Wifi/Data
-Notifications
--Ongoing Power save notifications show/hide
--Increase Lock Screen visible notifications
--Choose color of notification background
-Lockscreen
--Text Color hours
--Text Color minutes
--Text Color seconds
--Text Color date
--Show(hidde seconds
--Hide next alarm
--Color next alarm
-Expanded view
--Single swipe down right side for expanded quickpannel view
--All notifications remoneable on/off
---Expanded view colors
----Switch to enable color notification background
----Color of Data Usage text
----Switch to enable color expanded view background
----Choose color of expanded view background
--Custom Notification Panel Background
---Select image
---Image opacity
---Custom Background on/off
-Recent Panel options
--Show/hide Quicklaunchpanel
-Virtual Buttons
--Lock Button
---Right Side
---Left Side
---Center
--Home Button
---Right Side
---Left Side
---Center
--Recent Button
---Right Side
---Left Side
---Center
Set Theme
--Light/Dark Theme of RomControll App.

÷ Changelog V2.1:
- added switch in RomControl to show/hide next alarm on lockscreen
- added Quicklaunchpanel in recent apps
- added switch for Quichlaunchpanel in RomControl App
- added Custom image background for notification panel with RomControl
- added colorizer for Data Usage text in Expanded view
- added virtual lock, home and recent button for statusbar with on/off toggles in RomControl app
- fixed AppLock
- updated to newest SuperSu V2.76
- added SuperSu apk to system/priv-app
- Private mode fixed
- Photo editor fixed
- added support to colorize expanded view background in rom control app
- added support to colorize notification background in rom control app
- USB Plug/Unplug wake up disabled
- Activated Installing app older versions over newer
- Disabled Signature Check
- Added Kernel Chooser to Armoa (PF4 or PFB Kernel)...
View my Flipboard Magazine.
÷ Prerequisites:
•This tutorial is only for installing Android 6.0.1 Marshmallow Crisscross ROM V2.0 [ 2ZPFB] on Samsung Galaxy Note 5 SM- N920I.Please do not try on any other Galaxy Note 5 Variants.
•Your phone should have a custom recovery installed in order to install this NanoROM ROM on your phone.
•We will be using TWRP Recovery for this tutorial.
•This tutorial will wipe out all your data. Make sure you backup all your data in your phone before proceeding.
•Samsung KIES will NOT detect your phone after installing this ROM because it is a custom firmware
•Perform a Dalvik Cache wipe before proceeding from the Recovery Mode.
*Disclaimer:
Android Custom ROM fix ® provide various Firmware Updates and Rooting process along with Custom ROM,Modes,file are all belong to their owners/developers. The autor of this site or the developers are not responsible, if you damage or brick your device.Do it on your own risk and follow the instruction properly.
* Important:
Backup important files stored on your device before proceeding with the steps below, so that in case something goes wrong you’ll have backup of all your important files.
You can find out how to apply it right now via XDA.
For More Samsung Galaxy Note 5 Updates Keep Checking Android custom ROM Fix ™®
That’s all. We hope this guide serves you well. If there’s anything you’d like to be added/changed on this page, PLZ Use the comment box below to contribute more ideas & Suggestions .
Like this post? PLZ Hit the share buttons below to share this article with your friends on Facebook, Google + and Twitter.
Want the latest Updates Sign up for our newsletters!
PLZ Follow Us On Flipboard 4 More Latest Updates.
Best Regards.™
÷ Prerequisites:
•This tutorial is only for installing Android 6.0.1 Marshmallow Crisscross ROM V2.0 [ 2ZPFB] on Samsung Galaxy Note 5 SM- N920I.Please do not try on any other Galaxy Note 5 Variants.
•Your phone should have a custom recovery installed in order to install this NanoROM ROM on your phone.
•We will be using TWRP Recovery for this tutorial.
•This tutorial will wipe out all your data. Make sure you backup all your data in your phone before proceeding.
•Samsung KIES will NOT detect your phone after installing this ROM because it is a custom firmware
•Perform a Dalvik Cache wipe before proceeding from the Recovery Mode.
*Disclaimer:
Android Custom ROM fix ® provide various Firmware Updates and Rooting process along with Custom ROM,Modes,file are all belong to their owners/developers. The autor of this site or the developers are not responsible, if you damage or brick your device.Do it on your own risk and follow the instruction properly.
* Important:
Backup important files stored on your device before proceeding with the steps below, so that in case something goes wrong you’ll have backup of all your important files.
You can find out how to apply it right now via XDA.
For More Samsung Galaxy Note 5 Updates Keep Checking Android custom ROM Fix ™®
That’s all. We hope this guide serves you well. If there’s anything you’d like to be added/changed on this page, PLZ Use the comment box below to contribute more ideas & Suggestions .
Like this post? PLZ Hit the share buttons below to share this article with your friends on Facebook, Google + and Twitter.
Want the latest Updates Sign up for our newsletters!
PLZ Follow Us On Flipboard 4 More Latest Updates.
Best Regards.™
Available link for download

Thursday, January 12, 2017
can I flash android beta update Ota when rooted
can I flash android beta update Ota when rooted
I meant download the Ota of the Android beta over my custom rom
from xda-developers http://ift.tt/2a5v5xs
via IFTTT
Available link for download
Saturday, December 3, 2016
How to Install Pre rooted Android 6 0 1 Marshmallow Exyfire Firepower 4 2 ApF9 on Galaxy S7 SM G930F
How to Install Pre rooted Android 6 0 1 Marshmallow Exyfire Firepower 4 2 ApF9 on Galaxy S7 SM G930F
According to XDA Member BenjaminW8, Android 6.0.1 Marshmallow Exyfire Firepower 4.2 [ApF9]. Is now released for Samsung Galaxy S7 SM- G930F.

÷ ROM Features:
•Based on FXXU1APF9
•Pre-rooted with Super-Su v2.76
•Pre-installed BusyBox
•Xposed v85.1
•Soundmod v16 &v17
•Kernel Chooser (S7Flat,S7Edge,JesseKernel)
•5-way Reboot Menu
•Deodexed & Debloated but all the functions are intact
•Build.prop & System Optimizations
•Custom Boot Splash
•ROM Control...
View my Flipboard Magazine.
÷ Prerequisites:
•This tutorial is only for installing Android 6.0.1 Marshmallow Crisscross ROM V2.0 [ 2ZPFB] on Samsung Galaxy S7 SM-G930F. Please do not try on any other Galaxy S7 Variants.
•Your phone should have a custom recovery installed in order to install this NanoROM ROM on your phone.
•We will be using TWRP Recovery for this tutorial.
•This tutorial will wipe out all your data. Make sure you backup all your data in your phone before proceeding.
•Samsung KIES will NOT detect your phone after installing this ROM because it is a custom firmware
•Perform a Dalvik Cache wipe before proceeding from the Recovery Mode.
*Disclaimer:
Android Custom ROM fix ® provide various Firmware Updates and Rooting process along with Custom ROM,Modes,file are all belong to their owners/developers. The autor of this site or the developers are not responsible, if you damage or brick your device.Do it on your own risk and follow the instruction properly.
* Important:
Backup important files stored on your device before proceeding with the steps below, so that in case something goes wrong you’ll have backup of all your important files.
You can find out how to apply it right now via XDA.

For More Samsung Galaxy S7 Updates Keep Checking Android custom ROM Fix ™®
That’s all. We hope this guide serves you well. If there’s anything you’d like to be added/changed on this page, PLZ Use the comment box below to contribute more ideas & Suggestions .
Like this post? PLZ Hit the share buttons below to share this article with your friends on Facebook, Google + and Twitter.
Want the latest Updates Sign up for our newsletters!
PLZ Follow Us On Flipboard 4 More Latest Updates.
Best Regards.™
÷ Prerequisites:
•This tutorial is only for installing Android 6.0.1 Marshmallow Crisscross ROM V2.0 [ 2ZPFB] on Samsung Galaxy S7 SM-G930F. Please do not try on any other Galaxy S7 Variants.
•Your phone should have a custom recovery installed in order to install this NanoROM ROM on your phone.
•We will be using TWRP Recovery for this tutorial.
•This tutorial will wipe out all your data. Make sure you backup all your data in your phone before proceeding.
•Samsung KIES will NOT detect your phone after installing this ROM because it is a custom firmware
•Perform a Dalvik Cache wipe before proceeding from the Recovery Mode.
*Disclaimer:
Android Custom ROM fix ® provide various Firmware Updates and Rooting process along with Custom ROM,Modes,file are all belong to their owners/developers. The autor of this site or the developers are not responsible, if you damage or brick your device.Do it on your own risk and follow the instruction properly.
* Important:
Backup important files stored on your device before proceeding with the steps below, so that in case something goes wrong you’ll have backup of all your important files.
You can find out how to apply it right now via XDA.
For More Samsung Galaxy S7 Updates Keep Checking Android custom ROM Fix ™®
That’s all. We hope this guide serves you well. If there’s anything you’d like to be added/changed on this page, PLZ Use the comment box below to contribute more ideas & Suggestions .
Like this post? PLZ Hit the share buttons below to share this article with your friends on Facebook, Google + and Twitter.
Want the latest Updates Sign up for our newsletters!
PLZ Follow Us On Flipboard 4 More Latest Updates.
Best Regards.™
Available link for download
Wednesday, October 12, 2016
How to Update Galaxy S6 SM G920F to Android 6 0 1 Marshmallow PopWiz MSF v2 1 Rooted Odexed
How to Update Galaxy S6 SM G920F to Android 6 0 1 Marshmallow PopWiz MSF v2 1 Rooted Odexed
According to XDA Member Iris28, Android 6.0.1 Marshmallow PopWiz MSF v2.1 [ ODEX] is released For Samsung Galaxy S6 SM- G920F.

÷ ROM Features:
•Based on S6 Latest BTU Firmware
•S6 Edge apps
•Added Galaxy S7 Wallpapers
•Added Galaxy S7 Notifications, Ringtones, UI, and Alarms
•Rooted, Odexed
•Debloated (Gapps, Knox and Samsung Apps)
•CSC Tweaks (Messaging, Camera, Network mode and more) .
*ChangeLog:
÷ VERSION 1.0:
Note UX and C5 apps
Based on BTU G920FXXU3DPDP Firmware
Note UX icons
Odexed
÷ VERSION 2.1 :
Added C5 Smart Manager
Added Note UX icons
Added C5 File Manager
Added C5 Music Player
Added C5 Keyboard
Added C5 Calendar
Added C5 Weather Widget
Fixed Private Mode 0x1
Based on G920FXXU3DPDP Firmware
Debloated
Added CSC Tweaks...
÷ ROM Features:
•Based on S6 Latest BTU Firmware
•S6 Edge apps
•Added Galaxy S7 Wallpapers
•Added Galaxy S7 Notifications, Ringtones, UI, and Alarms
•Rooted, Odexed
•Debloated (Gapps, Knox and Samsung Apps)
•CSC Tweaks (Messaging, Camera, Network mode and more) .
*ChangeLog:
÷ VERSION 1.0:
Note UX and C5 apps
Based on BTU G920FXXU3DPDP Firmware
Note UX icons
Odexed
÷ VERSION 2.1 :
Added C5 Smart Manager
Added Note UX icons
Added C5 File Manager
Added C5 Music Player
Added C5 Keyboard
Added C5 Calendar
Added C5 Weather Widget
Fixed Private Mode 0x1
Based on G920FXXU3DPDP Firmware
Debloated
Added CSC Tweaks...
View my Flipboard Magazine.
÷ Prerequisites:
•This tutorial is only for installing Android 6.0.1 Marshmallow Crisscross ROM V2.0 [ 2ZPFB] on Samsung Galaxy S6 SM- G920F. Please do not try on any other Galaxy S6 Variants.
•Your phone should have a custom recovery installed in order to install this NanoROM ROM on your phone.
•We will be using TWRP Recovery for this tutorial.
•This tutorial will wipe out all your data. Make sure you backup all your data in your phone before proceeding.
•Samsung KIES will NOT detect your phone after installing this ROM because it is a custom firmware
•Perform a Dalvik Cache wipe before proceeding from the Recovery Mode.
*Disclaimer:
Android Custom ROM fix ® provide various Firmware Updates and Rooting process along with Custom ROM,Modes,file are all belong to their owners/developers. The autor of this site or the developers are not responsible, if you damage or brick your device.Do it on your own risk and follow the instruction properly.
* Important:
Backup important files stored on your device before proceeding with the steps below, so that in case something goes wrong you’ll have backup of all your important files.

You can find out how to apply it right now via XDA.
For More Samsung Galaxy S6 Updates Keep Checking Android custom ROM Fix ™®
That’s all. We hope this guide serves you well. If there’s anything you’d like to be added/changed on this page, PLZ Use the comment box below to contribute more ideas & Suggestions .
Like this post? PLZ Hit the share buttons below to share this article with your friends on Facebook, Google + and Twitter.
Want the latest Updates Sign up for our Newsletters!
PLZ Follow Us On Flipboard 4 More Latest Updates.
Best Regards.™
÷ Prerequisites:
•This tutorial is only for installing Android 6.0.1 Marshmallow Crisscross ROM V2.0 [ 2ZPFB] on Samsung Galaxy S6 SM- G920F. Please do not try on any other Galaxy S6 Variants.
•Your phone should have a custom recovery installed in order to install this NanoROM ROM on your phone.
•We will be using TWRP Recovery for this tutorial.
•This tutorial will wipe out all your data. Make sure you backup all your data in your phone before proceeding.
•Samsung KIES will NOT detect your phone after installing this ROM because it is a custom firmware
•Perform a Dalvik Cache wipe before proceeding from the Recovery Mode.
*Disclaimer:
Android Custom ROM fix ® provide various Firmware Updates and Rooting process along with Custom ROM,Modes,file are all belong to their owners/developers. The autor of this site or the developers are not responsible, if you damage or brick your device.Do it on your own risk and follow the instruction properly.
* Important:
Backup important files stored on your device before proceeding with the steps below, so that in case something goes wrong you’ll have backup of all your important files.
You can find out how to apply it right now via XDA.
For More Samsung Galaxy S6 Updates Keep Checking Android custom ROM Fix ™®
That’s all. We hope this guide serves you well. If there’s anything you’d like to be added/changed on this page, PLZ Use the comment box below to contribute more ideas & Suggestions .
Like this post? PLZ Hit the share buttons below to share this article with your friends on Facebook, Google + and Twitter.
Want the latest Updates Sign up for our Newsletters!
PLZ Follow Us On Flipboard 4 More Latest Updates.
Best Regards.™
View my Flipboard Magazine.
Available link for download
Sunday, September 18, 2016
How to Install Android 6 0 1 Marshmallow Pure Nexus ROM on Nexus 5 D820 Pre rooted
How to Install Android 6 0 1 Marshmallow Pure Nexus ROM on Nexus 5 D820 Pre rooted
According to XDA Member Beanstown106,Android 6.0.1 Marshmallow Pure Nexus ROM is available now for LG Nexus 5 D820 [ hammerhead].

The Pure Nexus Project aims to bring stability and features to your Nexus device, while keeping Googles vision in line and not straying too far away from that. If you are looking for a stable ROM with true tested features and minimal bugs, then this is the place to be.
÷ ROM Features:
-General
*Based on AOSP Android 6.0.1_r25(newer than r43)
*Pre-rooted with SuperSU 2.68
*SELinux Enforcing
*Busybox
*Init.d support
*Addon.d support
*Fully Working VoLTE
*Native Sprint PRL/Profile update
*Native ntfs and exfat support
*Full Layers and Theme engine support
*Google sounds from factory image not the horrible AOSP ones
*Googles marshmallow wallpapers added to wallpaper picker
*Advanced Reboot menu enabled by default
*Advanced rotation settings
*Enabled Developer settings by default
*Enabled option to use multi-window mode
*Enabled click/longclick on notification panel header items
*Disabled forced encryption
*Disabled Tethering checks
*Disable Full screen keyboard in landscape option
*Show apps being optimized during initial boot
*Bug fixs and stability improvements
*UI Improvements (fixed a bunch google forgot to materialize)
*Download Speed in download notifications
*Scrolling cache improvements
*Seek-bar animation speed and font size control
*Hostname customization
*Adb over wifi access
*Full 3-Minit battery support no mods needed
*Kitkat style silent mode is now default
*Added headset icon attached icon in statusbar
*Added PureAmbient display options
*Added Full CAF Based AppOps
*Added ability to see app version when sideloading app
*Added ability to launch app from app info sceen
*Added app package name to app info screen
*Added ability to disable battery saver color in nav/statusbars
*Added ability to launch purenexus settings from notification drawer (longpress settings icon)
*Added ability to customize Settings dashboard columns, dashboard text lines, dashboard dividers
*Added wireless charging sound for usb chargers
*Native Dialer lookup in the aosp dialer
*Increasing ringtone option
*Incall vibration options
*Proximity speakerphone option
*National Data roaming option
*Call/Message blocking
*Flip to mute/reject call option
*Link/Unlink Notification ringtone option
*Added Standalone documents ui file manager
*Added Special keys to all keyboard keys
*Added more smileys to the aosp keyboard
*Removed googles bug report option
*Removed googles SystemUpdate option
*Removed googles legal information
-PureNexus Settings
Lock Screen
*Option to customize lockscreen shortcuts
*Option to customize lockscreen weather
*Option to customize lockscreen clock font
*Long press power for torch
*double tap anywhere to sleep
*Option to disable lockscreen media art
*Scramble pin layout
*Quick pin unlock
*options to unlock straight to pin/pattern/password entry
*option to hide lockscreen clock
*option to hide lockscreen date
*option to hide lockscreen alarm text
*Option to control max notifications on the lockscreen
*option to set the alpha of lockscreen and lockscreen security bouncer
*Lockscreeen Wallpaper (add/crop/delete)
Notification Drawer
*Weather
*Force Expanded Notifications
*quick settings pulldown (left,right,always)
*smart pulldown (no ongoing, no dismissable)
*brightness slider on/off toggle
*option for time aware contexual notification header images
*option for poly hd notification header images
*fully customizable quick settings with now up to 30 custom tiles
*option to enable or disable the top two main quicksettings tiles
*option to enable 3/4/5 quick settings tiles per row
*option for advanced location in location quick setting tile
*option to enable vibration on quick settings tiles
*option to disable quick settings on secure lockscreen
Recent Apps
*Immersive recents (stock, full screen, statusbar only, navbar only)
*Clear all recents toggle
*Clear all recents location option
*Clear all recents but last app toggle
*Recent searchbar on/off toggle
*slim recents and slim recent options
Statusbar
*Battery customization (stock, landscape, circle, dotted circle, text, none)
*Battery percent options (hidden, inside the icon, next to the icon)
*Battery Bar options (location, color, style, thickness, anitmation)
*Carrier Text customization (text placement, custom text)
*Clock customization (position, am/pm, date, date position, date style, date format)
*Network traffic meter options (disabled/incoming/outgoing/both, units displayed, update interval, hide arrows, autohide, autohidethreshold)
*Status-bar options (purenexus icon, notification counter, double-tap to sleep, statusbar brightness control)
*Option to disable headset icon, vibrate/silent icon, vpn icon in statusbar
*Option to disale bluetooth icon in statusbar when not connected
Navigation Bar
*Enable/disable
*IME toggle
*Option for arrow cursor keys
*Option for double tap navbar to sleep
*Long-press back to kill toggle
*option to configure back kill delay
*Long-press recents for last app toggle
*Navigation bar size customization (width, height, length)
*Navigation bar customization (placement, buttons)
PowerMenu
*Option to disable on secure lock
*Add/remove (reboot, screenshot, screen-record, torch, airplane mode, user switcher,settings shortcut, search, voice search, lock now, sound panel)
Volume Rocker
*Volume key wake
*Volume key music control
*Volume key keyboard cursor control
*Volume button swap toggle
*Control media volume anytime toggle
*Option to allow volume down in silent to enter do not disturb
*Option to allow volume up in do not disturb to exit do not disturb
*Options to control volume steps on the fly
Display
*Expanded desktop options
*option to enable/disable wake on plug
*option to enable 3 finger swipe to screenshot
*LED controls
Media & Notifications
*option to disable camera shutter sound
*option to disable double tap camera vibration
*custom heads up options (global on/off, timeout, heads up snooze, force heads up, heads up whitelist, heads up do not disturb, heads up blacklist)
*option to disable low battery notification
*Option to disable battery saver notification
cLock Settings
*Customize the cLock widget
Tools and info
*device info
*battery history
*usage statistics
*wifi info
*build.prop editor
*fi switch tools (if project fi sim is installed)...

÷ Prerequisites:
•This tutorial is only for installing Android 6.0.1 Marshmallow Pure Nexus ROM is available now for LG Nexus 5 D820 [ hammerhead].Please do not try on any other Nexus 5 variants.
•Your phone should be rooted and haveClockworkMod recovery installed from before.
•This tutorial will wipe out all your data.Proceed at your own risk.Perform a Dalvik Cache wipe before proceeding from the recovery mode.
•Make sure you backup all your data in your phone before proceeding.
View my Flipboard Magazine.
*Disclaimer:
Android Custom ROM fix ® provide various Firmware Updates and Rooting process along with Custom ROM,Modes,file are all belong to their owners/developers. The autor of this site or the developers are not responsible, if you damage or brick your device.Do it on your own risk and follow the instruction properly.
* Important:
Backup important files stored on your device before proceeding with the steps below, so that in case something goes wrong you’ll have backup of all your important files.

ROM Download & Installation Instructions via XDA
For More Nexus 5 updates Keep Checking Android Custom ROM Fix™®
Like this post? PLZ Hit the share buttons below to share this article with your friends on Facebook, Google + and Twitter.
PLZ Follow Us On Flipboard 4 More Latest Updates.
PLZ Use the comment box below to contribute more ideas & Suggestions .
Best Regards.
*Disclaimer:
Android Custom ROM fix ® provide various Firmware Updates and Rooting process along with Custom ROM,Modes,file are all belong to their owners/developers. The autor of this site or the developers are not responsible, if you damage or brick your device.Do it on your own risk and follow the instruction properly.
* Important:
Backup important files stored on your device before proceeding with the steps below, so that in case something goes wrong you’ll have backup of all your important files.
ROM Download & Installation Instructions via XDA
For More Nexus 5 updates Keep Checking Android Custom ROM Fix™®
Like this post? PLZ Hit the share buttons below to share this article with your friends on Facebook, Google + and Twitter.
PLZ Follow Us On Flipboard 4 More Latest Updates.
PLZ Use the comment box below to contribute more ideas & Suggestions .
Best Regards.
Available link for download
Thursday, September 15, 2016
Install Android 6 0 1 Marshmallow Imperium ROM G4 v3 1 v20h on LG G4 H815 Rooted
Install Android 6 0 1 Marshmallow Imperium ROM G4 v3 1 v20h on LG G4 H815 Rooted
According to XDA member slim80, Android 6.0.1 Marshmallow Imperium ROM G4 v3.1[ v20h] is now released for International LG G4 H815.

÷ Features:
Based on the last official MM firmware v20h (thanks to @Al0n for the v20g kdz)
Stock odexed
Zipaligned
Rooted with SuperSU (thanks to @Chainfire)
Busybox
Aroma installer (thanks to amarullz)
Auto format system before flashing the ROM
÷Kernel:
Imperium kernel
÷Removed:
Many GAPPS
Some LG apps (moved in aroma)
Disabled OTA updates and logcat by default
÷Integrated:
Custom Settings for Imperium ROM - (thanks to ficeto and Goldie)
AdAway Material Design (thanks to mrRobinson and Lozone)
Quick Reboot (thanks to PhongIT)
÷Xposed:
Xposed framewok (thanks to rovo89 )
Greenify - (thanks to oasisfeng)
GravityBox - (thanks to C3C076)
÷ Mods:
Viper4Android (thanks to viper520 and zhuhang)
3Minit Battery Mod (thanks to gharrington)
Lock Button on statusbar (choice in aroma)
Home Button on statusbar (choice in aroma)
AOSP/Nexus MM bootanimation
60fps Camera MOD [credits to @Nadeox1 and @Pfeffernuss]
Camera quality mod
Flash disable battery level set to 2%
All apps in multiwindows
Launch dual window by back long pressed
Set qslide max window to 9
LG G5 UX5.0 partial porting (statusbar, quick toggles, Contacts and InCallUI)
LG G5 system icons
LG G5 Live Wallpapers
LG V10 MiniView (One Hand usage)
LG V10 File Manager
LG V10 Alarm Clock
LG V10 Calendar
LG V10 Gallery
and more...
÷Tweaks:
build.prop tweaks
init.d tweaks
Performance, moderate and battery improvements
÷ Features:
Based on the last official MM firmware v20h (thanks to @Al0n for the v20g kdz)
Stock odexed
Zipaligned
Rooted with SuperSU (thanks to @Chainfire)
Busybox
Aroma installer (thanks to amarullz)
Auto format system before flashing the ROM
÷Kernel:
Imperium kernel
÷Removed:
Many GAPPS
Some LG apps (moved in aroma)
Disabled OTA updates and logcat by default
÷Integrated:
Custom Settings for Imperium ROM - (thanks to ficeto and Goldie)
AdAway Material Design (thanks to mrRobinson and Lozone)
Quick Reboot (thanks to PhongIT)
÷Xposed:
Xposed framewok (thanks to rovo89 )
Greenify - (thanks to oasisfeng)
GravityBox - (thanks to C3C076)
÷ Mods:
Viper4Android (thanks to viper520 and zhuhang)
3Minit Battery Mod (thanks to gharrington)
Lock Button on statusbar (choice in aroma)
Home Button on statusbar (choice in aroma)
AOSP/Nexus MM bootanimation
60fps Camera MOD [credits to @Nadeox1 and @Pfeffernuss]
Camera quality mod
Flash disable battery level set to 2%
All apps in multiwindows
Launch dual window by back long pressed
Set qslide max window to 9
LG G5 UX5.0 partial porting (statusbar, quick toggles, Contacts and InCallUI)
LG G5 system icons
LG G5 Live Wallpapers
LG V10 MiniView (One Hand usage)
LG V10 File Manager
LG V10 Alarm Clock
LG V10 Calendar
LG V10 Gallery
and more...
÷Tweaks:
build.prop tweaks
init.d tweaks
Performance, moderate and battery improvements
View my Flipboard Magazine.
÷ Prerequisites:
•bootloader unlocked.
•This tutorial is only for installing Android 6.0.1 Marshmallow Imperium ROM G4 v3.1[ v20h] on International LG G4 H815.Please do not try on any other LG G4 Variants.
•Your phone should have a custom recovery installed in order to install this NanoROM ROM on your phone.
•We will be using TWRP Recovery for this tutorial.
•This tutorial will wipe out all your data. Make sure you backup all your data in your phone before proceeding.
*Disclaimer:
Android Custom ROM fix ® provide various Firmware Updates and Rooting process along with Custom ROM,Modes,file are all belong to their owners/developers. The autor of this site or the developers are not responsible, if you damage or brick your device.Do it on your own risk and follow the instruction properly.
* Important:
Backup important files stored on your device before proceeding with the steps below, so that in case something goes wrong you’ll have backup of all your important files.

You can find out how to apply it right now via XDA.
For More LG G4 Updates Keep Checking Android custom ROM Fix ™®
That’s all. We hope this guide serves you well. If there’s anything you’d like to be added/changed on this page, PLZ Use the comment box below to contribute more ideas & Suggestions .
Like this post? PLZ Hit the share buttons below to share this article with your friends on Facebook, Google + and Twitter.
Want the latest Updates Sign up for our newsletters!
PLZ Follow Us On Flipboard 4 More Latest Updates.
Best Regards.™
÷ Prerequisites:
•bootloader unlocked.
•This tutorial is only for installing Android 6.0.1 Marshmallow Imperium ROM G4 v3.1[ v20h] on International LG G4 H815.Please do not try on any other LG G4 Variants.
•Your phone should have a custom recovery installed in order to install this NanoROM ROM on your phone.
•We will be using TWRP Recovery for this tutorial.
•This tutorial will wipe out all your data. Make sure you backup all your data in your phone before proceeding.
*Disclaimer:
Android Custom ROM fix ® provide various Firmware Updates and Rooting process along with Custom ROM,Modes,file are all belong to their owners/developers. The autor of this site or the developers are not responsible, if you damage or brick your device.Do it on your own risk and follow the instruction properly.
* Important:
Backup important files stored on your device before proceeding with the steps below, so that in case something goes wrong you’ll have backup of all your important files.
You can find out how to apply it right now via XDA.
For More LG G4 Updates Keep Checking Android custom ROM Fix ™®
That’s all. We hope this guide serves you well. If there’s anything you’d like to be added/changed on this page, PLZ Use the comment box below to contribute more ideas & Suggestions .
Like this post? PLZ Hit the share buttons below to share this article with your friends on Facebook, Google + and Twitter.
Want the latest Updates Sign up for our newsletters!
PLZ Follow Us On Flipboard 4 More Latest Updates.
Best Regards.™
Available link for download
Saturday, September 3, 2016
How to Update Rooted OnePlus 3 to Oxygen OS 3 1 3 Firmware Camera HDR Performance Tuning
How to Update Rooted OnePlus 3 to Oxygen OS 3 1 3 Firmware Camera HDR Performance Tuning
OnePlus has started rolling out Official OnePlus 3 Oxygen OS 3.1.3 Firmware Update.This OTA Update comes with loads of bug fixes and stability improvement.The Update is available via OTA (Over-the-air).You can manually check for the update.We highly recommend upgrading your device to this firmware.
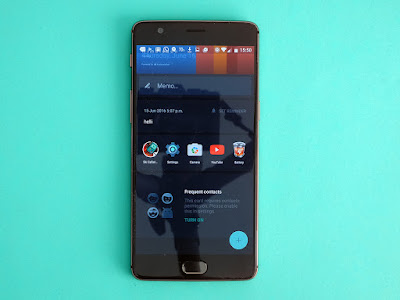
÷ NEW FEATURES IN OXYGEN OS 3.1.3:
•Camera HDR performance tuning
•Bluetooth and NFC connectivity improvements
•Bug fixes in general telephony
•Bug fixes in Google and OnePlus apps
More Info via OnePlus Forum .
View my Flipboard Magazine.
÷ Prerequisites:
•This tutorial is only for installing Oxygen OS 3.1.3 Firmware on Rooted OnePlus 3. Please do not try on any other One Plus variants.
•Your phone should be rooted and haveClockworkMod recovery installed from before.
•This tutorial will wipe out all your data.Proceed at your own risk.Perform a Dalvik Cache wipe before proceeding from the recovery mode.
•Make sure you backup all your data in your phone before proceeding.
*Disclaimer:
Android Custom ROM fix ® provide various Firmware Updates and Rooting process along with Custom ROM,Modes,file are all belong to their owners/developers. The autor of this site or the developers are not responsible, if you damage or brick your device.Do it on your own risk and follow the instruction properly.
* Important:
Backup important files stored on your device before proceeding with the steps below, so that in case something goes wrong you’ll have backup of all your important files.
÷ How to: Update Rooted OnePlus 3 to Oxygen OS 3.1.3 Firmware [ Camera HDR Performance Tuning].
Step 1 – Download Oxygen OS 3.1.3 Firmware for your OnePlus 3 to your computer.
Step 2 – Connect and mount your OnePlus 3 USB memory on your computer using the USB cable.
Step 3 – Now copy/paste the downloaded Android 6.0.1 ROM zip file and Google Appszip files to your SD card. Make sure the files are in the SD card root (not in any folder).
Step 4 – Then turn OFF your phone and disconnect from the USB cable.
Step 5 – Now to get in the Recovery Mode. Switch ON the phone while pressing and holding Volume Up + Home + Power buttons together
Step 6 – Once you are in ClockworkModRecovery, select perform a full data wipe by selecting “wipe data/factory reset”. Use the Power button to select everything while in the Recovery Mode.
Step 7 – Then, perform a cache wipe by selecting “wipe cache partition” .
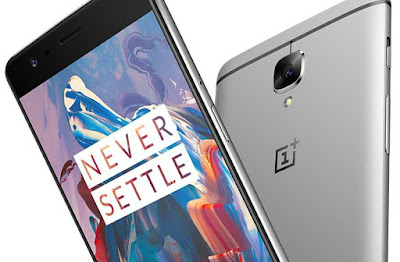
Step 8 – Now this is optional, but it is recommended to perform a wipe of your dalvik cache as well. You will not get into boot loops or any other errors. From CWM recovery, go to ‘advanced’ and then select “wipe dalvik cache”.
Step 9 – Then go back to the main recovery screen and select “install zip from SD card”.
Step 10 – Now select “choose zip from sdcard”. Using your volume keys, navigate to the Android 6.0.1 ROM zip file that you copied to your SD card and select it using the Power button. Confirm the installation on the next screen and the installation procedure should start now.
Step 11 – After the installation completes, go to “+++++Go Back+++++” and reboot the phone by selecting “reboot system now” from the recovery menu.
Your OnePlus 3 will boot now and it might take about 5 minutes to boot on your first time. So, please wait.
That’s it Your OnePlus 3 should now have Oxygen OS 3.1.3 Firmware installed on your phone! Go to Settings > About phone to verify.
For More One Plus3 Brand New Firmware & Custom ROM keep checking AndroidCustomROM Fix ™®
Like this post? PLZ Hit the share buttons below to share this article with your friends on Facebook, Google + and Twitter.
PLZ Follow Us On Flipboard 4 More latest custom ROM fix.
PLZ Use the comment box below to contribute more ideas & Suggestions .
Best Regards.
÷ Prerequisites:
•This tutorial is only for installing Oxygen OS 3.1.3 Firmware on Rooted OnePlus 3. Please do not try on any other One Plus variants.
•Your phone should be rooted and haveClockworkMod recovery installed from before.
•This tutorial will wipe out all your data.Proceed at your own risk.Perform a Dalvik Cache wipe before proceeding from the recovery mode.
•Make sure you backup all your data in your phone before proceeding.
*Disclaimer:
Android Custom ROM fix ® provide various Firmware Updates and Rooting process along with Custom ROM,Modes,file are all belong to their owners/developers. The autor of this site or the developers are not responsible, if you damage or brick your device.Do it on your own risk and follow the instruction properly.
* Important:
Backup important files stored on your device before proceeding with the steps below, so that in case something goes wrong you’ll have backup of all your important files.
÷ How to: Update Rooted OnePlus 3 to Oxygen OS 3.1.3 Firmware [ Camera HDR Performance Tuning].
Step 1 – Download Oxygen OS 3.1.3 Firmware for your OnePlus 3 to your computer.
Step 2 – Connect and mount your OnePlus 3 USB memory on your computer using the USB cable.
Step 3 – Now copy/paste the downloaded Android 6.0.1 ROM zip file and Google Appszip files to your SD card. Make sure the files are in the SD card root (not in any folder).
Step 4 – Then turn OFF your phone and disconnect from the USB cable.
Step 5 – Now to get in the Recovery Mode. Switch ON the phone while pressing and holding Volume Up + Home + Power buttons together
Step 6 – Once you are in ClockworkModRecovery, select perform a full data wipe by selecting “wipe data/factory reset”. Use the Power button to select everything while in the Recovery Mode.
Step 7 – Then, perform a cache wipe by selecting “wipe cache partition” .
Step 8 – Now this is optional, but it is recommended to perform a wipe of your dalvik cache as well. You will not get into boot loops or any other errors. From CWM recovery, go to ‘advanced’ and then select “wipe dalvik cache”.
Step 9 – Then go back to the main recovery screen and select “install zip from SD card”.
Step 10 – Now select “choose zip from sdcard”. Using your volume keys, navigate to the Android 6.0.1 ROM zip file that you copied to your SD card and select it using the Power button. Confirm the installation on the next screen and the installation procedure should start now.
Step 11 – After the installation completes, go to “+++++Go Back+++++” and reboot the phone by selecting “reboot system now” from the recovery menu.
Your OnePlus 3 will boot now and it might take about 5 minutes to boot on your first time. So, please wait.
That’s it Your OnePlus 3 should now have Oxygen OS 3.1.3 Firmware installed on your phone! Go to Settings > About phone to verify.
For More One Plus3 Brand New Firmware & Custom ROM keep checking AndroidCustomROM Fix ™®
Like this post? PLZ Hit the share buttons below to share this article with your friends on Facebook, Google + and Twitter.
PLZ Follow Us On Flipboard 4 More latest custom ROM fix.
PLZ Use the comment box below to contribute more ideas & Suggestions .
Best Regards.
Available link for download
How to Install Android 6 0 1 Marshmallow PopWiz ROM on Galaxy S6 G920F Rooted Odexed
How to Install Android 6 0 1 Marshmallow PopWiz ROM on Galaxy S6 G920F Rooted Odexed

Samsung Galaxy S6 G920F PopWiz custom ROM comes with tons of new features and is based on Android 6.0.1 Marshmallow. A quick list of the main features in PopWiz is given below and we are sure you’d love to use this on your Samsung Galaxy S6 G920F:
Based on S6 Latest BTU Firmware
S6 Edge apps
Added Galaxy S7 Wallpapers
Added Galaxy S7 Notifications, Ringtones, UI, and Alarms
Rooted, Odexed
Debloated (Gapps, Knox and Samsung Apps)
CSC Tweaks (Messaging, Camera, Network mode and more)..
Don’t worry we are going to share step by step guide to safely Install Android 6.0.1 Marshmallow PopWiz ROM on your Galaxy S6 G920F.
View my Flipboard Magazine.
÷ Prerequisites:
•This tutorial is only for installing Android 6.0.1 PopWiz ROM on Samsung Galaxy S6 G920F. Please do not try on any other Galaxy S6 variants.
•Your phone should have a custom recovery installed in order to install this PopWiz ROM on your phone.
•We will be using TWRP Recovery for this tutorial.
•This tutorial will wipe out all your data. Make sure you backup all your data in your phone before proceeding.
•Samsung KIES will NOT detect your phone after installing this ROM because it is a custom firmware.
•Perform a Dalvik Cache wipe before proceeding from the Recovery Mode.

*Disclaimer:
Android Custom ROM fix ® provide various Firmware Updates and Rooting process along with Custom ROM,Modes,file are all belong to their owners/developers. The autor of this site or the developers are not responsible, if you damage or brick your device.Do it on your own risk and follow the instruction properly.
* Important:
Backup important files stored on your device before proceeding with the steps below, so that in case something goes wrong you’ll have backup of all your important files.
÷ How to: Install Android 6.0.1 Marshmallow PopWiz ROM on Galaxy S6 G920F [ Rooted /Odexed]
Step 1 – Download Android 6.0.1 PopWiz ROM for Galaxy S6 to your computer.
Step 2 – Connect and mount your Galaxy S6 USB memory to your computer using the USB cable.
Step 3 – Now copy/paste the downloaded Android 6.0.1 ROM zip file to your phone memory / SD card. Make sure the file is in the phone memory / SD card root (not in any folder).
Step 4 – Then turn OFF your phone and disconnect from the USB cable.
Step 5 – Now to get in the Recovery Mode. Switch ON the phone while pressing and holding Volume Up + Home + Power buttons together.
Step 6 – Once you are in TWRP Recovery, perform a full data wipe by tapping on the ‘Wipe’ button. Then swipe on the “Swipe to Factory Reset” option at the bottom.
Step 7 – Now go back to the main menu and then tap on the ‘Install’ button. From the list, choose the ZIP file that you copied to your phone memory in Step 3.
Step 8 – Confirm installation on the next screen by swiping on the “Swipe to Confirm Flash” option. The installation procedure should start now.
Step 9 – Once the installation is completed.
Step 10 – Tap on the “Wipe cache/dalvik” button if you get into any boot loops or other issues.
Step 11 – You can now reboot your phone by selecting the “Reboot System” button.
Your Samsung Galaxy S6 will boot now and it might take about 5 minutes to boot on your first time after flashing a new ROM. So, please wait.

That’s it! Your Samsung Galaxy S6 should now have Android 6.0.1 PopWiz Marshmallow custom ROM installed on your phone! Go to Settings > About phone to verify.
For More Samsung Galaxy S6 Updates Keep Checking Android Custom ROM Fix ™®
That’s all. We hope this guide serves you well. If there’s anything you’d like to be added/changed on this page, PLZ Use the comment box below to contribute more ideas & Suggestions .
Like this post? PLZ Hit the share buttons below to share this article with your friends on Facebook, Google + and Twitter.
Want the latest Updates Sign up for our newsletters!
PLZ Follow Us On Flipboard 4 More Latest Updates.
Best Regards.™
÷ Prerequisites:
•This tutorial is only for installing Android 6.0.1 PopWiz ROM on Samsung Galaxy S6 G920F. Please do not try on any other Galaxy S6 variants.
•Your phone should have a custom recovery installed in order to install this PopWiz ROM on your phone.
•We will be using TWRP Recovery for this tutorial.
•This tutorial will wipe out all your data. Make sure you backup all your data in your phone before proceeding.
•Samsung KIES will NOT detect your phone after installing this ROM because it is a custom firmware.
•Perform a Dalvik Cache wipe before proceeding from the Recovery Mode.
*Disclaimer:
Android Custom ROM fix ® provide various Firmware Updates and Rooting process along with Custom ROM,Modes,file are all belong to their owners/developers. The autor of this site or the developers are not responsible, if you damage or brick your device.Do it on your own risk and follow the instruction properly.
* Important:
Backup important files stored on your device before proceeding with the steps below, so that in case something goes wrong you’ll have backup of all your important files.
÷ How to: Install Android 6.0.1 Marshmallow PopWiz ROM on Galaxy S6 G920F [ Rooted /Odexed]
Step 1 – Download Android 6.0.1 PopWiz ROM for Galaxy S6 to your computer.
Step 2 – Connect and mount your Galaxy S6 USB memory to your computer using the USB cable.
Step 3 – Now copy/paste the downloaded Android 6.0.1 ROM zip file to your phone memory / SD card. Make sure the file is in the phone memory / SD card root (not in any folder).
Step 4 – Then turn OFF your phone and disconnect from the USB cable.
Step 5 – Now to get in the Recovery Mode. Switch ON the phone while pressing and holding Volume Up + Home + Power buttons together.
Step 6 – Once you are in TWRP Recovery, perform a full data wipe by tapping on the ‘Wipe’ button. Then swipe on the “Swipe to Factory Reset” option at the bottom.
Step 7 – Now go back to the main menu and then tap on the ‘Install’ button. From the list, choose the ZIP file that you copied to your phone memory in Step 3.
Step 8 – Confirm installation on the next screen by swiping on the “Swipe to Confirm Flash” option. The installation procedure should start now.
Step 9 – Once the installation is completed.
Step 10 – Tap on the “Wipe cache/dalvik” button if you get into any boot loops or other issues.
Step 11 – You can now reboot your phone by selecting the “Reboot System” button.
Your Samsung Galaxy S6 will boot now and it might take about 5 minutes to boot on your first time after flashing a new ROM. So, please wait.
That’s it! Your Samsung Galaxy S6 should now have Android 6.0.1 PopWiz Marshmallow custom ROM installed on your phone! Go to Settings > About phone to verify.
For More Samsung Galaxy S6 Updates Keep Checking Android Custom ROM Fix ™®
That’s all. We hope this guide serves you well. If there’s anything you’d like to be added/changed on this page, PLZ Use the comment box below to contribute more ideas & Suggestions .
Like this post? PLZ Hit the share buttons below to share this article with your friends on Facebook, Google + and Twitter.
Want the latest Updates Sign up for our newsletters!
PLZ Follow Us On Flipboard 4 More Latest Updates.
Best Regards.™
Available link for download
Sunday, August 28, 2016
How do I unlock bootloader rooted sm 217s
How do I unlock bootloader rooted sm 217s
Ive Googled, Ive Binged, I have searched here until there is a sea of followed links and still am clearly missing something that must be right in front of my face.
I would like to put a custom rom on my tablet. A custom recovery is a necessary step from what I understand. So many tutorials including the one at TWRPs website themselves dont mention that you need to have an unlocked bootloader first. I have tried the TWRP Manager app and it says that I need an unlocked bootloader before I can flash a recovery.
How do I unlock the bootloader? I can not seem to find a tutorial or even any discussion of it in the Galaxy Tab 3 section here and I have spent many hours today trying to figure it out.
I stumbled upon the app Flashfire. It seems promising. It it what I need?
I would like to put a custom rom on my tablet. A custom recovery is a necessary step from what I understand. So many tutorials including the one at TWRPs website themselves dont mention that you need to have an unlocked bootloader first. I have tried the TWRP Manager app and it says that I need an unlocked bootloader before I can flash a recovery.
How do I unlock the bootloader? I can not seem to find a tutorial or even any discussion of it in the Galaxy Tab 3 section here and I have spent many hours today trying to figure it out.
I stumbled upon the app Flashfire. It seems promising. It it what I need?
from xda-developers http://ift.tt/2alMrs4
via IFTTT
Available link for download
Subscribe to:
Posts (Atom)