Sunday, February 19, 2017
How to Update OnePlus to Cyanogen OS 13 1 ZNH2KAS1KN Android 6 0 1 Marshmallow Official Firmware
How to Update OnePlus to Cyanogen OS 13 1 ZNH2KAS1KN Android 6 0 1 Marshmallow Official Firmware

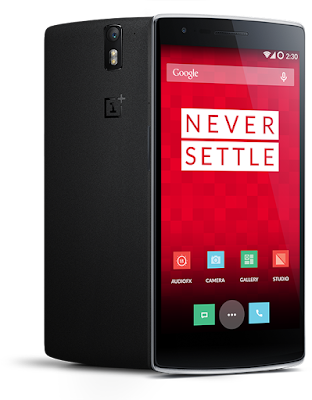
OnePlus One Cyanogen OS 13.1 custom ROM comes with tons of new features and is based on Android 6.0.1 Marshmallow with the all new Material Design. Several new apps have been redesigned and perform a lot faster on this phone. This update brings the following changes to your OnePlus One software:
View trending tweets on your lockscreen
Skype features built into the Phone app
New Cortana features
OneNote mod to take notes from anywhere in the OS
Microsoft Hyperlapse is also part of Cyanogen OS now..
Don’t worry we are going to share step by step guide to safely Update your OnePlus to Cyanogen OS 13.1 ZNH2KAS1KN Android 6.0.1 Marshmallow Official Firmware.
÷ Prerequisites:
•This tutorial is only for installing Cyanogen OS 13.1 ZNH2KAS1KN software update on OnePlus One.
•You can also install this software update using stock recovery.
•This tutorial will wipe out all your data. Make sure you backup all your data in your phone before proceeding. If you do not want to wipe any data, skip step 6.
*Disclaimer:
Android Custom ROM fix ® provide various Firmware Updates and Rooting process along with Custom ROM,Modes,file are all belong to their owners/developers. The autor of this site or the developers are not responsible, if you damage or brick your device.Do it on your own risk and follow the instruction properly.
* Important:
Backup important files stored on your device before proceeding with the steps below, so that in case something goes wrong you’ll have backup of all your important files.
Step 1 – Download Cyanogen OS 13.1 ZNH2KAS1KN ROM for One to your computer.
Step 2 – Connect and mount your One USB memory to your computer using the USB cable.
Step 3 – Now copy/paste the downloaded Cyanogen OS 13.1 ROM zip file to your phone memory / SD card. Make sure the file is in the phone memory / SD card root (not in any folder).
Step 4 – Then turn OFF your phone and disconnect from the USB cable.
Step 5 – Now to get in the Recovery Mode. Switch ON the phone while pressing and holding Volume Down + Power buttons together.
Step 6 – Once you are in TWRP Recovery, perform a full data wipe by tapping on the ‘Wipe’ button. Then swipe on the “Swipe to Factory Reset” option at the bottom.
Step 7 – Now go back to the main menu and then tap on the ‘Install’ button. From the list, choose the ZIP file that you copied to your phone memory in Step 3.
Step 8 – Confirm installation on the next screen by swiping on the “Swipe to Confirm Flash” option. The installation procedure should start now.
Step 9 – Once the installation is completed.
Step 10 – You can now reboot your phone by selecting the “Reboot System” button.
Your One will boot now and it might take about 5 minutes to boot on your first time. So, please wait.
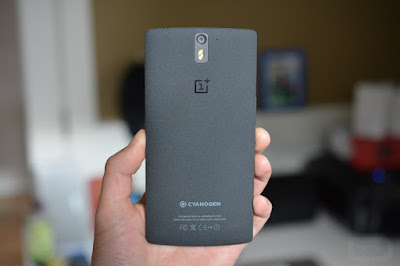
That’s it! Your OnePlus One should now have Cyanogen OS 13.1 ZNH2KAS1KN Android 6.0.1 Marshmallow official software update installed on your phone! Go to Settings > About phone to verify.
For More OnePlus One Updates Keep Checking Android Custom ROM Fix ™®
That’s all. We hope this guide serves you well. If there’s anything you’d like to be added/changed on this page, PLZ Use the comment box below to contribute more ideas & Suggestions .
Like this post? PLZ Hit the share buttons below to share this article with your friends on Facebook, Google + and Twitter.
Want the latest Updates Sign up for our newsletters!
PLZ Follow Us On Flipboard 4 More Latest Updates.
Best Regards.™
Available link for download

How to Install Android 6 0 1 Marshmallow Tekcafe v5 3 v30A ROM on AT T LG G3 D850
How to Install Android 6 0 1 Marshmallow Tekcafe v5 3 v30A ROM on AT T LG G3 D850
According to XDA member Truongthevinh, Android 6.0.1 Marshmallow Tekcafe v5.3 [ v30A] ROM is now released for AT&T LG G3 D850.

÷ ROM Info:
Android 6.0 (MRA58K) + some 6.0.1 patches
Based on LG v30A build 16052016
Updated Google security patches to May, 2016
Add supersu v2.76
Full UX 5.0 from latest LG G5 v10d base
Multi-ariants support
Battery life, performance and memory improvements.


÷ Changelog:
Changelog V5.3:
- Marshmallow 6.0 D855 V30A 16/05/2016
- Fixes and stability improvements, more battery life
- Updated Full app with latest LG G5 v10d base
- Added QSlide and QRemote quick toggles
- Added LED quick toggle
- Added SuperSU 2.76
- Added Play 360 VR Video G5
- Added LG Remote Call G5
- Added Smart Doctor from LG G5
- Added Mirror Link with car from G5
Changelog V5.2:
- Update Marshmallow 6.0 D855 V30A 16/05/2016
- Patch Security Android: 01/05/2016
- Added Xposed v85 in Aroma
- Updated some latest LG G5 apps
- New stock boot for D855(30K), F400(30G),D850(30K), D852(30D), VS985(47A)
- New kernel port for D851,us990, ls990
- Added Apn setting
- Fix copy Clip Tray
- Fix Qmemo
- Netfix: OK (for USA user)
- More Stable System
Changelog V5.1:
- Update Marshmallow 6.0 D855 V30K (26/04/2016)
- Updated and synced with latest LG G5 v10c base
- New stock boot for D855 (30K), D851 (30D)
- New kernel for all variants
- Fix thermal
Changelog V5.0:
- Update Marshmallow 6.0 D855 V30F
- Full LG G5 UX 5.0 and LG G5 Apps
- New stock boot for D855, D851, F400, D852, VS985
- New kernel for all variants
- New root - SuperSU 2.65
- Add ViPER4Android FX Audio Mod in Aroma
- Call Recorder in Aroma
- Navibar 32 dpi in Aroma
- Weather deodex for Support Install Xposed v80
- LG G3 LS990, US990: bug: NFC...
÷ Prerequisites:
•This tutorial is only for installing Android 6.0.1 Marshmallow Tekcafe v5.3 [ v30A] ROM on AT&T LG G3 D850.Please do not try on any other LG G3 Variants.
•Your phone should have a custom recovery installed in order to install this NanoROM ROM on your phone.
•We will be using TWRP Recovery for this tutorial.
•This tutorial will wipe out all your data. Make sure you backup all your data in your phone before proceeding.
•Perform a Dalvik Cache wipe before proceeding from the Recovery Mode.
*Disclaimer:
Android Custom ROM fix ® provide various Firmware Updates and Rooting process along with Custom ROM,Modes,file are all belong to their owners/developers. The autor of this site or the developers are not responsible, if you damage or brick your device.Do it on your own risk and follow the instruction properly.
* Important:
Backup important files stored on your device before proceeding with the steps below, so that in case something goes wrong you’ll have backup of all your important files.


You can find out how to apply it right now via XDA.
For More LG G3 Updates Keep Checking Android custom ROM Fix ™®
That’s all. We hope this guide serves you well. If there’s anything you’d like to be added/changed on this page, PLZ Use the comment box below to contribute more ideas & Suggestions .
Like this post? PLZ Hit the share buttons below to share this article with your friends on Facebook, Google + and Twitter.
Want the latest Updates Sign up for our newsletters!
PLZ Follow Us On Flipboard 4 More Latest Updates.
Best Regards.™
Available link for download
Saturday, February 18, 2017
Malware en Android Discovering Reversing Forensics
Malware en Android Discovering Reversing Forensics
 |
| Figura 1: Malware en Android: Discovering, Reversing & Forensics |
 |
| Figura 2: Malware en Android. Discovering, Reversing & Forensics |
Sigue Un informático en el lado del mal - Google+ RSS 0xWord

Available link for download
Thursday, February 16, 2017
Announcing the 2016 Android Experiments I O Challenge!
Announcing the 2016 Android Experiments I O Challenge!
Posted by Roman Nurik, Senior Interactive Designer, and Richard The, Google Creative Lab
Last summer we launched Android Experiments: a showcase of creative Android projects, and an open invitation for all developers to submit their own experiments to the gallery. So far we’ve seen some amazing work from the developer community - from live wallpaper, to watch faces, to interesting hacks of the IOIO board - and we want to see more.
Today we announce the Android Experiments I/O Challenge: a chance for your experiment (and you) to go to I/O 2016!

From now through April 13, you can enter by submitting your experiments to the gallery. The top three winners of the contest will receive a trip to this year’s Google I/O, and the five runner-ups will get the new Nexus 6P.
So what makes a good Android Experiment? It’s a project that utilizes the unique capabilities of the Android platform in an innovative way. Here are a few suggestions:
- Creative uses of Android’s new or distinctive features
- Projects that explore how we interact with our devices, in small and big ways
- Unique visual aesthetics
- Open source projects that inspire other developers
- Surprise us - we want to see the amazing things you’re cooking up
All projects on Android Experiments are open source. If you’re not sure where to start take a look on the site gallery, dig in and get inspired.
We can’t wait to see how you’re combining code and creativity! Enter on androidexperiments.com/challenge today.
Available link for download
How to Install CM13 0 Nightly Android 6 0 1 Marshmallow on AT T Galaxy S4 jflteatt
How to Install CM13 0 Nightly Android 6 0 1 Marshmallow on AT T Galaxy S4 jflteatt
If you are looking to install a new custom ROM on your AT&T Galaxy S4 ( jflteatt) then we have here as usual the best Custom ROMs for you.

CyanogenMod 13 [CM13.0] Nightly ROM latest build cm-13.0-20160629-NIGHTLY-jflteatt.zip is released for AT&T Galaxy S4 ( jflteatt).
CM13.0 will let AT&T Galaxy S4 users taste the sweetness of Marshmallow 6.0.1 such as the battery saving ‘doze’ functionality and new permissions model, alongside the CM features you’d expect.
Follow our guide below to download the Unofficial CM13.0 Nightly and install it yourself.
÷ Prerequisites:
•This tutorial is only for installing CyanogenMod 13 AT&T Galaxy S4 ( jflteatt) Please do not try on any other Samsung Galaxy S4 variants.
•Your phone should be rooted and haveClockworkMod recovery installed from before.
•This tutorial will wipe out all your data.Proceed at your own risk.Perform a Dalvik Cache wipe before proceeding from the recovery mode.
•Make sure you backup all your data in your phone before proceeding.
•Samsung KIES will NOT detect your phone after installing this ROM because it is a custom firmware.
*Disclaimer:
Android Custom ROM fix ® provide various Firmware Updates and Rooting process along with Custom ROM,Modes,file are all belong to their owners/developers. The autor of this site or the developers are not responsible, if you damage or brick your device.Do it on your own risk and follow the instruction properly.
* Important:
Backup important files stored on your device before proceeding with the steps below, so that in case something goes wrong you’ll have backup of all your important files.

÷ How to Install CM13.0 Nightly Android 6.0.1 Marshmallow on AT&T Galaxy S4 ( jflteatt)
Step 1 – Download CM13.0 Android 6.0.1 Marshmallow and Google Apps for your AT&T Samsung Galaxy S4 to your computer.
Step 2 – Connect and mount your Galaxy S4 ( jflteatt) USB memory on your computer using the USB cable.
Step 3 – Now copy/paste the downloaded Android 6.0.1 ROM zip file and Google Appszip files to your SD card. Make sure the files are in the SD card root (not in any folder).
Step 4 – Then turn OFF your phone and disconnect from the USB cable.
Step 5 – Now to get in the Recovery Mode. Switch ON the phone while pressing and holding Volume Up + Home + Power buttons together
Step 6 – Once you are in ClockworkModRecovery, select perform a full data wipe by selecting “wipe data/factory reset”. Use the Power button to select everything while in the Recovery Mode.
Step 7 – Then, perform a cache wipe by selecting “wipe cache partition” .
Step 8 – Now this is optional, but it is recommended to perform a wipe of your dalvik cache as well. You will not get into boot loops or any other errors. From CWM recovery, go to ‘advanced’ and then select “wipe dalvik cache”.
Step 9 – Then go back to the main recovery screen and select “install zip from SD card”.
Step 10 – Now select “choose zip from sdcard”. Using your volume keys, navigate to the Android 6.0.1 ROM zip file that you copied to your SD card and select it using the Power button. Confirm the installation on the next screen and the installation procedure should start now.
Google Apps: Repeat the above step for the Gapps zip file as well and install it on your phone.
Step 11 – After the installation completes, go to “+++++Go Back+++++” and reboot the phone by selecting “reboot system now” from the recovery menu.

Your AT&T Galaxy S4 ( jflteatt) will boot now and it might take about 5 minutes to boot on your first time. So, please wait.
That’s it Your Samsung Galaxy S4 should now have CM13.0 Nightly Android 6.0.1 Marshmallow latest build installed on your phone! Go to Settings > About phone to verify.
For More AT&T Galaxy S4 Brand New Firmware & Custom ROM keep checking AndroidCustomROM Fix ™®
Like this post? PLZ Hit the share buttons below to share this article with your friends on Facebook, Google + and Twitter.
PLZ Follow Us On Flipboard 4 More latest custom ROM fix.
PLZ Use the comment box below to contribute more ideas & Suggestions .
Best Regards.
Available link for download
Wednesday, February 15, 2017
Google adds Emergency Location Service to Android rolling out first in the UK and Estonia
Google adds Emergency Location Service to Android rolling out first in the UK and Estonia

You may be wary of making your location available to apps and service on Android, but that uneasiness goes away in an emergency situation. If you call emergency services, you want them to know exactly where you are, and now Android has the tools to make that happen. Well, if you live in the UK or Estonia. Those are the first two countries with support for the new Emergency Location Service.
When you call in an emergency with this service active, your location will automatically be transmitted directly to first responders (without passing through Google).
Read MoreGoogle adds Emergency Location Service to Android, rolling out first in the UK and Estonia was written by the awesome team at Android Police.


from Android Police – Android News, Apps, Games, Phones, Tablets http://ift.tt/2aFUVYu
via IFTTT
Available link for download
How to Update Huawei Honor 7 PLK L01 to B370 Android 6 0 Marshmallow
How to Update Huawei Honor 7 PLK L01 to B370 Android 6 0 Marshmallow
Huawei Honor 7 (PLK-L01) New B370 update has released in Finland & based on Android 6.0 Marshmallow and Emotion UI 4.0, bumping the Android security patch level to June 1, 2016.

You Can find out how to apply it right now via this easy tutorial.
÷ Firmware Details:
- Device: Huawei Honor 7
- Model: PLK-L01
- Android: v6.0 Marshmallow
- EMUI: 4.0
- Firmware: B370
- Build: PLK-L01C432B370
- Custom Number: CUSTC432D001
- Security Patch Level: June 1, 2016
- Region: Europe
- Country: Finland
- Status: Official (stable)
- Type: Full firmware image
÷ Prerequisites:
•This tutorial is only for Huawei Honor 7 (PLK-L01).
*Disclaimer:
Android Custom ROM fix ® provide various Firmware Updates and Rooting process along with Custom ROM,Modes,file are all belong to their owners/developers. The autor of this site or the developers are not responsible, if you damage or brick your device.Do it on your own risk and follow the instruction properly.
* Important:
Backup important files stored on your device before proceeding with the steps below, so that in case something goes wrong you’ll have backup of all your important files.

÷ How to Update Huawei Honor 7 (PLK-L01) to B370 Android 6.0 Marshmallow :
1- Download Huawei Honor 7 (PLK-L01) B370 Android 6.0 Marshmallow .
2- Extract the Zip package, copy “dload” folder to the external microSD card
3- Reboot your phone while holding Vol down + Vol up + Power. I do recommend that you take a full backup of your data before proceeding.

That’s it! Your Huawei Honor 7 (PLK-L01) should have B370 Marshmallow 6.0 OTA on your phone! Go to Settings > About phone to verify.
For More Huawei Honor 7 (PLK-L01) Updates Keep Checking Android Custom ROM Fix ®™
That’s all. We hope this guide serves you well. If there’s anything you’d like to be added/changed on this page, PLZ Use the comment box below to contribute more ideas & Suggestions .
Like this post? PLZ Hit the share buttons below to share this article with your friends on Facebook, Google + and Twitter.
Want the latest Updates Sign up for our newsletters!
PLZ Follow Us On Flipboard 4 More Latest Updates.
Best Regards.™
Available link for download
Tuesday, February 14, 2017
Android Mobiles Data Recovery Software Tool Free Download
Android Mobiles Data Recovery Software Tool Free Download

Now you can download android mobiles data recovery tool form below downloading links. If you are facing trouble or unable to download please contact us via commenting we will change or update downloading links. You will need to keep updating your software for best performance.
Downloading links
Android Data Recovery Software
Available link for download
Android Studio 2 2 Preview New UI Designer Constraint Layout
Android Studio 2 2 Preview New UI Designer Constraint Layout

Android Studio 2.2 Preview includes a portfolio of new features along the spectrum of developments, ranging from designing user interfaces to building and debugging your app in new ways. This preview includes the following new categories of features:
Design
- Layout Editor: A new user interface designer that helps you visually design the layouts in your app. Features like blueprint mode and the new properties panel allow you to quickly edit layouts and widgets faster.
- Constraint Layout: A new powerful and flexible Android layout that allows you to express complex UIs without nesting multiple layouts.
- Layout Inspector: Debug a snapshot of your app layout running on the Android Emulator or device. Inspect the view hierarchy and corresponding attributes.
Develop
- Firebase Plugin: Explore and integrate the suite of services offered by Firebase inside of Android Studio. Adding services like Analytics, Authentication, Notifications, and AdMob are just a few clicks away.
- Enhanced Code Analysis: Android Studio checks the quality of your Android app code. In addition to 260 Android lint and code inspections, this release includes new code quality checks for Java 8 language usage and a new inspection infrastructure for more cross-file analysis.
- Samples Browser: Referencing Android sample code is now even easier. Within the code editor window, find occurrences of your app code snippets in Google Android sample code to help jump start your app development.
- Improved C++ Support: Android Studio 2.2 improves C++ development with the ability to edit, build, and debug pre-existing Android projects that use ndk-build or CMake rather than Gradle. Additionally, the existing lldb C++ debugger is now even better with project type auto-detection and a Java language aware C++ mode that lets you use a single debugger process to inspect both Java language and C++ runtimes.
- IntelliJ 2016.1: Android Studio 2.2 includes all the latest updates from the underlying JetBrains product platforms IntelliJ.
Build
- Jack Compiler Improvements: For those using the new Jack compiler, Android Studio 2.2 adds support for annotation processing, as well as incremental builds for reduced build times.
- Merged Manifest Viewer: Diagnose how your AndroidManifest.xml merges with your app dependences across your project build variants.
Test
- Espresso Test Recorder: Record Espresso UI tests simply by using your app as a normal user. As you click through your app UI, reusable and editable test code is then generated for you. You can run the generated tests locally, in your Continuous Integration environment, or in Firebase Test lab.
- APK Analyzer: Drill into your APK to help you reduce your APK size, debug 64K method limit issues, view contents of Dex files and more.
Deeper Dive into the New Features
Design- Layout Editor: Android Studio 2.2 features a new user interface designer. There are many enhancements but some of the highlights include:
- Drag-and-drop widgets from the palette to the design surface or the component tree view of your app.
- Design surface has a blueprint mode to inspect the spacing and arrangement of your layout.
- Properties panel now shows a curated set of properties for quick widget edits with a full sheet of advanced properties one click away.
- UI builder can edit menu and system preference files.
 |
| The new Layout Editor in Android Studio 2.2 Preview |
 |
| Edit Menus in the new Layout Editor |
- Constraint Layout: This new layout is a flexible layout manager for your app that allows you to create dynamic user interfaces without nesting multiple layouts. It is distributed as a support library that is tightly coupled with Android Studio and backwards compatible to API Level 9.
To help you get started, the built-in templates in the New Project Wizard in Android Studio 2.2 Preview now generate a Constraint Layout. Alternately, you can right click on any layout in the new Layout Editor and select the Convert to ConstraintLayout option.
This is an early preview of the UI designer and Constraint Layout, and we will rapidly add enchantments in upcoming releases. Learn more on the Android Studio tools site.
 |
Constraint Layout |
 |
Start Layout Inspector |
- Layout Inspector: For new and existing layouts, many times you may want to debug your app UI to determine if your layout is rendering as expected. With the new Layout Inspector, you can drill into the view hierarchy of your app and analyze the attributes of each component of UI on the screen.
 |
| Layout Inspector |
- Firebase Plugin: Firebase is the new suite of developers services that can help you develop high-quality apps, grow your user base, and earn more money. Inside of Android Studio, you can add Firebase to a new or existing Android app with the new Assistant window. To access the Firebase features click on the Tools menu and then select Firebase. You will want to first setup the brand new Firebase Analytics as the foundation as you explore other Firebase services like Firebase Cloud Messaging or Firease Crash Reporting to add your application. Learn more about the Firebase integration inside Android Studio here.
 |
Firebase Plugin for Android Studio |
- Code Sample Browser: In addition to importing Android Samples, the Code Sample Browser is a menu option inside Android Studio 2.2 Preview that allows you to find high-quality, Google-provided Android code samples based on the currently highlighted symbol in your project. To use the feature, highlight a Variables, Types and Methods in your code then Right Click to show a context menu for Find Sample Code. The results are displayed in a bottom output box.
 |
| Code Sample Browser |
- CMake and NDK-Build: For those of you using the Android NDK, Android Studio now supports building CMake and NDK-Build Android app projects by pointing Gradle at your existing build files. Once you’ve added your cmake or ndk-build project to Gradle, Android Studio will automatically open your relevant Android code files for editing and debugging in Studio.
For CMake users, just add the path to your CMList.txt file in the
externalNativeBuild section of your Gradle file: |
| CMake Build in Android Studio |
For NDK-Build Users, just add the path to your *.mk file in the section of your Gradle file:
 |
| NDK-Build in Android Studio |
- Improved Jack Tools: The new Jack Toolchain compiles your Java language source into Android dex bytecode. The Jack compiler allows some Java 8 language features, like lambdas, to be used on all versions of Android. This release adds incremental build and full support for annotation processing, so you can explore using Java 8 language features in your existing projects.
 |
Enable Jack Incremental Compile Option |
 |
| Enable Jack Annotation Processing |
- Merged Manifest Viewer: Figuring out how your AndroidManifest merges with your project dependencies based on build types, flavors and variants is now easier with Android Studio. Navigate to your AndroidManifest.xml and click on the new Merged Manifest bottom tab. Explore how each node of your AndroidManifest resolves with various project dependencies.
 |
| Merged Manifest Viewer |
- Espresso Test Recorder: Sometimes writing UI tests can be tedious. With the Record Espresso UI tests feature, creating tests is now as easy as just using your app. Android Studio will capture all your UI interactions and convert them into a fully reusable Espresso Test that you can run locally or even on Firebase Test lab. To use the recorder, go to the Run menu and select Record Espresso Test.
 |
| Espresso Test Recorder |
- APK Analyzer: The new APK Analyzer helps you understand the contents and the sizes of different components in your APK. You can also use it to avoid 64K referenced method limit issues with your Dex files, diagnose ProGuard configuration issues, view merged AndroidManifest.xml file, and inspect the compiled resources file (resources.arsc). This can help you reduce your APK size and ensure your APK contains exactly the things you expect.
 |
| APK Analyzer |
- Java-aware C++ Debugger: When debugging C++ code on targets running N and above, you can now use a single, Java language aware lldb instance. This debugger continues to support great lldb features like fast steps and memory watchpoints while also allowing you to stop on Java language breakpoints and view your Java language memory contents.
- Auto Debugger Selection: Android Studio apps can now use debugger type “Auto.” This will automatically enable the appropriate debugger -- the Java language aware C++ debugger if enabled and otherwise the hybrid debugger for C++ projects. Projects exclusively using the Java language will continue to use the Java language debugger.
 |
| Enable Auto Debugger for C++ |
Whats Next
DownloadIf you are using a previous version of Android Studio, you can check for updates on the Canary channel from the navigation menu (Help ? Check for Update [Windows/Linux] , Android Studio ? Check for Updates [OS X]). This update will download a new version, and not patch your existing copy of Android Studio. You can also download Android Studio 2.2 Preview from canary release site.
For the Android Studio 2.2 Preview, we recommend you run a stable version alongside the new canary. Check out the tools site on how to run two versions at the same time.
We appreciate any feedback on things you like, issues or features you would like to see. Connect with us -- the Android Studio development team -- on our Google+ page or on Twitter.
Available link for download
Monday, February 13, 2017
How to Install Android 6 0 1 Marshmallow Nexify ROM V3 on T Mobile Galaxy Note 5 SM N920T
How to Install Android 6 0 1 Marshmallow Nexify ROM V3 on T Mobile Galaxy Note 5 SM N920T
According to XDA Member TechGuy081, Android 6.0.1 Marshmallow Nexify ROM V3 Available now for T-Mobile Samsung Galaxy Note 5 SM- N920T.

Nexify Rom Its Made To Make Your Note 5 Close To Stock Android MM Keep In Mind This Wont Make Your Device Be Stock Android I Just Removed Apps (Like Bloatware) From Samsung So You Can Download Google Apps To Replace Stock Apps, Like Clock App, Calculator With Googles Or Your Own!
•Rom Features
- Based on N920TUVU2DPD1 Firmware
- Deodexed all Apps
- Rooted with SuperSU 2.74
- Auto Wipe Cache, Dalvik Cache and Format System
- System Optimization
- Tweaks in Build.prop
- Removed Knox
- Removed As Many Apps As Possible
- Removed Safe Volume Warning
- Ad Away
- Private Mode Working
- 5 Reboot Menu
- Added Dolby Atmos
- Ultra Data Saving Working
- Battery Tweaks
- App Lock
- Gray Status Bar Removed
- Stock MM Emojis.

Change Log:
• June 16
-Initial Release V1
• June 26
- V2
-Special Thanks To @Battlehero
- Reboot Menu Fixed
- Gray Status Bar Removed
- Updated some apps
- Fixed Bugs
- Samsung keyboard Replaced By Googles
- Added Stock MM Emojis
• July 7
- Fixed alot of bugs you asked for
- Nfc And Payment, VPN functionality , Live Walpaper Picker, Hardware Buttons Fixed, Auto Brightness Fixed
- Removed Emergency From power Menu
- Removed Some More Bloat
- Removed Carrier Text In Lock-screen
- Removed Slide To Unlock in Lock-screen
- App Signature Check Removed Now You Can Install Old Apps Over New Versions
- Touchlight Key Enabled In Settings
- Animation Set to 0.25
- OutdoorMode
- Knox Removed
- All Apps In Multiwindow Mode
- And More!
÷ Prerequisites:
•This tutorial is only for installing Android 6.0.1 Marshmallow Nexify ROM V3 on T-Mobile Samsung Galaxy Note 5 SM- N920T.Please do not try on any other Galaxy Note 5 Variants.
•Your phone should have a custom recovery installed in order to install this NanoROM ROM on your phone.
•We will be using TWRP Recovery for this tutorial.
•This tutorial will wipe out all your data. Make sure you backup all your data in your phone before proceeding.
•Samsung KIES will NOT detect your phone after installing this ROM because it is a custom firmware
•Perform a Dalvik Cache wipe before proceeding from the Recovery Mode.
*Disclaimer:
Android Custom ROM fix ® provide various Firmware Updates and Rooting process along with Custom ROM,Modes,file are all belong to their owners/developers. The autor of this site or the developers are not responsible, if you damage or brick your device.Do it on your own risk and follow the instruction properly.
* Important:
Backup important files stored on your device before proceeding with the steps below, so that in case something goes wrong you’ll have backup of all your important files.
You can find out how to apply it right now via XDA.

For More Samsung Galaxy Note 5 Updates Keep Checking Android custom ROM Fix ™®
That’s all. We hope this guide serves you well. If there’s anything you’d like to be added/changed on this page, PLZ Use the comment box below to contribute more ideas & Suggestions .
Like this post? PLZ Hit the share buttons below to share this article with your friends on Facebook, Google + and Twitter.
Want the latest Updates Sign up for our newsletters!
PLZ Follow Us On Flipboard 4 More Latest Updates.
Best Regards.™
Available link for download
11 Android 4 4 Kitkat tips tricks and hidden secrets
11 Android 4 4 Kitkat tips tricks and hidden secrets
Whats hidden in Android 4.4?
Android L is upcoming, however most phones are going to utilize great old Android 4.4 for little while yet. That is no terrible thing, however – its a fantastically feature rich bit of programming. So much so that it takes a while to see anything approaching all it brings to the table.

Permit me to show the most intriguing and valuable Android 4.4 tips, tricks and hidden secrets of Android L.
Please note that your phone may look somewhat not the same as the screenshots here as many phones use custom interfaces that change the look and format of Android 4.4 a bit.
1. Get under the hood with Process Stats
 smartphones are really like computers in your pocket, and sometimes it is pleasant to get super-detailed in order to get a better understanding of how things are ticking over.
  there are few social circumstances more awkward that an alarm that you probably wont need sounding during a gathering.Only appearing in public naked comes close, in our opinion. You may not think its very that compelling, however in any case youll be appreciative of Android 4.4s advance alarm notification system.
  Previously, switching between launchers was something of a pain, but Google has now added a quick and easy toggle in the settings menu - so now theres no excuse not to try the many amazing launcher alternatives available on the Google Play market.
  Yes, it sounds creepy, but it’s actually really handy at times.
  Google has your back, however, and provides the means to remotely locate and wipe your phone should it go walkabout. Youll need to enable it from the device before you lose it, though - go to the Google Settings application in your app drawer and select Android Device Manager, then turn on "Remotely Locate This Device" and "Allow Remote Lock And Factory Reset".
  Android 4.4 tips 21Hangouts replaces the default SMS client in Android 4.4, and while it does the job perfectly well - integrating instant messaging and text chats - some people will no doubt long for the old way of doing things.
Available link for download