Sunday, February 19, 2017
How to Update OnePlus to Cyanogen OS 13 1 ZNH2KAS1KN Android 6 0 1 Marshmallow Official Firmware
How to Update OnePlus to Cyanogen OS 13 1 ZNH2KAS1KN Android 6 0 1 Marshmallow Official Firmware

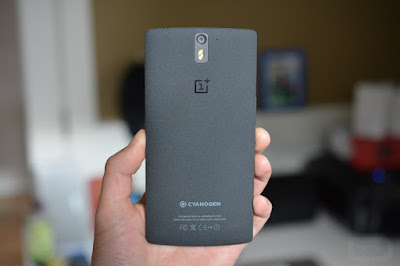
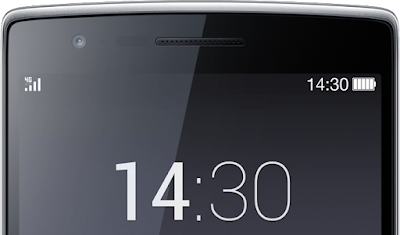
OnePlus One Cyanogen OS 13.1 custom ROM comes with tons of new features and is based on Android 6.0.1 Marshmallow with the all new Material Design. Several new apps have been redesigned and perform a lot faster on this phone. This update brings the following changes to your OnePlus One software:
View trending tweets on your lockscreen
Skype features built into the Phone app
New Cortana features
OneNote mod to take notes from anywhere in the OS
Microsoft Hyperlapse is also part of Cyanogen OS now..
Don’t worry we are going to share step by step guide to safely Update your OnePlus to Cyanogen OS 13.1 ZNH2KAS1KN Android 6.0.1 Marshmallow Official Firmware.
÷ Prerequisites:
•This tutorial is only for installing Cyanogen OS 13.1 ZNH2KAS1KN software update on OnePlus One.
•You can also install this software update using stock recovery.
•This tutorial will wipe out all your data. Make sure you backup all your data in your phone before proceeding. If you do not want to wipe any data, skip step 6.

*Disclaimer:
Android Custom ROM fix ® provide various Firmware Updates and Rooting process along with Custom ROM,Modes,file are all belong to their owners/developers. The autor of this site or the developers are not responsible, if you damage or brick your device.Do it on your own risk and follow the instruction properly.
* Important:
Backup important files stored on your device before proceeding with the steps below, so that in case something goes wrong you’ll have backup of all your important files.
Step 1 – Download Cyanogen OS 13.1 ZNH2KAS1KN ROM for One to your computer.
Step 2 – Connect and mount your One USB memory to your computer using the USB cable.
Step 3 – Now copy/paste the downloaded Cyanogen OS 13.1 ROM zip file to your phone memory / SD card. Make sure the file is in the phone memory / SD card root (not in any folder).
Step 4 – Then turn OFF your phone and disconnect from the USB cable.
Step 5 – Now to get in the Recovery Mode. Switch ON the phone while pressing and holding Volume Down + Power buttons together.
Step 6 – Once you are in TWRP Recovery, perform a full data wipe by tapping on the ‘Wipe’ button. Then swipe on the “Swipe to Factory Reset” option at the bottom.
Step 7 – Now go back to the main menu and then tap on the ‘Install’ button. From the list, choose the ZIP file that you copied to your phone memory in Step 3.
Step 8 – Confirm installation on the next screen by swiping on the “Swipe to Confirm Flash” option. The installation procedure should start now.
Step 9 – Once the installation is completed.
Step 10 – You can now reboot your phone by selecting the “Reboot System” button.
Your One will boot now and it might take about 5 minutes to boot on your first time. So, please wait.
That’s it! Your OnePlus One should now have Cyanogen OS 13.1 ZNH2KAS1KN Android 6.0.1 Marshmallow official software update installed on your phone! Go to Settings > About phone to verify.
For More OnePlus One Updates Keep Checking Android Custom ROM Fix ™®
That’s all. We hope this guide serves you well. If there’s anything you’d like to be added/changed on this page, PLZ Use the comment box below to contribute more ideas & Suggestions .
Like this post? PLZ Hit the share buttons below to share this article with your friends on Facebook, Google + and Twitter.
Want the latest Updates Sign up for our newsletters!
PLZ Follow Us On Flipboard 4 More Latest Updates.
Best Regards.™
Available link for download
How to Install Android 6 0 1 Marshmallow Tekcafe v5 3 v30A ROM on AT T LG G3 D850
How to Install Android 6 0 1 Marshmallow Tekcafe v5 3 v30A ROM on AT T LG G3 D850
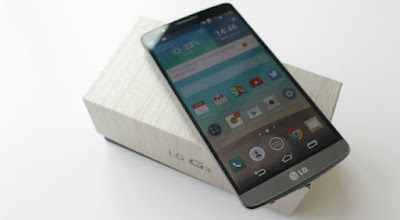
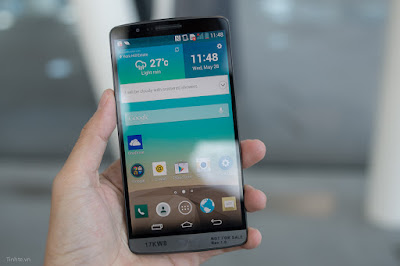
According to XDA member Truongthevinh, Android 6.0.1 Marshmallow Tekcafe v5.3 [ v30A] ROM is now released for AT&T LG G3 D850.

÷ ROM Info:
Android 6.0 (MRA58K) + some 6.0.1 patches
Based on LG v30A build 16052016
Updated Google security patches to May, 2016
Add supersu v2.76
Full UX 5.0 from latest LG G5 v10d base
Multi-ariants support
Battery life, performance and memory improvements.


÷ Changelog:
Changelog V5.3:
- Marshmallow 6.0 D855 V30A 16/05/2016
- Fixes and stability improvements, more battery life
- Updated Full app with latest LG G5 v10d base
- Added QSlide and QRemote quick toggles
- Added LED quick toggle
- Added SuperSU 2.76
- Added Play 360 VR Video G5
- Added LG Remote Call G5
- Added Smart Doctor from LG G5
- Added Mirror Link with car from G5
Changelog V5.2:
- Update Marshmallow 6.0 D855 V30A 16/05/2016
- Patch Security Android: 01/05/2016
- Added Xposed v85 in Aroma
- Updated some latest LG G5 apps
- New stock boot for D855(30K), F400(30G),D850(30K), D852(30D), VS985(47A)
- New kernel port for D851,us990, ls990
- Added Apn setting
- Fix copy Clip Tray
- Fix Qmemo
- Netfix: OK (for USA user)
- More Stable System
Changelog V5.1:
- Update Marshmallow 6.0 D855 V30K (26/04/2016)
- Updated and synced with latest LG G5 v10c base
- New stock boot for D855 (30K), D851 (30D)
- New kernel for all variants
- Fix thermal
Changelog V5.0:
- Update Marshmallow 6.0 D855 V30F
- Full LG G5 UX 5.0 and LG G5 Apps
- New stock boot for D855, D851, F400, D852, VS985
- New kernel for all variants
- New root - SuperSU 2.65
- Add ViPER4Android FX Audio Mod in Aroma
- Call Recorder in Aroma
- Navibar 32 dpi in Aroma
- Weather deodex for Support Install Xposed v80
- LG G3 LS990, US990: bug: NFC...
÷ Prerequisites:
•This tutorial is only for installing Android 6.0.1 Marshmallow Tekcafe v5.3 [ v30A] ROM on AT&T LG G3 D850.Please do not try on any other LG G3 Variants.
•Your phone should have a custom recovery installed in order to install this NanoROM ROM on your phone.
•We will be using TWRP Recovery for this tutorial.
•This tutorial will wipe out all your data. Make sure you backup all your data in your phone before proceeding.
•Perform a Dalvik Cache wipe before proceeding from the Recovery Mode.
*Disclaimer:
Android Custom ROM fix ® provide various Firmware Updates and Rooting process along with Custom ROM,Modes,file are all belong to their owners/developers. The autor of this site or the developers are not responsible, if you damage or brick your device.Do it on your own risk and follow the instruction properly.
* Important:
Backup important files stored on your device before proceeding with the steps below, so that in case something goes wrong you’ll have backup of all your important files.


You can find out how to apply it right now via XDA.
For More LG G3 Updates Keep Checking Android custom ROM Fix ™®
That’s all. We hope this guide serves you well. If there’s anything you’d like to be added/changed on this page, PLZ Use the comment box below to contribute more ideas & Suggestions .
Like this post? PLZ Hit the share buttons below to share this article with your friends on Facebook, Google + and Twitter.
Want the latest Updates Sign up for our newsletters!
PLZ Follow Us On Flipboard 4 More Latest Updates.
Best Regards.™
Available link for download
Thursday, February 16, 2017
How to Install CM13 0 Nightly Android 6 0 1 Marshmallow on AT T Galaxy S4 jflteatt
How to Install CM13 0 Nightly Android 6 0 1 Marshmallow on AT T Galaxy S4 jflteatt
If you are looking to install a new custom ROM on your AT&T Galaxy S4 ( jflteatt) then we have here as usual the best Custom ROMs for you.

CyanogenMod 13 [CM13.0] Nightly ROM latest build cm-13.0-20160629-NIGHTLY-jflteatt.zip is released for AT&T Galaxy S4 ( jflteatt).
CM13.0 will let AT&T Galaxy S4 users taste the sweetness of Marshmallow 6.0.1 such as the battery saving ‘doze’ functionality and new permissions model, alongside the CM features you’d expect.
Follow our guide below to download the Unofficial CM13.0 Nightly and install it yourself.
÷ Prerequisites:
•This tutorial is only for installing CyanogenMod 13 AT&T Galaxy S4 ( jflteatt) Please do not try on any other Samsung Galaxy S4 variants.
•Your phone should be rooted and haveClockworkMod recovery installed from before.
•This tutorial will wipe out all your data.Proceed at your own risk.Perform a Dalvik Cache wipe before proceeding from the recovery mode.
•Make sure you backup all your data in your phone before proceeding.
•Samsung KIES will NOT detect your phone after installing this ROM because it is a custom firmware.
*Disclaimer:
Android Custom ROM fix ® provide various Firmware Updates and Rooting process along with Custom ROM,Modes,file are all belong to their owners/developers. The autor of this site or the developers are not responsible, if you damage or brick your device.Do it on your own risk and follow the instruction properly.
* Important:
Backup important files stored on your device before proceeding with the steps below, so that in case something goes wrong you’ll have backup of all your important files.

÷ How to Install CM13.0 Nightly Android 6.0.1 Marshmallow on AT&T Galaxy S4 ( jflteatt)
Step 1 – Download CM13.0 Android 6.0.1 Marshmallow and Google Apps for your AT&T Samsung Galaxy S4 to your computer.
Step 2 – Connect and mount your Galaxy S4 ( jflteatt) USB memory on your computer using the USB cable.
Step 3 – Now copy/paste the downloaded Android 6.0.1 ROM zip file and Google Appszip files to your SD card. Make sure the files are in the SD card root (not in any folder).
Step 4 – Then turn OFF your phone and disconnect from the USB cable.
Step 5 – Now to get in the Recovery Mode. Switch ON the phone while pressing and holding Volume Up + Home + Power buttons together
Step 6 – Once you are in ClockworkModRecovery, select perform a full data wipe by selecting “wipe data/factory reset”. Use the Power button to select everything while in the Recovery Mode.
Step 7 – Then, perform a cache wipe by selecting “wipe cache partition” .
Step 8 – Now this is optional, but it is recommended to perform a wipe of your dalvik cache as well. You will not get into boot loops or any other errors. From CWM recovery, go to ‘advanced’ and then select “wipe dalvik cache”.
Step 9 – Then go back to the main recovery screen and select “install zip from SD card”.
Step 10 – Now select “choose zip from sdcard”. Using your volume keys, navigate to the Android 6.0.1 ROM zip file that you copied to your SD card and select it using the Power button. Confirm the installation on the next screen and the installation procedure should start now.
Google Apps: Repeat the above step for the Gapps zip file as well and install it on your phone.
Step 11 – After the installation completes, go to “+++++Go Back+++++” and reboot the phone by selecting “reboot system now” from the recovery menu.

Your AT&T Galaxy S4 ( jflteatt) will boot now and it might take about 5 minutes to boot on your first time. So, please wait.
That’s it Your Samsung Galaxy S4 should now have CM13.0 Nightly Android 6.0.1 Marshmallow latest build installed on your phone! Go to Settings > About phone to verify.
For More AT&T Galaxy S4 Brand New Firmware & Custom ROM keep checking AndroidCustomROM Fix ™®
Like this post? PLZ Hit the share buttons below to share this article with your friends on Facebook, Google + and Twitter.
PLZ Follow Us On Flipboard 4 More latest custom ROM fix.
PLZ Use the comment box below to contribute more ideas & Suggestions .
Best Regards.
Available link for download
Wednesday, February 15, 2017
How to Update Huawei Honor 7 PLK L01 to B370 Android 6 0 Marshmallow
How to Update Huawei Honor 7 PLK L01 to B370 Android 6 0 Marshmallow
Huawei Honor 7 (PLK-L01) New B370 update has released in Finland & based on Android 6.0 Marshmallow and Emotion UI 4.0, bumping the Android security patch level to June 1, 2016.

You Can find out how to apply it right now via this easy tutorial.
÷ Firmware Details:
- Device: Huawei Honor 7
- Model: PLK-L01
- Android: v6.0 Marshmallow
- EMUI: 4.0
- Firmware: B370
- Build: PLK-L01C432B370
- Custom Number: CUSTC432D001
- Security Patch Level: June 1, 2016
- Region: Europe
- Country: Finland
- Status: Official (stable)
- Type: Full firmware image
÷ Prerequisites:
•This tutorial is only for Huawei Honor 7 (PLK-L01).
*Disclaimer:
Android Custom ROM fix ® provide various Firmware Updates and Rooting process along with Custom ROM,Modes,file are all belong to their owners/developers. The autor of this site or the developers are not responsible, if you damage or brick your device.Do it on your own risk and follow the instruction properly.
* Important:
Backup important files stored on your device before proceeding with the steps below, so that in case something goes wrong you’ll have backup of all your important files.

÷ How to Update Huawei Honor 7 (PLK-L01) to B370 Android 6.0 Marshmallow :
1- Download Huawei Honor 7 (PLK-L01) B370 Android 6.0 Marshmallow .
2- Extract the Zip package, copy “dload” folder to the external microSD card
3- Reboot your phone while holding Vol down + Vol up + Power. I do recommend that you take a full backup of your data before proceeding.

That’s it! Your Huawei Honor 7 (PLK-L01) should have B370 Marshmallow 6.0 OTA on your phone! Go to Settings > About phone to verify.
For More Huawei Honor 7 (PLK-L01) Updates Keep Checking Android Custom ROM Fix ®™
That’s all. We hope this guide serves you well. If there’s anything you’d like to be added/changed on this page, PLZ Use the comment box below to contribute more ideas & Suggestions .
Like this post? PLZ Hit the share buttons below to share this article with your friends on Facebook, Google + and Twitter.
Want the latest Updates Sign up for our newsletters!
PLZ Follow Us On Flipboard 4 More Latest Updates.
Best Regards.™
Available link for download
Tuesday, February 14, 2017
How to Update Huawei GR5 KII L22 to Marshmallow 6 0 B310 Firmware
How to Update Huawei GR5 KII L22 to Marshmallow 6 0 B310 Firmware

You can find out how to apply it right now via this easy tutorial.
÷ Prerequisites:
This firmware requires your phone to be running one of the following versions onboard already:
KII-L22C636B130
KII-L22C636B301.
*Disclaimer:
Android Custom ROM fix ® provide various Firmware Updates and Rooting process along with Custom ROM,Modes,file are all belong to their owners/developers. The autor of this site or the developers are not responsible, if you damage or brick your device.Do it on your own risk and follow the instruction properly.
* Important:
Backup important files stored on your device before proceeding with the steps below, so that in case something goes wrong you’ll have backup of all your important files.

÷ How to Update Huawei GR5 KII-L22 to Marshmallow 6.0 B310 Firmware :
1- Download Huawei GR5 KII-L22 Marshmallow 6.0 B310 Firmware zip package on your PC.
2- Extract the archive and transfer the “dload” folder to the external microSD card.
3-[Recommended] Take a full backup of your existing stuff.
4- Power your device off.
5- Now reboot while holding Volume down + Volume up + Power keys for a couple of seconds to initiate the upgrade.

That’s it! Your Huawei GR5 KII-L22 should now have Marshmallow 6.0 final B310 Firmware on your phone! Go to Settings > About phone to verify.
For More Huawei GR5 KII-L22 Updated Keep Checking Android Custom ROM Fix ™©
That’s all. We hope this guide serves you well. If there’s anything you’d like to be added/changed on this page, PLZ Use the comment box below to contribute more ideas & Suggestions .
Like this post? PLZ Hit the share buttons below to share this article with your friends on Facebook, Google + and Twitter.
Want the latest Updates Sign up for our newsletters!
PLZ Follow Us On Flipboard 4 More Latest Updates.
Best Regards.™
Available link for download
Monday, February 13, 2017
How to Install Android 6 0 1 Marshmallow Nexify ROM V3 on T Mobile Galaxy Note 5 SM N920T
How to Install Android 6 0 1 Marshmallow Nexify ROM V3 on T Mobile Galaxy Note 5 SM N920T
According to XDA Member TechGuy081, Android 6.0.1 Marshmallow Nexify ROM V3 Available now for T-Mobile Samsung Galaxy Note 5 SM- N920T.

Nexify Rom Its Made To Make Your Note 5 Close To Stock Android MM Keep In Mind This Wont Make Your Device Be Stock Android I Just Removed Apps (Like Bloatware) From Samsung So You Can Download Google Apps To Replace Stock Apps, Like Clock App, Calculator With Googles Or Your Own!
•Rom Features
- Based on N920TUVU2DPD1 Firmware
- Deodexed all Apps
- Rooted with SuperSU 2.74
- Auto Wipe Cache, Dalvik Cache and Format System
- System Optimization
- Tweaks in Build.prop
- Removed Knox
- Removed As Many Apps As Possible
- Removed Safe Volume Warning
- Ad Away
- Private Mode Working
- 5 Reboot Menu
- Added Dolby Atmos
- Ultra Data Saving Working
- Battery Tweaks
- App Lock
- Gray Status Bar Removed
- Stock MM Emojis.

Change Log:
• June 16
-Initial Release V1
• June 26
- V2
-Special Thanks To @Battlehero
- Reboot Menu Fixed
- Gray Status Bar Removed
- Updated some apps
- Fixed Bugs
- Samsung keyboard Replaced By Googles
- Added Stock MM Emojis
• July 7
- Fixed alot of bugs you asked for
- Nfc And Payment, VPN functionality , Live Walpaper Picker, Hardware Buttons Fixed, Auto Brightness Fixed
- Removed Emergency From power Menu
- Removed Some More Bloat
- Removed Carrier Text In Lock-screen
- Removed Slide To Unlock in Lock-screen
- App Signature Check Removed Now You Can Install Old Apps Over New Versions
- Touchlight Key Enabled In Settings
- Animation Set to 0.25
- OutdoorMode
- Knox Removed
- All Apps In Multiwindow Mode
- And More!
÷ Prerequisites:
•This tutorial is only for installing Android 6.0.1 Marshmallow Nexify ROM V3 on T-Mobile Samsung Galaxy Note 5 SM- N920T.Please do not try on any other Galaxy Note 5 Variants.
•Your phone should have a custom recovery installed in order to install this NanoROM ROM on your phone.
•We will be using TWRP Recovery for this tutorial.
•This tutorial will wipe out all your data. Make sure you backup all your data in your phone before proceeding.
•Samsung KIES will NOT detect your phone after installing this ROM because it is a custom firmware
•Perform a Dalvik Cache wipe before proceeding from the Recovery Mode.
*Disclaimer:
Android Custom ROM fix ® provide various Firmware Updates and Rooting process along with Custom ROM,Modes,file are all belong to their owners/developers. The autor of this site or the developers are not responsible, if you damage or brick your device.Do it on your own risk and follow the instruction properly.
* Important:
Backup important files stored on your device before proceeding with the steps below, so that in case something goes wrong you’ll have backup of all your important files.
You can find out how to apply it right now via XDA.

For More Samsung Galaxy Note 5 Updates Keep Checking Android custom ROM Fix ™®
That’s all. We hope this guide serves you well. If there’s anything you’d like to be added/changed on this page, PLZ Use the comment box below to contribute more ideas & Suggestions .
Like this post? PLZ Hit the share buttons below to share this article with your friends on Facebook, Google + and Twitter.
Want the latest Updates Sign up for our newsletters!
PLZ Follow Us On Flipboard 4 More Latest Updates.
Best Regards.™
Available link for download
Thursday, February 9, 2017
How to Update Nexus 6 To Android 6 0 1 Marshmallow Chroma r 45 ROM
How to Update Nexus 6 To Android 6 0 1 Marshmallow Chroma r 45 ROM
According to XDA member zephik, Android 6.0.1 Marshmallow Chroma ROM is now available for Motorola Nexus 6 XT1112 [ shamu].

Chroma is a lightweight AOSP ROM focused on battery, performance and stability.
The philosophy of Chroma is to stay relatively close to Googles stock Marshmallow with the additions of essential features that should have been included with stock Marshmallow as well as providing the most up-to-date security patches.
÷ ROM Features:
Layers support
Native LED notifications (solid, limited to RGB colors)
Status Bar Customization:
Battery Style (Icon Portrait/Landscape, Circle, Text, Hide) and Battery Percentage
Clock & Date (Show/Hide, Color, Alignment, AM/PM, Show/Hide Date, Date Style, Date Format)
Brightness Control (long press status bar to change brightness)
Double-tap status bar to turn screen off
Show/hide notification count
Quick pull-down on left/right side to pull down tiles
Network traffic
Pressing on clock or date on status bar opens up Clock, Calendar
Status bar weather
Show/hide brightness slider
Navigation bar customization
Navigation bar height
Kill app back button
Double tap navigation bar to sleep
Clear all recents button (swipe down on recent apps and itll display on the bottom right)
Lock screen customization
Lock screen wallpaper
Power menu customization (power off, reboot, screenshot, airplane mode)
Advanced Reboot (reboot/soft reboot/recovery/bootloader)
Volume rocker customization:
Wake device with volume keys when screen off
Long press volume up/down keys to skip track when screen off
Other:
A large number of optimizations, memory leak fixes, security patches
Long press recents to swap back to previous app
Prevent camera shutter sound
... and more (see changelog).
÷ Prerequisites:
•This tutorial is only for installing S5 TouchWiz Port V4.4.1 ROM on Motorola Nexus 6 XT1112 [ shamu]. Please do not try on any other Nexus 6 variants.
•Your phone should be rooted and haveClockworkMod recovery installed from before.
•This tutorial will wipe out all your data.Proceed at your own risk.Perform a Dalvik Cache wipe before proceeding from the recovery mode.
•Make sure you backup all your data in your phone before proceeding.
*Disclaimer:
Android Custom ROM fix ® provide various Firmware Updates and Rooting process along with Custom ROM,Modes,file are all belong to their owners/developers. The autor of this site or the developers are not responsible, if you damage or brick your device.Do it on your own risk and follow the instruction properly.
* Important:
Backup important files stored on your device before proceeding with the steps below, so that in case something goes wrong you’ll have backup of all your important files.
ROM Download & Installation Instructions via XDA
For More Motorola Nexus 6 XT1112 [ shamu] updates Keep Checking Android Custom ROM Fix™®
Like this post? PLZ Hit the share buttons below to share this article with your friends on Facebook, Google + and Twitter.
PLZ Follow Us On Flipboard 4 More Latest Updates.
PLZ Use the comment box below to contribute more ideas & Suggestions .
Best Regards.
Available link for download
How to Update OnePlus One to Android 6 0 1 Marshmallow SmartisanOS ROM
How to Update OnePlus One to Android 6 0 1 Marshmallow SmartisanOS ROM

Android 6.0.1 Marshmallow.
Beautiful UI.
Fast & Smooth.
Stable....
Don’t worry we are going to share step by step guide to safely Update your OnePlus One to Android 6.0.1 Marshmallow SmartisanOS ROM:
÷ Prerequisites:
•This tutorial is only for installing Android 6.0.1 SmartisanOS ROM on OnePlus One. Please do not try on any other One variants.
•Your phone should have a custom recovery installed in order to install this SmartisanOS ROM on your phone.
•We will be using TWRP Recovery for this tutorial.
•This tutorial will wipe out all your data. Make sure you backup all your data in your phone before proceeding.
•Perform a Dalvik Cache wipe before proceeding from the Recovery Mode.
*Disclaimer:
Android Custom ROM fix ® provide various Firmware Updates and Rooting process along with Custom ROM,Modes,file are all belong to their owners/developers. The autor of this site or the developers are not responsible, if you damage or brick your device.Do it on your own risk and follow the instruction properly.
* Important:
Backup important files stored on your device before proceeding with the steps below, so that in case something goes wrong you’ll have backup of all your important files.
How to: Update OnePlus One to Android 6.0.1 Marshmallow SmartisanOS ROM:
Step 1 – Download Android 6.0.1 SmartisanOS ROM for One to your computer.
Step 2 – Connect and mount your OnePlus One USB memory to your computer using the USB cable.
Step 3 – Now copy/paste the downloaded Android 6.0.1 ROM zip file to your phone memory / SD card. Make sure the file is in the phone memory / SD card root (not in any folder).
Step 4 – Then turn OFF your phone and disconnect from the USB cable.
Step 5 – Now to get in the Recovery Mode. Switch ON the phone while pressing and holding Volume Down + Power buttons together.
Step 6 – Once you are in TWRP Recovery, perform a full data wipe by tapping on the ‘Wipe’ button. Then swipe on the “Swipe to Factory Reset” option at the bottom.
Step 7 – Now go back to the main menu and then tap on the ‘Install’ button. From the list, choose the ZIP file that you copied to your phone memory in Step 3.
Step 8 – Confirm installation on the next screen by swiping on the “Swipe to Confirm Flash” option. The installation procedure should start now.
Step 9 – Once the installation is completed.
Step 10 – Tap on the “Wipe cache/dalvik” button if you get into any boot loops or other issues.
Step 11 – You can now reboot your phone by selecting the “Reboot System” button.
Your One will boot now and it might take about 5 minutes to boot on your first time after flashing a new ROM. So, please wait.

That’s it! Your OnePlus One should now have Android 6.0.1 SmartisanOS Marshmallow custom ROM installed on your phone! Go to Settings > About phone to verify.
For More OnePlus One Updates Keep Checking Android Custom ROM Fix ™®
That’s all. We hope this guide serves you well. If there’s anything you’d like to be added/changed on this page, PLZ Use the comment box below to contribute more ideas & Suggestions .
Like this post? PLZ Hit the share buttons below to share this article with your friends on Facebook, Google + and Twitter.
Want the latest Updates Sign up for our newsletters!
PLZ Follow Us On Flipboard 4 More Latest Updates.
Best Regards.™
Available link for download
Monday, February 6, 2017
Huawei p8 GRA L09 C109B190 Marshmallow update
Huawei p8 GRA L09 C109B190 Marshmallow update
Model: Huawei GRA-L09
Build: GRA-L09 C109B190
Android version: 5.0.2
EMUI version: EMUI 3.1
Thank you so much in advance :D :D :D
from xda-developers http://ift.tt/2akwdB0
via IFTTT
Available link for download
Como Instalar Rom Galaxy Note 5 Duos N920CD Marshmallow
Como Instalar Rom Galaxy Note 5 Duos N920CD Marshmallow

- ARCHIVOS NECESARIOS :
- Controlador USB [DESCARGAR] o Kies [DESCARGAR]
- Odin v3 [DESCARGAR]
- Rom, Firmware Samsung Galaxy Note 5 Duos N920C / N920CD [DESCARGAR]
- Bateria por lo menos al 50%
- PASOS A SEGUIR :
- Instale el controlador USB de Samsung o Kies en su ordenador
- Extraer el firmware Samsung Galaxy con rar victoria para encontrar el archivo .md5
- Apagar el celular
- Pasos a seguir (Download mode). Tener el dispositivo completamente apagado Mantener presionado durante 5 segundo Volumen Abajo + Home + Power Aparecerá un mensaje de Warning (pero no se alarmen), presionar Volumen Arriba para ingresar a Download Mode, con Volumen Abajo el Young booteará normal
- Abrir Odin (el que descargaron arriba)
- Ver que la opción Re-Partition NO esté seleccionada
- Conectar por cable USB el Galaxy Note 5 Duos N920C a la computadora, Odin debe reconocer al dispositivo, nos daremos cuenta porque abajo de donde dice ID:CON aparecerá el cuadro sombreado de amarillo.
- Click en el botón PDA y seleccionar PDA_XXXXX.md5
- Ver que la opción Re-Partition NO esté seleccionada
- Click en Start
- Esperar a que salga PASS en fondo verde en Odin
- Listo!
Si por algún motivo se te queda booteando en el logo de Samsung, apaga el celular, reinicia en Recovery Mode Galaxy y realiza un wipe data y wipe cache.
Available link for download
Sunday, February 5, 2017
Action Launcher 3 updated with Marshmallow based launcher improvements Google Now integration root and more
Action Launcher 3 updated with Marshmallow based launcher improvements Google Now integration root and more

An update to Action Launcher 3 is currently rolling out with the usual assortment of improvements, feature tweaks, and fixes... but theres more going on here. This isnt just any update—the latest version of Action Launcher 3 moves to a Marshmallow launcher code base and adds (root-only) Google Now integration.
Heres the full changelog.
- NEW: Update base code to Android 6.0.1s Launcher3 code. Notable usability enhancements include the addition of fast scroll in the All Apps drawer, a much improved widget picker and infinite paged folders and more.
Action Launcher 3 updated with Marshmallow-based launcher improvements, Google Now integration (root), and more was written by the awesome team at Android Police.


from Android Police – Android News, Apps, Games, Phones, Tablets http://ift.tt/2ag93bT
via IFTTT
Available link for download
Friday, February 3, 2017
How to Root Verizon LG G3 on 47A Marshmallow Update
How to Root Verizon LG G3 on 47A Marshmallow Update
Thanks to the folks over at xda, we (at-least) still have a way to root Verizon LG G3 even on the latest 47A Marshmallow update. Cheers!

You can have root access on the Verizon G3’s latest update with software version 47a, but the procedure isn’t a pretty one. Rooting 47A firmware requires downgrading back to 10B first, then achieve root using Stump and then install TWRP and flash the bootstack from version 35B, and then finally flash a 47A stock ROM (or any custom 47A ROM) from TWRP.
÷ Prerequisites:
This tutorial is only for Rooting Verizon G3 on latest 47A Marshmallow update Please do not try on any other LG G3 variants.
*Disclaimer:
Android Custom ROM fix ® provide various Firmware Updates and Rooting process along with Custom ROM,Modes,file are all belong to their owners/developers. The autor of this site or the developers are not responsible, if you damage or brick your device.Do it on your own risk and follow the instruction properly.
* Important:
Backup important files stored on your device before proceeding with the steps below, so that in case something goes wrong you’ll have backup of all your important files.
÷ How to Root Verizon LG G3 on 47A Marshmallow Update:
1- Flash 10B firmware:
Step1- Download the Verizon G3 10B KDZ firmware file to your PC from the downloads section above.
Step2- Flash the 10B firmware KDZ to your Verizon G3.
For help, follow our detailed guide ? How to Flash KDZ firmware on LG Devices.
2- Root 10B firmware using StumpRoot: Once you’re on 10B firmware, do the following:
Step 3- Download the StumpRoot apk from the links above and install it on your Verizon G3.
Step 4- Open the app and tap the Grind button to execute root exploit.
Step5- Restart your G3 when prompted.
3- Install SuperSU and TWRP Recovery:
Step 5- Once you’ve successfully rooted your Verizon G3 on 10B firmware, install the SuperSU app from Play Store to manage superuser permission and TWRP Manager app to download/install TWRP recovery.
Step 6- Now download/transfer the 35B Bootstack zip file and 47A firmware zip file to your Verizon G3’s internal storage.
Step 7- Boot into TWRP recovery and perform a simple factory reset.
Step 8- Install/Flash the 35B Bootstack zip file from TWRP recovery.
Step 9- Perform a wipe data/cache from within the recovery.
Step 10- Install/Flash the 47A firmware zip file from TWRP recovery.
Step 11- Reboot device.
? If TWRP asks to install SuperSU, DENY IT.
That’s all. Your Verizon G3 should be rooted now, running on firmware 47A.
For More LG G3 Updates Keep Checking Android Custom ROM Fix ™®
That’s all. We hope this guide serves you well. If there’s anything you’d like to be added/changed on this page, PLZ Use the comment box below to contribute more ideas & Suggestions .
Like this post? PLZ Hit the share buttons below to share this article with your friends on Facebook, Google + and Twitter.
Want the latest Updates Sign up for our newsletters!
PLZ Follow Us On Flipboard 4 More Latest Updates.
Best Regards.™
Available link for download
How to Update Xperia Z3 to Android 6 0 1 Marshmallow LinuXRoM Fast Smooth
How to Update Xperia Z3 to Android 6 0 1 Marshmallow LinuXRoM Fast Smooth
Android 6.0.1 Marshmallow.
Xperia X System UI.
Fast & Smooth.
Stable...
You can find out how to apply it right now via this easy tutorial.
÷ Prerequisites:
•This tutorial is only for installing Android 6.0.1 LinuXRoM ROM on Sony Xperia Z3. Please do not try on any other Xperia Z3 variants.
•Your phone should be rooted and have ClockworkMod recovery installed from before.
•This tutorial will wipe out all your data. Proceed at your own risk.
•Perform a Dalvik Cache wipe before proceeding from the recovery mode.
•Sony PC Companion will NOT detect your phone after installing this ROM because it is a custom firmware.
•Bootloader should be unlocked or you will not be able to install this ROM.
•Make sure you backup all your data in your phone before proceeding.
*Disclaimer:
Android Custom ROM fix ® provide various Firmware Updates and Rooting process along with Custom ROM,Modes,file are all belong to their owners/developers. The autor of this site or the developers are not responsible, if you damage or brick your device.Do it on your own risk and follow the instruction properly.
* Important:
Backup important files stored on your device before proceeding with the steps below, so that in case something goes wrong you’ll have backup of all your important files.

Step 1 – Download LinuXRoM Android 6.0.1 ROM for Sony Xperia Z3 to your computer and extract boot.img from the zip file separately.
Step 2 – Connect and mount your Sony Xperia Z3 USB (mass) memory on your computer using the USB cable.
Step 3 – Now copy/paste the downloaded Android 6.0.1 ROM zip file to your SD card. Make sure the file is in the SD card root.
Step 4 – Copy/paste the boot.img file to android-sdk-windowsplatform-tools directory.
Step 5 – Then turn OFF your phone.
Step 6 – Now to get into the Bootloader Mode. Press and hold the Volume Up button while connecting it again with the USB cable. Your phone LED will turn blue and it will get into the Bootloader Mode.
Step 7 – Once in the Fastboot mode (on your phone), navigate to android-sdk-windowsplatform-tools directory (on your computer) and open Command Prompt (Shift + Right-click > Open Command Prompt).
Step 8 – Type the following command and press Enter.
fastboot flash boot boot.img
Step 9 – Then, type the following command and press Enter.
fastboot reboot
Step 10 – Now to get in the Recovery Mode. Switch ON the phone while pressing the Volume Up or Volume Down buttons a few times when you see the LED light turn pink or any other colour.
Step 11 – Once you are in ClockworkMod Recovery, select perform a full data wipe by selecting “wipe data/factory reset” . Use the Power button to select everything while in the Recovery Mode.
Step 12 – Then, perform a cache wipe by selecting “wipe cache partition”.
Step 13 – Now this is optional, but it is recommended to perform a wipe of your dalvik cache as well. You will not get into boot loops or any other errors. From CWM recovery, go to ‘advanced’ and then select “wipe dalvik cache”.
Step 14 – Then go back to the main recovery screen and select “install zip from SD card”.
Step 15 – Now select “choose zip from sdcard”. Using your volume keys, navigate to the Android 6.0.1 ROM zip file that you copied to your SD card and select it using the Power button. Confirm the installation on the next screen and the installation procedure should start now.
Step 16 – After the installation completes, go to “+++++Go Back+++++” and reboot the phone by selecting “reboot system now” from the recovery menu.

Your Xperia Z3 will boot now and it might take about 5 minutes to boot on your first time. So, please wait.
That’s it! Your Xperia Z3 should now have Android 6.0.1 LinuXRoM Marshmallow custom ROM installed on your phone! Go to Settings > About phone to verify.
For MoreXperia Z3 latest updates Keep Checking Android Custom ROM Fix™®
That’s all. We hope this guide serves you well. If there’s anything you’d like to be added/changed on this page, PLZ Use the comment box below to contribute more ideas & Suggestions .
Like this post? PLZ Hit the share buttons below to share this article with your friends on Facebook, Google + and Twitter.
Want the latest Updates Sign up for our newsletters!
PLZ Follow Us On Flipboard 4 More Latest Updates.
Best Regards.™
Available link for download
Wednesday, February 1, 2017
How to Install Android 6 0 1 Marshmallow Slim6 ROM on HTC One M9
How to Install Android 6 0 1 Marshmallow Slim6 ROM on HTC One M9

Don’t worry we are going to share step by step guide to safely Install Android 6.0.1 Marshmallow Slim6 ROM on your HTC One (M9).
÷ Prerequisites:
•This tutorial is only for installing Android 6.0.1 Slim6 ROM on HTC One M9. Please do not try on any other One M9 variants.
•Your phone should have a custom recovery installed in order to install this Slim6 ROM on your phone.
•We will be using TWRP Recovery for this tutorial.
•Bootloader should be unlocked.
•This tutorial will wipe out all your data. Make sure you backup all your data in your phone before proceeding.
•Perform a Dalvik Cache wipe before proceeding from the Recovery Mode.
*Disclaimer:
Android Custom ROM fix ® provide various Firmware Updates and Rooting process along with Custom ROM,Modes,file are all belong to their owners/developers. The autor of this site or the developers are not responsible, if you damage or brick your device.Do it on your own risk and follow the instruction properly.
* Important:
Backup important files stored on your device before proceeding with the steps below, so that in case something goes wrong you’ll have backup of all your important files.

÷ How to Install Android 6.0.1 Marshmallow Slim6 ROM on HTC One (M9)
Step 1 – Download Android 6.0.1 Slim6 ROM for One M9 to your computer and extract boot.img from the zip file separately.
Step 2 – Connect and mount your One M9 USB memory to your computer using the USB cable.
Step 3 – Now copy/paste the downloaded Android 6.0.1 ROM zip file to your phone memory / SD card. Make sure the file is in the phone memory / SD card root (not in any folder).
Step 4 – Copy/paste the boot.img file to android-sdk-windowsplatform-tools directory.
Step 5 – Then turn OFF your phone and disconnect from the USB cable.
Step 6 – Now to get in the Bootloader/Fastboot Mode. Turn ON the phone while pressing and holding the Volume Down + Power buttons.
Step 7 – Once in the Fastboot mode (on your phone), navigate to android-sdk-windowsplatform-tools directory (on your computer) and open Command Prompt (Shift + Right-click > Open Command Prompt).
Step 8 – Type the following command and press Enter.
fastboot flash boot boot.img
Step 9 – Then, type the following command and press Enter.
fastboot reboot
Step 10 – Follow the navigation instructions on the screen. Select BOOTLOADER and then go to RECOVERY.
Step 11 – Once you are in TWRP Recovery, perform a full data wipe by tapping on the ‘Wipe’ button. Then swipe on the “Swipe to Factory Reset” option at the bottom.
Step 12 – Now go back to the main menu and then tap on the ‘Install’ button. From the list, choose the ZIP file that you copied to your phone memory in Step 3.
Step 13 – Confirm installation on the next screen by swiping on the “Swipe to Confirm Flash” option. The installation procedure should start now.
Step 14 – Once the installation is completed.
Step 15 – Tap on the “Wipe cache/dalvik” button if you get into any boot loops or other issues.
Step 16 – You can now reboot your phone by selecting the “Reboot System” button.
Your HTC One M9 will boot now and it might take about 5 minutes to boot on your first time after flashing a new ROM. So, please wait.

For More HTC One M9 latest updates Keep Checking Android Custom ROM Fix …
That’s all. We hope this guide serves you well. If there’s anything you’d like to be added/changed on this page, PLZ Use the comment box below to contribute more ideas & Suggestions .
Like this post? PLZ Hit the share buttons below to share this article with your friends on Facebook, Google + and Twitter.
Want the latest Updates Sign up for our newsletters!
PLZ Follow Us On Flipboard 4 More Latest Updates.
Best Regards.™
Available link for download
Monday, January 23, 2017
How to Update T Mobile Galaxy S6 Edge G925T to Android 6 0 1 Marshmallow Sick as Hell ROM
How to Update T Mobile Galaxy S6 Edge G925T to Android 6 0 1 Marshmallow Sick as Hell ROM

Sick as Hell custom ROM is basically a stock ROM with some performance and battery optimisations that makes your device run faster and smoother. Other than that it is a simple TouchWiz ROM and the developer claims that it runs faster than the stock firmware.
Don’t worry we are going to share step by step guide to safely Install Android 6.0.1 Marshmallow Sick as Hell ROM on your T-Mobile Galaxy S6 Edge G925T.
÷ Prerequisites:
•This tutorial is only for installing Android 6.0.1 Sick as Hell ROM on T-Mobile Galaxy S6 Edge G925T. Please do not try on any other Galaxy S6 Edge variants.
•Your phone should have a custom recovery installed in order to install this Sick as Hell ROM on your phone.
•We will be using TWRP Recovery for this tutorial.
•This tutorial will wipe out all your data. Make sure you backup all your data in your phone before proceeding.
•Perform a Dalvik Cache wipe before proceeding from the Recovery Mode.
*Disclaimer:
Android Custom ROM fix ® provide various Firmware Updates and Rooting process along with Custom ROM,Modes,file are all belong to their owners/developers. The autor of this site or the developers are not responsible, if you damage or brick your device.Do it on your own risk and follow the instruction properly.
* Important:
Backup important files stored on your device before proceeding with the steps below, so that in case something goes wrong you’ll have backup of all your important files.

÷ How to Update T-Mobile Galaxy S6 Edge G925T to Android 6.0.1 Marshmallow Sick as Hell ROM:
Step 1 – Download Android 6.0.1 Sick as Hell ROM for Galaxy S6 Edge to your computer.
Step 2 – Connect and mount your Galaxy S6 Edge USB memory to your computer using the USB cable.
Step 3 – Now copy/paste the downloaded Android 6.0.1 ROM zip file to your phone memory / SD card. Make sure the file is in the phone memory / SD card root (not in any folder).
Step 4 – Then turn OFF your phone and disconnect from the USB cable.
Step 5 – Now to get in the Recovery Mode. Switch ON the phone while pressing and holding Volume Up + Home + Power buttons together.
Step 6 – Once you are in TWRP Recovery, perform a full data wipe by tapping on the ‘Wipe’ button. Then swipe on the “Swipe to Factory Reset” option at the bottom.
Step 7 – Now go back to the main menu and then tap on the ‘Install’ button. From the list, choose the ZIP file that you copied to your phone memory in Step 3.
Step 8 – Confirm installation on the next screen by swiping on the “Swipe to Confirm Flash” option. The installation procedure should start now.
Step 9 – Once the installation is completed.
Step 10 – Tap on the “Wipe cache/dalvik” button if you get into any boot loops or other issues.
Step 11 – You can now reboot your phone by selecting the “Reboot System” button.
Your T-Mobile Galaxy S6 Edge will boot now and it might take about 5 minutes to boot on your first time after flashing a new ROM. So, please wait.

For More Samsung Galaxy S6 Edge Updates Keep Checking Android Custom ROM Fix ™®
That’s all. We hope this guide serves you well. If there’s anything you’d like to be added/changed on this page, PLZ Use the comment box below to contribute more ideas & Suggestions .
Like this post? PLZ Hit the share buttons below to share this article with your friends on Facebook, Google + and Twitter.
Want the latest Updates Sign up for our newsletters!
PLZ Follow Us On Flipboard 4 More Latest Updates.
Best Regards.™
Available link for download