Showing posts with label z3. Show all posts
Showing posts with label z3. Show all posts
Friday, February 3, 2017
How to Update Xperia Z3 to Android 6 0 1 Marshmallow LinuXRoM Fast Smooth
How to Update Xperia Z3 to Android 6 0 1 Marshmallow LinuXRoM Fast Smooth
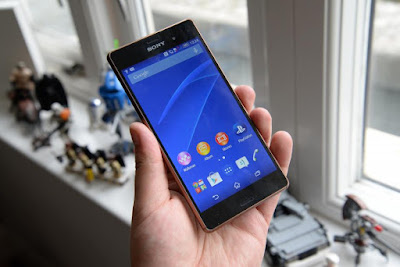
Sony Xperia Z3 LinuXRoM custom ROM comes with tons of new features and is based on Android 6.0.1 Marshmallow . A quick list of the main features in LinuXRoM is given below and we are sure you’d love to use this on your Xperia Z3:
Android 6.0.1 Marshmallow.
Xperia X System UI.
Fast & Smooth.
Stable...
You can find out how to apply it right now via this easy tutorial.
Android 6.0.1 Marshmallow.
Xperia X System UI.
Fast & Smooth.
Stable...
You can find out how to apply it right now via this easy tutorial.
View my Flipboard Magazine.
÷ Prerequisites:
•This tutorial is only for installing Android 6.0.1 LinuXRoM ROM on Sony Xperia Z3. Please do not try on any other Xperia Z3 variants.
•Your phone should be rooted and have ClockworkMod recovery installed from before.
•This tutorial will wipe out all your data. Proceed at your own risk.
•Perform a Dalvik Cache wipe before proceeding from the recovery mode.
•Sony PC Companion will NOT detect your phone after installing this ROM because it is a custom firmware.
•Bootloader should be unlocked or you will not be able to install this ROM.
•Make sure you backup all your data in your phone before proceeding.
*Disclaimer:
Android Custom ROM fix ® provide various Firmware Updates and Rooting process along with Custom ROM,Modes,file are all belong to their owners/developers. The autor of this site or the developers are not responsible, if you damage or brick your device.Do it on your own risk and follow the instruction properly.
* Important:
Backup important files stored on your device before proceeding with the steps below, so that in case something goes wrong you’ll have backup of all your important files.
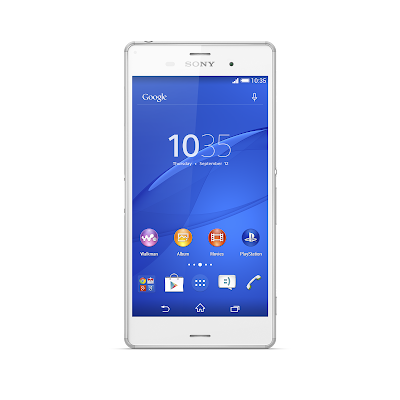 ÷ How to Update Xperia Z3 to Android 6.0.1 Marshmallow LinuXRoM [ Fast & Smooth]
Step 1 – Download LinuXRoM Android 6.0.1 ROM for Sony Xperia Z3 to your computer and extract boot.img from the zip file separately.
Step 2 – Connect and mount your Sony Xperia Z3 USB (mass) memory on your computer using the USB cable.
Step 3 – Now copy/paste the downloaded Android 6.0.1 ROM zip file to your SD card. Make sure the file is in the SD card root.
Step 4 – Copy/paste the boot.img file to android-sdk-windowsplatform-tools directory.
Step 5 – Then turn OFF your phone.
Step 6 – Now to get into the Bootloader Mode. Press and hold the Volume Up button while connecting it again with the USB cable. Your phone LED will turn blue and it will get into the Bootloader Mode.
Step 7 – Once in the Fastboot mode (on your phone), navigate to android-sdk-windowsplatform-tools directory (on your computer) and open Command Prompt (Shift + Right-click > Open Command Prompt).
Step 8 – Type the following command and press Enter.
fastboot flash boot boot.img
Step 9 – Then, type the following command and press Enter.
fastboot reboot
Step 10 – Now to get in the Recovery Mode. Switch ON the phone while pressing the Volume Up or Volume Down buttons a few times when you see the LED light turn pink or any other colour.
Step 11 – Once you are in ClockworkMod Recovery, select perform a full data wipe by selecting “wipe data/factory reset” . Use the Power button to select everything while in the Recovery Mode.
Step 12 – Then, perform a cache wipe by selecting “wipe cache partition”.
Step 13 – Now this is optional, but it is recommended to perform a wipe of your dalvik cache as well. You will not get into boot loops or any other errors. From CWM recovery, go to ‘advanced’ and then select “wipe dalvik cache”.
Step 14 – Then go back to the main recovery screen and select “install zip from SD card”.
Step 15 – Now select “choose zip from sdcard”. Using your volume keys, navigate to the Android 6.0.1 ROM zip file that you copied to your SD card and select it using the Power button. Confirm the installation on the next screen and the installation procedure should start now.
Step 16 – After the installation completes, go to “+++++Go Back+++++” and reboot the phone by selecting “reboot system now” from the recovery menu.
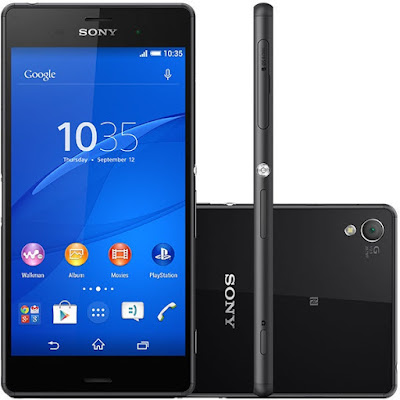
Your Xperia Z3 will boot now and it might take about 5 minutes to boot on your first time. So, please wait.
That’s it! Your Xperia Z3 should now have Android 6.0.1 LinuXRoM Marshmallow custom ROM installed on your phone! Go to Settings > About phone to verify.
For MoreXperia Z3 latest updates Keep Checking Android Custom ROM Fix™®
That’s all. We hope this guide serves you well. If there’s anything you’d like to be added/changed on this page, PLZ Use the comment box below to contribute more ideas & Suggestions .
Like this post? PLZ Hit the share buttons below to share this article with your friends on Facebook, Google + and Twitter.
Want the latest Updates Sign up for our newsletters!
PLZ Follow Us On Flipboard 4 More Latest Updates.
Best Regards.™
÷ Prerequisites:
•This tutorial is only for installing Android 6.0.1 LinuXRoM ROM on Sony Xperia Z3. Please do not try on any other Xperia Z3 variants.
•Your phone should be rooted and have ClockworkMod recovery installed from before.
•This tutorial will wipe out all your data. Proceed at your own risk.
•Perform a Dalvik Cache wipe before proceeding from the recovery mode.
•Sony PC Companion will NOT detect your phone after installing this ROM because it is a custom firmware.
•Bootloader should be unlocked or you will not be able to install this ROM.
•Make sure you backup all your data in your phone before proceeding.
*Disclaimer:
Android Custom ROM fix ® provide various Firmware Updates and Rooting process along with Custom ROM,Modes,file are all belong to their owners/developers. The autor of this site or the developers are not responsible, if you damage or brick your device.Do it on your own risk and follow the instruction properly.
* Important:
Backup important files stored on your device before proceeding with the steps below, so that in case something goes wrong you’ll have backup of all your important files.
Step 1 – Download LinuXRoM Android 6.0.1 ROM for Sony Xperia Z3 to your computer and extract boot.img from the zip file separately.
Step 2 – Connect and mount your Sony Xperia Z3 USB (mass) memory on your computer using the USB cable.
Step 3 – Now copy/paste the downloaded Android 6.0.1 ROM zip file to your SD card. Make sure the file is in the SD card root.
Step 4 – Copy/paste the boot.img file to android-sdk-windowsplatform-tools directory.
Step 5 – Then turn OFF your phone.
Step 6 – Now to get into the Bootloader Mode. Press and hold the Volume Up button while connecting it again with the USB cable. Your phone LED will turn blue and it will get into the Bootloader Mode.
Step 7 – Once in the Fastboot mode (on your phone), navigate to android-sdk-windowsplatform-tools directory (on your computer) and open Command Prompt (Shift + Right-click > Open Command Prompt).
Step 8 – Type the following command and press Enter.
fastboot flash boot boot.img
Step 9 – Then, type the following command and press Enter.
fastboot reboot
Step 10 – Now to get in the Recovery Mode. Switch ON the phone while pressing the Volume Up or Volume Down buttons a few times when you see the LED light turn pink or any other colour.
Step 11 – Once you are in ClockworkMod Recovery, select perform a full data wipe by selecting “wipe data/factory reset” . Use the Power button to select everything while in the Recovery Mode.
Step 12 – Then, perform a cache wipe by selecting “wipe cache partition”.
Step 13 – Now this is optional, but it is recommended to perform a wipe of your dalvik cache as well. You will not get into boot loops or any other errors. From CWM recovery, go to ‘advanced’ and then select “wipe dalvik cache”.
Step 14 – Then go back to the main recovery screen and select “install zip from SD card”.
Step 15 – Now select “choose zip from sdcard”. Using your volume keys, navigate to the Android 6.0.1 ROM zip file that you copied to your SD card and select it using the Power button. Confirm the installation on the next screen and the installation procedure should start now.
Step 16 – After the installation completes, go to “+++++Go Back+++++” and reboot the phone by selecting “reboot system now” from the recovery menu.
Your Xperia Z3 will boot now and it might take about 5 minutes to boot on your first time. So, please wait.
That’s it! Your Xperia Z3 should now have Android 6.0.1 LinuXRoM Marshmallow custom ROM installed on your phone! Go to Settings > About phone to verify.
For MoreXperia Z3 latest updates Keep Checking Android Custom ROM Fix™®
That’s all. We hope this guide serves you well. If there’s anything you’d like to be added/changed on this page, PLZ Use the comment box below to contribute more ideas & Suggestions .
Like this post? PLZ Hit the share buttons below to share this article with your friends on Facebook, Google + and Twitter.
Want the latest Updates Sign up for our newsletters!
PLZ Follow Us On Flipboard 4 More Latest Updates.
Best Regards.™
Available link for download

Tuesday, December 20, 2016
How to Install TWRP on Xperia Z3 Dual D6633
How to Install TWRP on Xperia Z3 Dual D6633
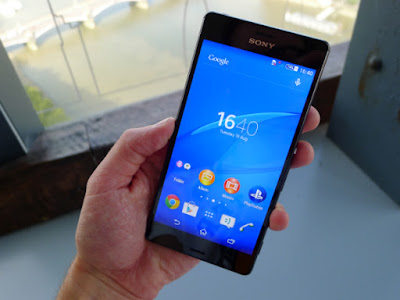
To install TWRP on your Xperia Z3 Dual though, you’ll need to unlock bootloader on the device first.
You can find out how to apply it right now via this easy tutorial
You can find out how to apply it right now via this easy tutorial
View my Flipboard Magazine.
*Disclaimer:
Android Custom ROM fix ® provide various Firmware Updates and Rooting process along with Custom ROM,Modes,file are all belong to their owners/developers. The autor of this site or the developers are not responsible, if you damage or brick your device.Do it on your own risk and follow the instruction properly.
* Important:
Backup important files stored on your device before proceeding with the steps below, so that in case something goes wrong you’ll have backup of all your important files.
÷ How to Install TWRP on Xperia Z3 Dual D6633:
Unlocking the bootloader:
1- Enable OEM unlocking (if applicable) on your Xperia Z3 Dual:
Go into Settings » About phone and tap seven times on Build number to enable Developer options.
2- From Settings, go into Developer options and enable OEM Unlocking.
3- Setup ADB and Fastboot on your PC.
Open the official Sony bootloader unlock help page on your PC .
5- Provide your email address on the page, accept the terms and conditions and then hit the continue button.
6- Sony will now send you an email with a link for further instructions to unlock bootloader.
7- Open that link and follow the instructions carefully.
8- Download the TWRP recovery .img file for Xperia Z3 Dual and save it your PC.
9- Tick the USB Debugging checkbox.
10- Open the folder where your TWRP Recovery .img file is saved.
11- Now open a command window inside that folder. To do that, “Shift + Right click” on any empty white space inside the folder and then select “Open command window here” from the context menu.
12- Connect your device to the PC. And type the following into the command window we opened in step 4 above to boot your device into bootloader/fastboot mode:
adb reboot bootloader
? If your asks for permission to “Allow USB debugging”, tap OK.
13- Once your device boots into bootloader mode, issue the following command into command window to flash the TWRP recovery .img file:
fastboot flash recovery twrp-2.8.x.x-xxx.img
? Here modify twrp.img with the name of your TWRP recovery .img file, OR change your TWRP recovery filename to twrp.img and use the command above.
14- Once TWRP is successfully flashed on your device, issue the following command to reboot:
fastboot reboot
Once TWRP is installed, go ahead root your device.

For More Sony Xperia Z3 Keep Checking Android Custom ROM Fix ®™
That’s all. We hope this guide serves you well. If there’s anything you’d like to be added/changed on this page, PLZ Use the comment box below to contribute more ideas & Suggestions .
Like this post? PLZ Hit the share buttons below to share this article with your friends on Facebook, Google + and Twitter.
Want the latest Updates Sign up for our newsletters!
PLZ Follow Us On Flipboard 4 More Latest Updates.
Best Regards.™
*Disclaimer:
Android Custom ROM fix ® provide various Firmware Updates and Rooting process along with Custom ROM,Modes,file are all belong to their owners/developers. The autor of this site or the developers are not responsible, if you damage or brick your device.Do it on your own risk and follow the instruction properly.
* Important:
Backup important files stored on your device before proceeding with the steps below, so that in case something goes wrong you’ll have backup of all your important files.
÷ How to Install TWRP on Xperia Z3 Dual D6633:
Unlocking the bootloader:
1- Enable OEM unlocking (if applicable) on your Xperia Z3 Dual:
Go into Settings » About phone and tap seven times on Build number to enable Developer options.
2- From Settings, go into Developer options and enable OEM Unlocking.
3- Setup ADB and Fastboot on your PC.
Open the official Sony bootloader unlock help page on your PC .
5- Provide your email address on the page, accept the terms and conditions and then hit the continue button.
6- Sony will now send you an email with a link for further instructions to unlock bootloader.
7- Open that link and follow the instructions carefully.
8- Download the TWRP recovery .img file for Xperia Z3 Dual and save it your PC.
9- Tick the USB Debugging checkbox.
10- Open the folder where your TWRP Recovery .img file is saved.
11- Now open a command window inside that folder. To do that, “Shift + Right click” on any empty white space inside the folder and then select “Open command window here” from the context menu.
12- Connect your device to the PC. And type the following into the command window we opened in step 4 above to boot your device into bootloader/fastboot mode:
adb reboot bootloader
? If your asks for permission to “Allow USB debugging”, tap OK.
13- Once your device boots into bootloader mode, issue the following command into command window to flash the TWRP recovery .img file:
fastboot flash recovery twrp-2.8.x.x-xxx.img
? Here modify twrp.img with the name of your TWRP recovery .img file, OR change your TWRP recovery filename to twrp.img and use the command above.
14- Once TWRP is successfully flashed on your device, issue the following command to reboot:
fastboot reboot
Once TWRP is installed, go ahead root your device.
For More Sony Xperia Z3 Keep Checking Android Custom ROM Fix ®™
That’s all. We hope this guide serves you well. If there’s anything you’d like to be added/changed on this page, PLZ Use the comment box below to contribute more ideas & Suggestions .
Like this post? PLZ Hit the share buttons below to share this article with your friends on Facebook, Google + and Twitter.
Want the latest Updates Sign up for our newsletters!
PLZ Follow Us On Flipboard 4 More Latest Updates.
Best Regards.™
Available link for download
Monday, October 3, 2016
How to Update Xperia Z3 to Android 6 0 1 Marshmallow Moonwalker Custom ROM
How to Update Xperia Z3 to Android 6 0 1 Marshmallow Moonwalker Custom ROM
Sony Xperia Z3 Moonwalker custom ROM comes with tons of new features and is based on Android 6.0.1 Marshmallow.

Don’t worry we are going to share step by step guide to safely Install Android 6.0.1 Marshmallow Moonwalker Custom ROM on your Sony Xperia Z3.
View my Flipboard Magazine.
÷ Prerequisites:
•This tutorial is only for installing Android 6.0.1 Moonwalker ROM on Sony Xperia Z3. Please do not try on any other Xperia Z3 variants.
•Your phone should be rooted and have ClockworkMod recovery installed from before.
•This tutorial will wipe out all your data. Proceed at your own risk.
•Perform a Dalvik Cache wipe before proceeding from the recovery mode.
•Sony PC Companion will NOT detect your phone after installing this ROM because it is a custom firmware.
•Bootloader should be unlocked or you will not be able to install this ROM.
•Make sure you backup all your data in your phone before proceeding.
*Disclaimer:
Android Custom ROM fix ® provide various Firmware Updates and Rooting process along with Custom ROM,Modes,file are all belong to their owners/developers. The autor of this site or the developers are not responsible, if you damage or brick your device.Do it on your own risk and follow the instruction properly.
* Important:
Backup important files stored on your device before proceeding with the steps below, so that in case something goes wrong you’ll have backup of all your important files.

÷ How to : Update Xperia Z3 to Android 6.0.1 Marshmallow Moonwalker Custom ROM:
Step 1 – Download Moonwalker Android 6.0.1 ROM for Sony Xperia Z3 to your computer and extract boot.img from the zip file separately.
Step 2 – Connect and mount your Sony Xperia Z3 USB (mass) memory on your computer using the USB cable.
Step 3 – Now copy/paste the downloaded Android 6.0.1 ROM zip file to your SD card. Make sure the file is in the SD card root.
Step 4 – Copy/paste the boot.img file to android-sdk-windowsplatform-tools directory.
Step 5 – Then turn OFF your phone.
Step 6 – Now to get into the Bootloader Mode. Press and hold the Volume Up button while connecting it again with the USB cable. Your phone LED will turn blue and it will get into the Bootloader Mode.
Step 7 – Once in the Fastboot mode (on your phone), navigate to android-sdk-windowsplatform-tools directory (on your computer) and open Command Prompt (Shift + Right-click > Open Command Prompt).
Step 8 – Type the following command and press Enter.
fastboot flash boot boot.img
Step 9 – Then, type the following command and press Enter.
fastboot reboot
Step 10 – Now to get in the Recovery Mode. Switch ON the phone while pressing the Volume Up or Volume Down buttons a few times when you see the LED light turn pink or any other colour.
Step 11 – Once you are in ClockworkMod Recovery, select perform a full data wipe by selecting “wipe data/factory reset” . Use the Power button to select everything while in the Recovery Mode.
Step 12 – Then, perform a cache wipe by selecting “wipe cache partition” .
Step 13 – Now this is optional, but it is recommended to perform a wipe of your dalvik cache as well. You will not get into boot loops or any other errors. From CWM recovery, go to ‘advanced’ and then select “wipe dalvik cache”.
Step 14 – Then go back to the main recovery screen and select “install zip from SD card”.
Step 15 – Now select “choose zip from sdcard”. Using your volume keys, navigate to the Android 6.0.1 ROM zip file that you copied to your SD card and select it using the Power button. Confirm the installation on the next screen and the installation procedure should start now.
Step 16 – After the installation completes, go to “+++++Go Back+++++” and reboot the phone by selecting “reboot system now” from the recovery menu.

Your Xperia Z3 will boot now and it might take about 5 minutes to boot on your first time. So, please wait.
That’s it! Your Xperia Z3 should now have Android 6.0.1 Moonwalker Marshmallow custom ROM installed on your phone! Go to Settings > About phone to verify.
For More Sony Xperia Z3 Update Keep Checking Android Custom ROM Fix ™®
That’s all. We hope this guide serves you well. If there’s anything you’d like to be added/changed on this page, PLZ Use the comment box below to contribute more ideas & Suggestions .
Like this post? PLZ Hit the share buttons below to share this article with your friends on Facebook, Google + and Twitter.
Want the latest Updates Sign up for our newsletters!
PLZ Follow Us On Flipboard 4 More Latest Updates.
Best Regards.™
÷ Prerequisites:
•This tutorial is only for installing Android 6.0.1 Moonwalker ROM on Sony Xperia Z3. Please do not try on any other Xperia Z3 variants.
•Your phone should be rooted and have ClockworkMod recovery installed from before.
•This tutorial will wipe out all your data. Proceed at your own risk.
•Perform a Dalvik Cache wipe before proceeding from the recovery mode.
•Sony PC Companion will NOT detect your phone after installing this ROM because it is a custom firmware.
•Bootloader should be unlocked or you will not be able to install this ROM.
•Make sure you backup all your data in your phone before proceeding.
*Disclaimer:
Android Custom ROM fix ® provide various Firmware Updates and Rooting process along with Custom ROM,Modes,file are all belong to their owners/developers. The autor of this site or the developers are not responsible, if you damage or brick your device.Do it on your own risk and follow the instruction properly.
* Important:
Backup important files stored on your device before proceeding with the steps below, so that in case something goes wrong you’ll have backup of all your important files.
÷ How to : Update Xperia Z3 to Android 6.0.1 Marshmallow Moonwalker Custom ROM:
Step 1 – Download Moonwalker Android 6.0.1 ROM for Sony Xperia Z3 to your computer and extract boot.img from the zip file separately.
Step 2 – Connect and mount your Sony Xperia Z3 USB (mass) memory on your computer using the USB cable.
Step 3 – Now copy/paste the downloaded Android 6.0.1 ROM zip file to your SD card. Make sure the file is in the SD card root.
Step 4 – Copy/paste the boot.img file to android-sdk-windowsplatform-tools directory.
Step 5 – Then turn OFF your phone.
Step 6 – Now to get into the Bootloader Mode. Press and hold the Volume Up button while connecting it again with the USB cable. Your phone LED will turn blue and it will get into the Bootloader Mode.
Step 7 – Once in the Fastboot mode (on your phone), navigate to android-sdk-windowsplatform-tools directory (on your computer) and open Command Prompt (Shift + Right-click > Open Command Prompt).
Step 8 – Type the following command and press Enter.
fastboot flash boot boot.img
Step 9 – Then, type the following command and press Enter.
fastboot reboot
Step 10 – Now to get in the Recovery Mode. Switch ON the phone while pressing the Volume Up or Volume Down buttons a few times when you see the LED light turn pink or any other colour.
Step 11 – Once you are in ClockworkMod Recovery, select perform a full data wipe by selecting “wipe data/factory reset” . Use the Power button to select everything while in the Recovery Mode.
Step 12 – Then, perform a cache wipe by selecting “wipe cache partition” .
Step 13 – Now this is optional, but it is recommended to perform a wipe of your dalvik cache as well. You will not get into boot loops or any other errors. From CWM recovery, go to ‘advanced’ and then select “wipe dalvik cache”.
Step 14 – Then go back to the main recovery screen and select “install zip from SD card”.
Step 15 – Now select “choose zip from sdcard”. Using your volume keys, navigate to the Android 6.0.1 ROM zip file that you copied to your SD card and select it using the Power button. Confirm the installation on the next screen and the installation procedure should start now.
Step 16 – After the installation completes, go to “+++++Go Back+++++” and reboot the phone by selecting “reboot system now” from the recovery menu.
Your Xperia Z3 will boot now and it might take about 5 minutes to boot on your first time. So, please wait.
That’s it! Your Xperia Z3 should now have Android 6.0.1 Moonwalker Marshmallow custom ROM installed on your phone! Go to Settings > About phone to verify.
For More Sony Xperia Z3 Update Keep Checking Android Custom ROM Fix ™®
That’s all. We hope this guide serves you well. If there’s anything you’d like to be added/changed on this page, PLZ Use the comment box below to contribute more ideas & Suggestions .
Like this post? PLZ Hit the share buttons below to share this article with your friends on Facebook, Google + and Twitter.
Want the latest Updates Sign up for our newsletters!
PLZ Follow Us On Flipboard 4 More Latest Updates.
Best Regards.™
Available link for download
Subscribe to:
Posts (Atom)