Showing posts with label update. Show all posts
Showing posts with label update. Show all posts
Monday, February 20, 2017
Micromax X267 SPD 6531A CPU Update Flash File Download
Micromax X267 SPD 6531A CPU Update Flash File Download
Micromax X267 latest flash file download directly for free without waiting longer. This is the latest version firmware setup available It is tested as well as good and working software setup. This Chinese basic mobile phone comes in the Spreadtrum (SPD) group. Other groups are Mstar, MTK, and RDA . It contains files to successfully flash it. is the main software setup file, the SPD is for language and the is content package and contains wallpapers, games, logos, etc. The SPD in most models ends with BIN ends with an alphabet while the file has the words bin, or image in it. To select files, its better to use file settings, so that it locates all the files automatically. This file has Bangla, English, Hindi and other local Indian languages

All the flash files of this model are of small size file, so it can be downloaded very easily within a few minutes. You can flash any Micromax NEW mobile phone with Volcano Box, Miracle Box, Eagle Eye Miracle Box Crack or free sp flash tools. There are also many other flasher boxes available for flashing this Micromax All mobile dual SIM basic cell phone. You can also flash or update any Micromax handset with GPG Dragon Box.
Click below to download the Micromax X267 flash file and usb Driver:
Micromax X267 SPD 6531A Flash File (3.4 Mb)
Micromax x267 USB Driver Download
Available link for download
Sunday, February 19, 2017
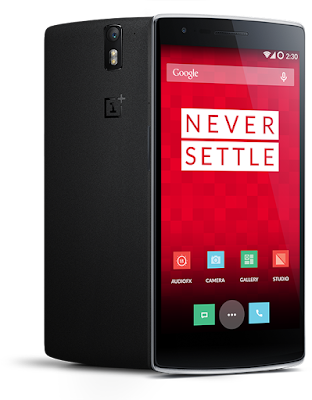
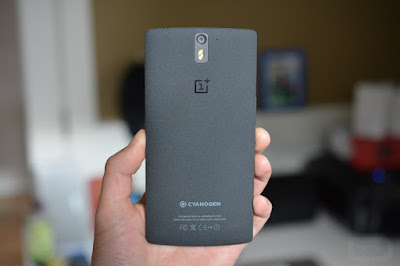
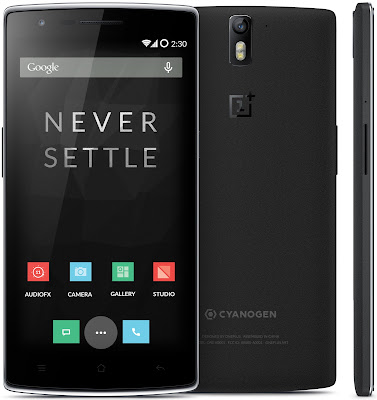
How to Update OnePlus to Cyanogen OS 13 1 ZNH2KAS1KN Android 6 0 1 Marshmallow Official Firmware
How to Update OnePlus to Cyanogen OS 13 1 ZNH2KAS1KN Android 6 0 1 Marshmallow Official Firmware

OnePlus One Cyanogen OS 13.1 custom ROM comes with tons of new features and is based on Android 6.0.1 Marshmallow with the all new Material Design. Several new apps have been redesigned and perform a lot faster on this phone. This update brings the following changes to your OnePlus One software:
View trending tweets on your lockscreen
Skype features built into the Phone app
New Cortana features
OneNote mod to take notes from anywhere in the OS
Microsoft Hyperlapse is also part of Cyanogen OS now..
Don’t worry we are going to share step by step guide to safely Update your OnePlus to Cyanogen OS 13.1 ZNH2KAS1KN Android 6.0.1 Marshmallow Official Firmware.
View my Flipboard Magazine.
÷ Prerequisites:
•This tutorial is only for installing Cyanogen OS 13.1 ZNH2KAS1KN software update on OnePlus One.
•You can also install this software update using stock recovery.
•This tutorial will wipe out all your data. Make sure you backup all your data in your phone before proceeding. If you do not want to wipe any data, skip step 6.
*Disclaimer:
Android Custom ROM fix ® provide various Firmware Updates and Rooting process along with Custom ROM,Modes,file are all belong to their owners/developers. The autor of this site or the developers are not responsible, if you damage or brick your device.Do it on your own risk and follow the instruction properly.
* Important:
Backup important files stored on your device before proceeding with the steps below, so that in case something goes wrong you’ll have backup of all your important files.
÷ How to Update OnePlus to Cyanogen OS 13.1 ZNH2KAS1KN Android 6.0.1 Marshmallow Official Firmware:÷ Prerequisites:
•This tutorial is only for installing Cyanogen OS 13.1 ZNH2KAS1KN software update on OnePlus One.
•You can also install this software update using stock recovery.
•This tutorial will wipe out all your data. Make sure you backup all your data in your phone before proceeding. If you do not want to wipe any data, skip step 6.
*Disclaimer:
Android Custom ROM fix ® provide various Firmware Updates and Rooting process along with Custom ROM,Modes,file are all belong to their owners/developers. The autor of this site or the developers are not responsible, if you damage or brick your device.Do it on your own risk and follow the instruction properly.
* Important:
Backup important files stored on your device before proceeding with the steps below, so that in case something goes wrong you’ll have backup of all your important files.
Step 1 – Download Cyanogen OS 13.1 ZNH2KAS1KN ROM for One to your computer.
Step 2 – Connect and mount your One USB memory to your computer using the USB cable.
Step 3 – Now copy/paste the downloaded Cyanogen OS 13.1 ROM zip file to your phone memory / SD card. Make sure the file is in the phone memory / SD card root (not in any folder).
Step 4 – Then turn OFF your phone and disconnect from the USB cable.
Step 5 – Now to get in the Recovery Mode. Switch ON the phone while pressing and holding Volume Down + Power buttons together.
Step 6 – Once you are in TWRP Recovery, perform a full data wipe by tapping on the ‘Wipe’ button. Then swipe on the “Swipe to Factory Reset” option at the bottom.
Step 7 – Now go back to the main menu and then tap on the ‘Install’ button. From the list, choose the ZIP file that you copied to your phone memory in Step 3.
Step 8 – Confirm installation on the next screen by swiping on the “Swipe to Confirm Flash” option. The installation procedure should start now.
Step 9 – Once the installation is completed.
Step 10 – You can now reboot your phone by selecting the “Reboot System” button.
Your One will boot now and it might take about 5 minutes to boot on your first time. So, please wait.
That’s it! Your OnePlus One should now have Cyanogen OS 13.1 ZNH2KAS1KN Android 6.0.1 Marshmallow official software update installed on your phone! Go to Settings > About phone to verify.
For More OnePlus One Updates Keep Checking Android Custom ROM Fix ™®
That’s all. We hope this guide serves you well. If there’s anything you’d like to be added/changed on this page, PLZ Use the comment box below to contribute more ideas & Suggestions .
Like this post? PLZ Hit the share buttons below to share this article with your friends on Facebook, Google + and Twitter.
Want the latest Updates Sign up for our newsletters!
PLZ Follow Us On Flipboard 4 More Latest Updates.
Best Regards.™
Available link for download
GPG Dragon Box Update v3 53c and Drivers Download free
GPG Dragon Box Update v3 53c and Drivers Download free
Download GPG Dragon Latest Update Version3.53c. it is a type of flashing tool throug which you can flash original Mobiles like Nokia, Samsung pattern lock etc..
GPG Dragon Box Latest Setup Version3.53cGPG
 Available link for download
Wednesday, February 15, 2017
How to Update Huawei Honor 7 PLK L01 to B370 Android 6 0 Marshmallow
How to Update Huawei Honor 7 PLK L01 to B370 Android 6 0 Marshmallow
Huawei Honor 7 (PLK-L01) New B370 update has released in Finland & based on Android 6.0 Marshmallow and Emotion UI 4.0, bumping the Android security patch level to June 1, 2016.

You Can find out how to apply it right now via this easy tutorial.
÷ Firmware Details:
- Device: Huawei Honor 7
- Model: PLK-L01
- Android: v6.0 Marshmallow
- EMUI: 4.0
- Firmware: B370
- Build: PLK-L01C432B370
- Custom Number: CUSTC432D001
- Security Patch Level: June 1, 2016
- Region: Europe
- Country: Finland
- Status: Official (stable)
- Type: Full firmware image
View my Flipboard Magazine.
÷ Prerequisites:
•This tutorial is only for Huawei Honor 7 (PLK-L01).
*Disclaimer:
Android Custom ROM fix ® provide various Firmware Updates and Rooting process along with Custom ROM,Modes,file are all belong to their owners/developers. The autor of this site or the developers are not responsible, if you damage or brick your device.Do it on your own risk and follow the instruction properly.
* Important:
Backup important files stored on your device before proceeding with the steps below, so that in case something goes wrong you’ll have backup of all your important files.

÷ How to Update Huawei Honor 7 (PLK-L01) to B370 Android 6.0 Marshmallow :
1- Download Huawei Honor 7 (PLK-L01) B370 Android 6.0 Marshmallow .
2- Extract the Zip package, copy “dload” folder to the external microSD card
3- Reboot your phone while holding Vol down + Vol up + Power. I do recommend that you take a full backup of your data before proceeding.

That’s it! Your Huawei Honor 7 (PLK-L01) should have B370 Marshmallow 6.0 OTA on your phone! Go to Settings > About phone to verify.
For More Huawei Honor 7 (PLK-L01) Updates Keep Checking Android Custom ROM Fix ®™
That’s all. We hope this guide serves you well. If there’s anything you’d like to be added/changed on this page, PLZ Use the comment box below to contribute more ideas & Suggestions .
Like this post? PLZ Hit the share buttons below to share this article with your friends on Facebook, Google + and Twitter.
Want the latest Updates Sign up for our newsletters!
PLZ Follow Us On Flipboard 4 More Latest Updates.
Best Regards.™
÷ Prerequisites:
•This tutorial is only for Huawei Honor 7 (PLK-L01).
*Disclaimer:
Android Custom ROM fix ® provide various Firmware Updates and Rooting process along with Custom ROM,Modes,file are all belong to their owners/developers. The autor of this site or the developers are not responsible, if you damage or brick your device.Do it on your own risk and follow the instruction properly.
* Important:
Backup important files stored on your device before proceeding with the steps below, so that in case something goes wrong you’ll have backup of all your important files.
÷ How to Update Huawei Honor 7 (PLK-L01) to B370 Android 6.0 Marshmallow :
1- Download Huawei Honor 7 (PLK-L01) B370 Android 6.0 Marshmallow .
2- Extract the Zip package, copy “dload” folder to the external microSD card
3- Reboot your phone while holding Vol down + Vol up + Power. I do recommend that you take a full backup of your data before proceeding.
That’s it! Your Huawei Honor 7 (PLK-L01) should have B370 Marshmallow 6.0 OTA on your phone! Go to Settings > About phone to verify.
For More Huawei Honor 7 (PLK-L01) Updates Keep Checking Android Custom ROM Fix ®™
That’s all. We hope this guide serves you well. If there’s anything you’d like to be added/changed on this page, PLZ Use the comment box below to contribute more ideas & Suggestions .
Like this post? PLZ Hit the share buttons below to share this article with your friends on Facebook, Google + and Twitter.
Want the latest Updates Sign up for our newsletters!
PLZ Follow Us On Flipboard 4 More Latest Updates.
Best Regards.™
Available link for download
Tuesday, February 14, 2017
How to Update Huawei GR5 KII L22 to Marshmallow 6 0 B310 Firmware
How to Update Huawei GR5 KII L22 to Marshmallow 6 0 B310 Firmware
Huawei GR5 KII-L22 Official Android 6.0 Marshmallow update (C636B310) is now available to download in Asian Pacific countries.

You can find out how to apply it right now via this easy tutorial.
You can find out how to apply it right now via this easy tutorial.
View my Flipboard Magazine.
÷ Prerequisites:
This firmware requires your phone to be running one of the following versions onboard already:
KII-L22C636B130
KII-L22C636B301.
*Disclaimer:
Android Custom ROM fix ® provide various Firmware Updates and Rooting process along with Custom ROM,Modes,file are all belong to their owners/developers. The autor of this site or the developers are not responsible, if you damage or brick your device.Do it on your own risk and follow the instruction properly.
* Important:
Backup important files stored on your device before proceeding with the steps below, so that in case something goes wrong you’ll have backup of all your important files.

÷ How to Update Huawei GR5 KII-L22 to Marshmallow 6.0 B310 Firmware :
1- Download Huawei GR5 KII-L22 Marshmallow 6.0 B310 Firmware zip package on your PC.
2- Extract the archive and transfer the “dload” folder to the external microSD card.
3-[Recommended] Take a full backup of your existing stuff.
4- Power your device off.
5- Now reboot while holding Volume down + Volume up + Power keys for a couple of seconds to initiate the upgrade.

That’s it! Your Huawei GR5 KII-L22 should now have Marshmallow 6.0 final B310 Firmware on your phone! Go to Settings > About phone to verify.
For More Huawei GR5 KII-L22 Updated Keep Checking Android Custom ROM Fix ™©
That’s all. We hope this guide serves you well. If there’s anything you’d like to be added/changed on this page, PLZ Use the comment box below to contribute more ideas & Suggestions .
Like this post? PLZ Hit the share buttons below to share this article with your friends on Facebook, Google + and Twitter.
Want the latest Updates Sign up for our newsletters!
PLZ Follow Us On Flipboard 4 More Latest Updates.
Best Regards.™
÷ Prerequisites:
This firmware requires your phone to be running one of the following versions onboard already:
KII-L22C636B130
KII-L22C636B301.
*Disclaimer:
Android Custom ROM fix ® provide various Firmware Updates and Rooting process along with Custom ROM,Modes,file are all belong to their owners/developers. The autor of this site or the developers are not responsible, if you damage or brick your device.Do it on your own risk and follow the instruction properly.
* Important:
Backup important files stored on your device before proceeding with the steps below, so that in case something goes wrong you’ll have backup of all your important files.
÷ How to Update Huawei GR5 KII-L22 to Marshmallow 6.0 B310 Firmware :
1- Download Huawei GR5 KII-L22 Marshmallow 6.0 B310 Firmware zip package on your PC.
2- Extract the archive and transfer the “dload” folder to the external microSD card.
3-[Recommended] Take a full backup of your existing stuff.
4- Power your device off.
5- Now reboot while holding Volume down + Volume up + Power keys for a couple of seconds to initiate the upgrade.
That’s it! Your Huawei GR5 KII-L22 should now have Marshmallow 6.0 final B310 Firmware on your phone! Go to Settings > About phone to verify.
For More Huawei GR5 KII-L22 Updated Keep Checking Android Custom ROM Fix ™©
That’s all. We hope this guide serves you well. If there’s anything you’d like to be added/changed on this page, PLZ Use the comment box below to contribute more ideas & Suggestions .
Like this post? PLZ Hit the share buttons below to share this article with your friends on Facebook, Google + and Twitter.
Want the latest Updates Sign up for our newsletters!
PLZ Follow Us On Flipboard 4 More Latest Updates.
Best Regards.™
Available link for download
Monday, February 13, 2017
2014 Volcano box Latest Update Setup 2 8 1 Free Download
2014 Volcano box Latest Update Setup 2 8 1 Free Download
Volcano box latest update Setup Version 2.8.1 now available AND Android Tool you can free download from here
download directly for free without waiting longer. This is the latest version Software setup.
Volcano Box 2.8.1 Small update Some Bugs Fixed now all china flashing problem solved
Whats new ?
Solve mtk Andriod SPD Andriod read/write bug
MTK6577?6582added new flash supported
SPD 6820/8810added new flash supported

Click below to download the Latest Volcano box Latest Update Setup 2.8.7
DOWNLOAD LINK: Click Here
Click below to download the Latest Volcano box Latest Update Setup 2.8.1
DOWNLOAD LINK: Click Here
Click below to download the Volcano box old Update Setup 2.5.9
DOWNLOAD LINK: Click Here
Available link for download
Thursday, February 9, 2017
How to Update Nexus 6 To Android 6 0 1 Marshmallow Chroma r 45 ROM
How to Update Nexus 6 To Android 6 0 1 Marshmallow Chroma r 45 ROM
According to XDA member zephik, Android 6.0.1 Marshmallow Chroma ROM is now available for Motorola Nexus 6 XT1112 [ shamu].

Chroma is a lightweight AOSP ROM focused on battery, performance and stability.
The philosophy of Chroma is to stay relatively close to Googles stock Marshmallow with the additions of essential features that should have been included with stock Marshmallow as well as providing the most up-to-date security patches.
÷ ROM Features:
Layers support
Native LED notifications (solid, limited to RGB colors)
Status Bar Customization:
Battery Style (Icon Portrait/Landscape, Circle, Text, Hide) and Battery Percentage
Clock & Date (Show/Hide, Color, Alignment, AM/PM, Show/Hide Date, Date Style, Date Format)
Brightness Control (long press status bar to change brightness)
Double-tap status bar to turn screen off
Show/hide notification count
Quick pull-down on left/right side to pull down tiles
Network traffic
Pressing on clock or date on status bar opens up Clock, Calendar
Status bar weather
Show/hide brightness slider
Navigation bar customization
Navigation bar height
Kill app back button
Double tap navigation bar to sleep
Clear all recents button (swipe down on recent apps and itll display on the bottom right)
Lock screen customization
Lock screen wallpaper
Power menu customization (power off, reboot, screenshot, airplane mode)
Advanced Reboot (reboot/soft reboot/recovery/bootloader)
Volume rocker customization:
Wake device with volume keys when screen off
Long press volume up/down keys to skip track when screen off
Other:
A large number of optimizations, memory leak fixes, security patches
Long press recents to swap back to previous app
Prevent camera shutter sound
... and more (see changelog).
÷ Prerequisites:
•This tutorial is only for installing S5 TouchWiz Port V4.4.1 ROM on Motorola Nexus 6 XT1112 [ shamu]. Please do not try on any other Nexus 6 variants.
•Your phone should be rooted and haveClockworkMod recovery installed from before.
•This tutorial will wipe out all your data.Proceed at your own risk.Perform a Dalvik Cache wipe before proceeding from the recovery mode.
•Make sure you backup all your data in your phone before proceeding.
View my Flipboard Magazine.
*Disclaimer:
Android Custom ROM fix ® provide various Firmware Updates and Rooting process along with Custom ROM,Modes,file are all belong to their owners/developers. The autor of this site or the developers are not responsible, if you damage or brick your device.Do it on your own risk and follow the instruction properly.
* Important:
Backup important files stored on your device before proceeding with the steps below, so that in case something goes wrong you’ll have backup of all your important files.
ROM Download & Installation Instructions via XDA
For More Motorola Nexus 6 XT1112 [ shamu] updates Keep Checking Android Custom ROM Fix™®
Like this post? PLZ Hit the share buttons below to share this article with your friends on Facebook, Google + and Twitter.
PLZ Follow Us On Flipboard 4 More Latest Updates.
PLZ Use the comment box below to contribute more ideas & Suggestions .
Best Regards.
Available link for download
How to Update OnePlus One to Android 6 0 1 Marshmallow SmartisanOS ROM
How to Update OnePlus One to Android 6 0 1 Marshmallow SmartisanOS ROM
OnePlus One SmartisanOS custom ROM comes with tons of new features and is based on Android 6.0.1 Marshmallow. A quick list of the main features in SmartisanOS is given below and we are sure you’d love to use this on your OnePlus One:
Android 6.0.1 Marshmallow.
Beautiful UI.
Fast & Smooth.
Stable....
Don’t worry we are going to share step by step guide to safely Update your OnePlus One to Android 6.0.1 Marshmallow SmartisanOS ROM:
Android 6.0.1 Marshmallow.
Beautiful UI.
Fast & Smooth.
Stable....
Don’t worry we are going to share step by step guide to safely Update your OnePlus One to Android 6.0.1 Marshmallow SmartisanOS ROM:
View my Flipboard Magazine.
÷ Prerequisites:
•This tutorial is only for installing Android 6.0.1 SmartisanOS ROM on OnePlus One. Please do not try on any other One variants.
•Your phone should have a custom recovery installed in order to install this SmartisanOS ROM on your phone.
•We will be using TWRP Recovery for this tutorial.
•This tutorial will wipe out all your data. Make sure you backup all your data in your phone before proceeding.
•Perform a Dalvik Cache wipe before proceeding from the Recovery Mode.
*Disclaimer:
Android Custom ROM fix ® provide various Firmware Updates and Rooting process along with Custom ROM,Modes,file are all belong to their owners/developers. The autor of this site or the developers are not responsible, if you damage or brick your device.Do it on your own risk and follow the instruction properly.
* Important:
Backup important files stored on your device before proceeding with the steps below, so that in case something goes wrong you’ll have backup of all your important files.
How to: Update OnePlus One to Android 6.0.1 Marshmallow SmartisanOS ROM:
Step 1 – Download Android 6.0.1 SmartisanOS ROM for One to your computer.
Step 2 – Connect and mount your OnePlus One USB memory to your computer using the USB cable.
Step 3 – Now copy/paste the downloaded Android 6.0.1 ROM zip file to your phone memory / SD card. Make sure the file is in the phone memory / SD card root (not in any folder).
Step 4 – Then turn OFF your phone and disconnect from the USB cable.
Step 5 – Now to get in the Recovery Mode. Switch ON the phone while pressing and holding Volume Down + Power buttons together.
Step 6 – Once you are in TWRP Recovery, perform a full data wipe by tapping on the ‘Wipe’ button. Then swipe on the “Swipe to Factory Reset” option at the bottom.
Step 7 – Now go back to the main menu and then tap on the ‘Install’ button. From the list, choose the ZIP file that you copied to your phone memory in Step 3.
Step 8 – Confirm installation on the next screen by swiping on the “Swipe to Confirm Flash” option. The installation procedure should start now.
Step 9 – Once the installation is completed.
Step 10 – Tap on the “Wipe cache/dalvik” button if you get into any boot loops or other issues.
Step 11 – You can now reboot your phone by selecting the “Reboot System” button.
Your One will boot now and it might take about 5 minutes to boot on your first time after flashing a new ROM. So, please wait.
That’s it! Your OnePlus One should now have Android 6.0.1 SmartisanOS Marshmallow custom ROM installed on your phone! Go to Settings > About phone to verify.
For More OnePlus One Updates Keep Checking Android Custom ROM Fix ™®
That’s all. We hope this guide serves you well. If there’s anything you’d like to be added/changed on this page, PLZ Use the comment box below to contribute more ideas & Suggestions .
Like this post? PLZ Hit the share buttons below to share this article with your friends on Facebook, Google + and Twitter.
Want the latest Updates Sign up for our newsletters!
PLZ Follow Us On Flipboard 4 More Latest Updates.
Best Regards.™
Available link for download
Monday, February 6, 2017
Huawei p8 GRA L09 C109B190 Marshmallow update
Huawei p8 GRA L09 C109B190 Marshmallow update
Hello, just want to know how to update my phone to Marshmallow?
Model: Huawei GRA-L09
Build: GRA-L09 C109B190
Android version: 5.0.2
EMUI version: EMUI 3.1
Thank you so much in advance :D :D :D
Model: Huawei GRA-L09
Build: GRA-L09 C109B190
Android version: 5.0.2
EMUI version: EMUI 3.1
Thank you so much in advance :D :D :D
from xda-developers http://ift.tt/2akwdB0
via IFTTT
Available link for download
Chimera tool update V8 34 1902 Full Installer Download
Chimera tool update V8 34 1902 Full Installer Download
Chimera tool latest update version V8.34.1902 full official installer free download. Chimera tool latest update is released and ready to free download. Chimera tool new setup full installer you can free download from its official download link. Follow the provided official download link to download chimera tool latest setup full installer. Chimera tool latest setup full installer is completely free from chimera tool developer team.
Chimera tool update V8.34.1902 This is not crack its original service software.
Chimera tool update V8.34.1902 This is not crack its original service software.
Dear Chimera Users,
We have updated Chimera Tool!
Latest version: V8.34.1902
Release Date: 14/11/2015
- Current application version
- Last version was on: 2015-11-14 16:04:16
- Version: V8.34.1902
- Size: 41.05 MB
- System requirements
- 32-bit: Windows Vista, XP, 2000, Windows 7
- 64-bit: Windows Vista, Windows 7
- RAM 2Gb, HDD 100Mb
- USB 2.0
- Other
- You must have active internet connection to use the program.

Direct Unlock, Repair Imei, Download/Flash Firmware, Store/Restore Backup:
Samsung Galaxy Core Prime VE Duos - SM-G361HU
Samsung Galaxy Young 2 Duos - SM-G130BU
Samsung Galaxy Tab E 9.6 - SM-T561
Direct Unlock, Download/Flash Firmware, Store/Restore Backup:
Samsung Galaxy J1 Ace Duos - SM-J110G
Samsung Galaxy J1 Ace - SM-J110M
Samsung Galaxy Note 4 - SM-N910C
Samsung Galaxy Note 4 - SM-N910H
Samsung Galaxy Mega 2 - SM-G750A
Samsung Galaxy Mega 2 - SM-G750F
Samsung Galaxy A7 - SM-A700F
Direct Unlock, Download/Flash Firmware, Store/Restore Backup, Network Repair:
Samsung Galaxy Tab Active - SM-T365
Samsung Galaxy A5 Duos - SM-A5000
Samsung Galaxy A5 - SM-A500S
Samsung Galaxy Core Prime - SM-G360FY
Samsung Galaxy Note 3 Neo - SM-N750S
Samsung Galaxy Grand 3 Duos - SM-G7200
Samsung Galaxy Tab A 8.0 - SM-P355M
Direct Unlock, Read/Write Cert, Download/Flash Firmware, Store/Restore Backup:
Samsung Galaxy S6 Edge - SM-G925L
Samsung Galaxy J7 - SM-J700M
Samsung Galaxy Alpha - SM-G850F
Samsung Galaxy Alpha - SM-G850FQ
Samsung Galaxy Alpha - SM-G850M
Samsung Galaxy Alpha - SM-G850Y
Samsung Galaxy S5 - SM-G900H
Samsung Galaxy Note 4 - SM-N910U
Samsung Galaxy Note 3 Neo - SM-N750
Samsung Galaxy Note 3 Neo - SM-N7500Q
Samsung Galaxy Note 3 Neo - SM-N7505
Samsung Galaxy Note 3 Neo - SM-N7505L
Samsung Galaxy Note 3 Neo - SM-N7507
Samsung Galaxy Note 3 - SM-N900
Samsung Galaxy Note 3 - SM-N9000Q
Samsung Galaxy Note 10.1 2014 - SM-P601
Samsung Galaxy Note 10.1 2014 - SM-P602
Samsung Galaxy Note Pro 12.2 - SM-P901
Samsung Galaxy Tab S 8.4 - SM-T705
Samsung Galaxy Tab S 8.4 - SM-T705M
Samsung Galaxy Tab S 8.4 - SM-T705W
Samsung Galaxy Tab S 8.4 - SM-T705Y
Samsung Galaxy Tab S 8.4 - SM-T707A
Samsung Galaxy Tab S 10.5 - SM-T805
Samsung Galaxy Tab S 10.5 - SM-T805M
Samsung Galaxy Tab S 10.5 - SM-T805W
Samsung Galaxy Tab S 10.5 - SM-T805Y
Samsung Galaxy Tab S 10.5 - SM-T807A
Samsung Galaxy Tab S 10.5 - SM-T807T
Samsung Galaxy Tab 3 10.1 - GT-P5220
Samsung Galaxy K Zoom - SM-C111
Samsung Galaxy K Zoom - SM-C111M
Samsung Galaxy K Zoom - SM-C115
Samsung Galaxy K Zoom - SM-C115M
Samsung Galaxy K Zoom - SM-C115W
Chimera tool Setup file size 41.5 MB
Click here to Direct Download
Available link for download
Friday, February 3, 2017
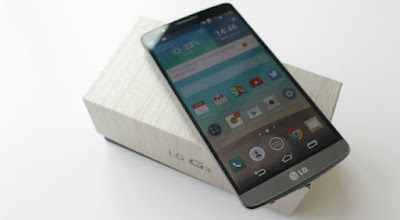
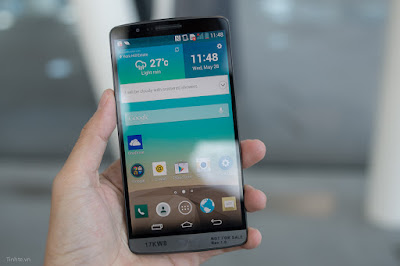
How to Root Verizon LG G3 on 47A Marshmallow Update
How to Root Verizon LG G3 on 47A Marshmallow Update
Thanks to the folks over at xda, we (at-least) still have a way to root Verizon LG G3 even on the latest 47A Marshmallow update. Cheers!

You can have root access on the Verizon G3’s latest update with software version 47a, but the procedure isn’t a pretty one. Rooting 47A firmware requires downgrading back to 10B first, then achieve root using Stump and then install TWRP and flash the bootstack from version 35B, and then finally flash a 47A stock ROM (or any custom 47A ROM) from TWRP.
View my Flipboard Magazine.
÷ Prerequisites:
This tutorial is only for Rooting Verizon G3 on latest 47A Marshmallow update Please do not try on any other LG G3 variants.
*Disclaimer:
Android Custom ROM fix ® provide various Firmware Updates and Rooting process along with Custom ROM,Modes,file are all belong to their owners/developers. The autor of this site or the developers are not responsible, if you damage or brick your device.Do it on your own risk and follow the instruction properly.
* Important:
Backup important files stored on your device before proceeding with the steps below, so that in case something goes wrong you’ll have backup of all your important files.
÷ How to Root Verizon LG G3 on 47A Marshmallow Update:
1- Flash 10B firmware:
Step1- Download the Verizon G3 10B KDZ firmware file to your PC from the downloads section above.
Step2- Flash the 10B firmware KDZ to your Verizon G3.
For help, follow our detailed guide ? How to Flash KDZ firmware on LG Devices.
2- Root 10B firmware using StumpRoot: Once you’re on 10B firmware, do the following:
Step 3- Download the StumpRoot apk from the links above and install it on your Verizon G3.
Step 4- Open the app and tap the Grind button to execute root exploit.
Step5- Restart your G3 when prompted.
3- Install SuperSU and TWRP Recovery:
Step 5- Once you’ve successfully rooted your Verizon G3 on 10B firmware, install the SuperSU app from Play Store to manage superuser permission and TWRP Manager app to download/install TWRP recovery.
Step 6- Now download/transfer the 35B Bootstack zip file and 47A firmware zip file to your Verizon G3’s internal storage.
Step 7- Boot into TWRP recovery and perform a simple factory reset.
Step 8- Install/Flash the 35B Bootstack zip file from TWRP recovery.
Step 9- Perform a wipe data/cache from within the recovery.
Step 10- Install/Flash the 47A firmware zip file from TWRP recovery.
Step 11- Reboot device.
? If TWRP asks to install SuperSU, DENY IT.
That’s all. Your Verizon G3 should be rooted now, running on firmware 47A.
For More LG G3 Updates Keep Checking Android Custom ROM Fix ™®
That’s all. We hope this guide serves you well. If there’s anything you’d like to be added/changed on this page, PLZ Use the comment box below to contribute more ideas & Suggestions .
Like this post? PLZ Hit the share buttons below to share this article with your friends on Facebook, Google + and Twitter.
Want the latest Updates Sign up for our newsletters!
PLZ Follow Us On Flipboard 4 More Latest Updates.
Best Regards.™
Available link for download
How to Update Xperia Z3 to Android 6 0 1 Marshmallow LinuXRoM Fast Smooth
How to Update Xperia Z3 to Android 6 0 1 Marshmallow LinuXRoM Fast Smooth
Sony Xperia Z3 LinuXRoM custom ROM comes with tons of new features and is based on Android 6.0.1 Marshmallow . A quick list of the main features in LinuXRoM is given below and we are sure you’d love to use this on your Xperia Z3:
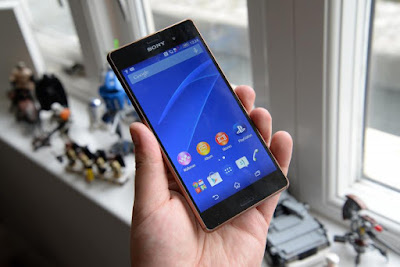
Android 6.0.1 Marshmallow.
Xperia X System UI.
Fast & Smooth.
Stable...
You can find out how to apply it right now via this easy tutorial.
Android 6.0.1 Marshmallow.
Xperia X System UI.
Fast & Smooth.
Stable...
You can find out how to apply it right now via this easy tutorial.
View my Flipboard Magazine.
÷ Prerequisites:
•This tutorial is only for installing Android 6.0.1 LinuXRoM ROM on Sony Xperia Z3. Please do not try on any other Xperia Z3 variants.
•Your phone should be rooted and have ClockworkMod recovery installed from before.
•This tutorial will wipe out all your data. Proceed at your own risk.
•Perform a Dalvik Cache wipe before proceeding from the recovery mode.
•Sony PC Companion will NOT detect your phone after installing this ROM because it is a custom firmware.
•Bootloader should be unlocked or you will not be able to install this ROM.
•Make sure you backup all your data in your phone before proceeding.
*Disclaimer:
Android Custom ROM fix ® provide various Firmware Updates and Rooting process along with Custom ROM,Modes,file are all belong to their owners/developers. The autor of this site or the developers are not responsible, if you damage or brick your device.Do it on your own risk and follow the instruction properly.
* Important:
Backup important files stored on your device before proceeding with the steps below, so that in case something goes wrong you’ll have backup of all your important files.
 ÷ How to Update Xperia Z3 to Android 6.0.1 Marshmallow LinuXRoM [ Fast & Smooth]
Step 1 – Download LinuXRoM Android 6.0.1 ROM for Sony Xperia Z3 to your computer and extract boot.img from the zip file separately.
Step 2 – Connect and mount your Sony Xperia Z3 USB (mass) memory on your computer using the USB cable.
Step 3 – Now copy/paste the downloaded Android 6.0.1 ROM zip file to your SD card. Make sure the file is in the SD card root.
Step 4 – Copy/paste the boot.img file to android-sdk-windowsplatform-tools directory.
Step 5 – Then turn OFF your phone.
Step 6 – Now to get into the Bootloader Mode. Press and hold the Volume Up button while connecting it again with the USB cable. Your phone LED will turn blue and it will get into the Bootloader Mode.
Step 7 – Once in the Fastboot mode (on your phone), navigate to android-sdk-windowsplatform-tools directory (on your computer) and open Command Prompt (Shift + Right-click > Open Command Prompt).
Step 8 – Type the following command and press Enter.
fastboot flash boot boot.img
Step 9 – Then, type the following command and press Enter.
fastboot reboot
Step 10 – Now to get in the Recovery Mode. Switch ON the phone while pressing the Volume Up or Volume Down buttons a few times when you see the LED light turn pink or any other colour.
Step 11 – Once you are in ClockworkMod Recovery, select perform a full data wipe by selecting “wipe data/factory reset” . Use the Power button to select everything while in the Recovery Mode.
Step 12 – Then, perform a cache wipe by selecting “wipe cache partition”.
Step 13 – Now this is optional, but it is recommended to perform a wipe of your dalvik cache as well. You will not get into boot loops or any other errors. From CWM recovery, go to ‘advanced’ and then select “wipe dalvik cache”.
Step 14 – Then go back to the main recovery screen and select “install zip from SD card”.
Step 15 – Now select “choose zip from sdcard”. Using your volume keys, navigate to the Android 6.0.1 ROM zip file that you copied to your SD card and select it using the Power button. Confirm the installation on the next screen and the installation procedure should start now.
Step 16 – After the installation completes, go to “+++++Go Back+++++” and reboot the phone by selecting “reboot system now” from the recovery menu.

Your Xperia Z3 will boot now and it might take about 5 minutes to boot on your first time. So, please wait.
That’s it! Your Xperia Z3 should now have Android 6.0.1 LinuXRoM Marshmallow custom ROM installed on your phone! Go to Settings > About phone to verify.
For MoreXperia Z3 latest updates Keep Checking Android Custom ROM Fix™®
That’s all. We hope this guide serves you well. If there’s anything you’d like to be added/changed on this page, PLZ Use the comment box below to contribute more ideas & Suggestions .
Like this post? PLZ Hit the share buttons below to share this article with your friends on Facebook, Google + and Twitter.
Want the latest Updates Sign up for our newsletters!
PLZ Follow Us On Flipboard 4 More Latest Updates.
Best Regards.™
÷ Prerequisites:
•This tutorial is only for installing Android 6.0.1 LinuXRoM ROM on Sony Xperia Z3. Please do not try on any other Xperia Z3 variants.
•Your phone should be rooted and have ClockworkMod recovery installed from before.
•This tutorial will wipe out all your data. Proceed at your own risk.
•Perform a Dalvik Cache wipe before proceeding from the recovery mode.
•Sony PC Companion will NOT detect your phone after installing this ROM because it is a custom firmware.
•Bootloader should be unlocked or you will not be able to install this ROM.
•Make sure you backup all your data in your phone before proceeding.
*Disclaimer:
Android Custom ROM fix ® provide various Firmware Updates and Rooting process along with Custom ROM,Modes,file are all belong to their owners/developers. The autor of this site or the developers are not responsible, if you damage or brick your device.Do it on your own risk and follow the instruction properly.
* Important:
Backup important files stored on your device before proceeding with the steps below, so that in case something goes wrong you’ll have backup of all your important files.
Step 1 – Download LinuXRoM Android 6.0.1 ROM for Sony Xperia Z3 to your computer and extract boot.img from the zip file separately.
Step 2 – Connect and mount your Sony Xperia Z3 USB (mass) memory on your computer using the USB cable.
Step 3 – Now copy/paste the downloaded Android 6.0.1 ROM zip file to your SD card. Make sure the file is in the SD card root.
Step 4 – Copy/paste the boot.img file to android-sdk-windowsplatform-tools directory.
Step 5 – Then turn OFF your phone.
Step 6 – Now to get into the Bootloader Mode. Press and hold the Volume Up button while connecting it again with the USB cable. Your phone LED will turn blue and it will get into the Bootloader Mode.
Step 7 – Once in the Fastboot mode (on your phone), navigate to android-sdk-windowsplatform-tools directory (on your computer) and open Command Prompt (Shift + Right-click > Open Command Prompt).
Step 8 – Type the following command and press Enter.
fastboot flash boot boot.img
Step 9 – Then, type the following command and press Enter.
fastboot reboot
Step 10 – Now to get in the Recovery Mode. Switch ON the phone while pressing the Volume Up or Volume Down buttons a few times when you see the LED light turn pink or any other colour.
Step 11 – Once you are in ClockworkMod Recovery, select perform a full data wipe by selecting “wipe data/factory reset” . Use the Power button to select everything while in the Recovery Mode.
Step 12 – Then, perform a cache wipe by selecting “wipe cache partition”.
Step 13 – Now this is optional, but it is recommended to perform a wipe of your dalvik cache as well. You will not get into boot loops or any other errors. From CWM recovery, go to ‘advanced’ and then select “wipe dalvik cache”.
Step 14 – Then go back to the main recovery screen and select “install zip from SD card”.
Step 15 – Now select “choose zip from sdcard”. Using your volume keys, navigate to the Android 6.0.1 ROM zip file that you copied to your SD card and select it using the Power button. Confirm the installation on the next screen and the installation procedure should start now.
Step 16 – After the installation completes, go to “+++++Go Back+++++” and reboot the phone by selecting “reboot system now” from the recovery menu.
Your Xperia Z3 will boot now and it might take about 5 minutes to boot on your first time. So, please wait.
That’s it! Your Xperia Z3 should now have Android 6.0.1 LinuXRoM Marshmallow custom ROM installed on your phone! Go to Settings > About phone to verify.
For MoreXperia Z3 latest updates Keep Checking Android Custom ROM Fix™®
That’s all. We hope this guide serves you well. If there’s anything you’d like to be added/changed on this page, PLZ Use the comment box below to contribute more ideas & Suggestions .
Like this post? PLZ Hit the share buttons below to share this article with your friends on Facebook, Google + and Twitter.
Want the latest Updates Sign up for our newsletters!
PLZ Follow Us On Flipboard 4 More Latest Updates.
Best Regards.™
Available link for download
Subscribe to:
Comments (Atom)