Thursday, February 9, 2017
How to Update Nexus 6 To Android 6 0 1 Marshmallow Chroma r 45 ROM
How to Update Nexus 6 To Android 6 0 1 Marshmallow Chroma r 45 ROM
According to XDA member zephik, Android 6.0.1 Marshmallow Chroma ROM is now available for Motorola Nexus 6 XT1112 [ shamu].

Chroma is a lightweight AOSP ROM focused on battery, performance and stability.
The philosophy of Chroma is to stay relatively close to Googles stock Marshmallow with the additions of essential features that should have been included with stock Marshmallow as well as providing the most up-to-date security patches.
÷ ROM Features:
Layers support
Native LED notifications (solid, limited to RGB colors)
Status Bar Customization:
Battery Style (Icon Portrait/Landscape, Circle, Text, Hide) and Battery Percentage
Clock & Date (Show/Hide, Color, Alignment, AM/PM, Show/Hide Date, Date Style, Date Format)
Brightness Control (long press status bar to change brightness)
Double-tap status bar to turn screen off
Show/hide notification count
Quick pull-down on left/right side to pull down tiles
Network traffic
Pressing on clock or date on status bar opens up Clock, Calendar
Status bar weather
Show/hide brightness slider
Navigation bar customization
Navigation bar height
Kill app back button
Double tap navigation bar to sleep
Clear all recents button (swipe down on recent apps and itll display on the bottom right)
Lock screen customization
Lock screen wallpaper
Power menu customization (power off, reboot, screenshot, airplane mode)
Advanced Reboot (reboot/soft reboot/recovery/bootloader)
Volume rocker customization:
Wake device with volume keys when screen off
Long press volume up/down keys to skip track when screen off
Other:
A large number of optimizations, memory leak fixes, security patches
Long press recents to swap back to previous app
Prevent camera shutter sound
... and more (see changelog).
÷ Prerequisites:
•This tutorial is only for installing S5 TouchWiz Port V4.4.1 ROM on Motorola Nexus 6 XT1112 [ shamu]. Please do not try on any other Nexus 6 variants.
•Your phone should be rooted and haveClockworkMod recovery installed from before.
•This tutorial will wipe out all your data.Proceed at your own risk.Perform a Dalvik Cache wipe before proceeding from the recovery mode.
•Make sure you backup all your data in your phone before proceeding.
*Disclaimer:
Android Custom ROM fix ® provide various Firmware Updates and Rooting process along with Custom ROM,Modes,file are all belong to their owners/developers. The autor of this site or the developers are not responsible, if you damage or brick your device.Do it on your own risk and follow the instruction properly.
* Important:
Backup important files stored on your device before proceeding with the steps below, so that in case something goes wrong you’ll have backup of all your important files.
ROM Download & Installation Instructions via XDA
For More Motorola Nexus 6 XT1112 [ shamu] updates Keep Checking Android Custom ROM Fix™®
Like this post? PLZ Hit the share buttons below to share this article with your friends on Facebook, Google + and Twitter.
PLZ Follow Us On Flipboard 4 More Latest Updates.
PLZ Use the comment box below to contribute more ideas & Suggestions .
Best Regards.
Available link for download

Monday, January 30, 2017
How to Root Nexus 6 Running Android N NPD90G Developer Preview 5
How to Root Nexus 6 Running Android N NPD90G Developer Preview 5

The latest Android N Developer Preview 5 NPD90G is the next upcoming major firmware release by Google. It brings some new features like multi-window mode, an enhanced doze mode, a revamped Settings screen and a quick toggle in the notifications panel. Other changes include improved notifications, improved multitasking and app switching, dark mode etc...
÷ Prerequisites:
•This root method is only for Android N (NPD90G) installed on Nexus 6 and I am not sure if it will work on the other variants of the Nexus 6 on other carriers.
•Your Nexus 6 bootloader should be unlocked.
Nexus 6 should be on Android N NPD90G software version.
•Make a Nandroid backup of your previous phone set up before proceeding – for just in case anything goes wrong.
*Disclaimer:
Android Custom ROM fix ® provide various Firmware Updates and Rooting process along with Custom ROM,Modes,file are all belong to their owners/developers. The autor of this site or the developers are not responsible, if you damage or brick your device.Do it on your own risk and follow the instruction properly.
* Important:
Backup important files stored on your device before proceeding with the steps below, so that in case something goes wrong you’ll have backup of all your important files.

÷ How to Root Nexus 6 Running Android N (NPD90G) Developer Preview 5.
Step 1 – Download Android SDK from the Android Developers website and install. Also set it up with downloading platform-tools and USB drivers package in SDK.
Step 2 – Enable USB Debugging mode in your Nexus 6.
Step 3 – Download Fastboot from the following links depending on your OS and extract it in android-sdk-windowsplatform-tools directory. Create directory if not already there.
Windows: Download here
Mac: Download here.
Linux: Download here.
NOTE: Skip Steps 1, 2, 3 if you already have them.
Step 4 – Download SuperSU v2.71 for Nexus 6 on your PC, if you haven’t already.
Step 5 – Connect and mount your Nexus 6 USB memory on your computer using the USB cable.
Step 6 – Now copy/paste the BETA-SuperSU-v2.71-20160331103524.zip file to your SD card. Make sure the file is in the SD card / internal storage root (not in any folder).
Step 7 – Then turn OFF your phone.
Step 8 – twrp-3.0.0-0-shamu.img and save it to your android-sdk-windowsplatform-tools directory on your computer.
Step 9 – Now go into Fastboot/Bootloader Mode on Nexus 6. How? Press Volume Down + Power keys for a few seconds till you see some text on the screen. This is Bootloader Mode.
Step 10 – Navigate to android-sdk-windowsplatform-tools directory and open Command Prompt (Shift + Right-click > Open Command Prompt).
Step 11 – Type in the following command and press Enter.
fastboot flash recovery twrp-3.0.0-0-shamu.img
Step 12 – Once completed, choose RECOVERY from the Fastboot menu and enter Recovery Mode.
Step 13 – In ClockworkMod recovery, scroll down to “flash zip from SD card” and press the power button to select it.
Step 14 – Press the Power button again and select “choose zip from sdcard”.
Step 15 – Now using your volume keys, navigate to BETA-SuperSU-v2.71-20160331103524.zip and select it using the Power button. Confirm the installation on the next screen and the installation procedure should start now.
Step 16 – After the installation completes, go to “+++++Go Back” and reboot the phone by selecting “reboot system now” from the Recovery menu. The phone will boot now and it might take about 5 minutes to boot on your first time. So, please wait.

That’s it! Your Nexus 6 is now rooted on Android N Developer Preview 5 firmware on your phone! Check for the SuperSU app in your apps list to verify.
For More Nexus 6 latest updates Keep Checking Android Custom ROM Fix™®
That’s all. We hope this guide serves you well. If there’s anything you’d like to be added/changed on this page, PLZ Use the comment box below to contribute more ideas & Suggestions .
Like this post? PLZ Hit the share buttons below to share this article with your friends on Facebook, Google + and Twitter.
Want the latest Updates Sign up for our newsletters!
PLZ Follow Us On Flipboard 4 More Latest Updates.
Best Regards.™
Available link for download
Sunday, January 29, 2017
Deal Alert B H Best Buy and Newegg offer up to 130 off the Nexus 5X 100 off the 6P
Deal Alert B H Best Buy and Newegg offer up to 130 off the Nexus 5X 100 off the 6P

Nexus 5X - note that different colors have different discounts. The best deal is the white or black 32GB version for $269.
Read More[Deal Alert] B&H, Best Buy, and Newegg offer up to $130 off the Nexus 5X, $100 off the 6P was written by the awesome team at Android Police.


from Android Police – Android News, Apps, Games, Phones, Tablets http://ift.tt/2aEz2sJ
via IFTTT
Available link for download
Thursday, December 29, 2016
Google Store sale offering discounts on Nexus 6P Huawei Watch and more
Google Store sale offering discounts on Nexus 6P Huawei Watch and more

It’s about time for students to head back to school, and to make the return easier, Google is offering discounts on several of the products in its store.
The Google Store is running a sale on Android hardware, Chromecasts, and Chromebooks. On the Android side, you can score $100 off a Nexus 6P, meaning that the device starts at $399. The Nexus 6P discount will be available through August 13.

from PhoneDog.com - Latest videos, reviews, articles, news and posts http://ift.tt/2a9fiLY
via IFTTT
Available link for download
Friday, December 16, 2016
Get a refurbished Nexus 6P for 318 99
Get a refurbished Nexus 6P for 318 99

We regularly see deals on the Nexus 5X, but there aren’t quite as many for the larger Nexus 6P. Today’s a good day for phablet fans, though, because there’s now a pretty nice sale on the 6P.

from PhoneDog.com - Latest videos, reviews, articles, news and posts http://ift.tt/2a6dPtZ
via IFTTT
Available link for download
Charging Nexus 6P through an adapter
Charging Nexus 6P through an adapter
from xda-developers http://ift.tt/2ahicBh
via IFTTT
Available link for download
Thursday, December 15, 2016
How to Install Android 6 0 1 Marshmallow Pure White ROM on Nexus 5
How to Install Android 6 0 1 Marshmallow Pure White ROM on Nexus 5
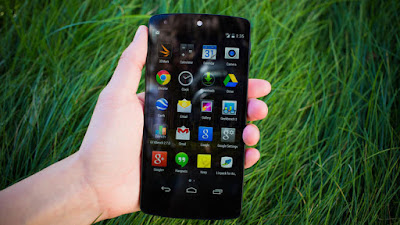
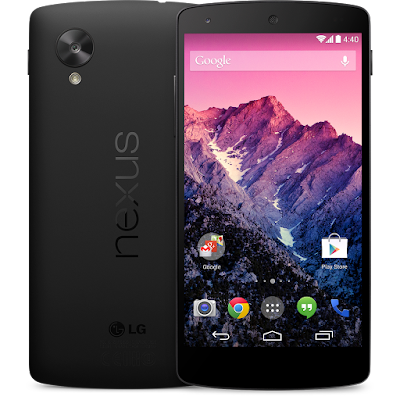
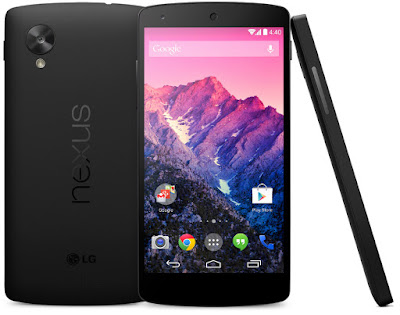
Nexus 5 Pure White custom ROM comes with tons of new features and is based on Android 6.0.1 Marshmallow. A quick list of the main features in Pure White is given below and we are sure you’d love to use this on your Nexus 5:
Base Factory Image Google MOB30P 6.0.1
Layers fully supported
Odex
Stock kernel MOB30P
Ads disabled
Audio enhancements
New Statusbar icon
New Softkey
Ambient display
N notifications
Reduced navbar
Used daily~super stable
General improvements
Google home
Google now
LockClock
Apollo music
Aosp Browser
GoogleCamera
Gallery Aosp
Video Player
Aosp keyboard
Aosp calendar
Calendar sync
Omni calendar widget
Aosp Mms
Aosp email
Stk sim....
÷ Prerequisites:
•This Android 6.0.1 Pure White ROM tutorial is only for Nexus 5 (hammerhead) and I am not sure if it will work on the other variants of the Nexus 5 on other carriers.
•Make sure your phone is rooted and has a custom recovery like ClockworkMod installed.
•Make a Nandroid backup of your previous phone set up before proceeding – for just in case anything goes wrong.
*Disclaimer:
Android Custom ROM fix ® provide various Firmware Updates and Rooting process along with Custom ROM,Modes,file are all belong to their owners/developers. The autor of this site or the developers are not responsible, if you damage or brick your device.Do it on your own risk and follow the instruction properly.
* Important:
Backup important files stored on your device before proceeding with the steps below, so that in case something goes wrong you’ll have backup of all your important files.
÷ How to Install Android 6.0.1 Marshmallow Pure White ROM on Nexus 5 :
Step 1 – Download Android 6.0.1 Pure White ROM for Nexus 5 on your PC, if you haven’t already.
Step 2 – Connect and mount your Nexus 5 USB memory on your computer using the USB cable.
Step 3 – Now copy/paste the downloaded Android 6.0.1 ROM zip file to your internal SD card. Make sure the file is in the SD card root (not in any folder).
Step 4 – Then turn OFF your phone and disconnect from the USB cable.
Step 5 – Now to get in the Bootloader Mode. Turn ON the phone while pressing and holding the Volume Up + Volume Down and Power buttons.
Step 6 – Follow the navigation instructions on the screen. Select BOOTLOADER and then go to RECOVERY.
Step 7 – Once you are in ClockworkMod Recovery, select perform a full data wipe by selecting “wipe data/factory reset”. Use the Power button to select everything while in the Recovery Mode.
Step 8 – Then, perform a cache wipe by selecting “wipe cache partition” .
Step 9 – Now this is optional, but it is recommended to perform a wipe of your dalvik cache as well. You will not get into boot loops or any other errors. From CWM recovery, go to ‘advanced’ and then select “wipe dalvik cache”.
Step 10 – Then go back to the main recovery screen and select “install zip from SD card”.
Step 11 – Now select “choose zip from sdcard”. Using your volume keys, navigate to the Android 6.0.1 ROM zip file that you copied to your SD card and select it using the Power button. Confirm the installation on the next screen and the installation procedure should start now.
Step 12 – After the installation completes, go to “+++++Go Back+++++” and reboot the phone by selecting “reboot system now” from the recovery menu .
Your Nexus 5 will boot now and it might take about 5 minutes to boot on your first time. So, please wait.
That’s it! Your Nexus 5 should now have Android 6.0.1 Pure White Marshmallow custom ROM installed on your phone! Go to Settings > About phone to verify.
For More Nexus 5 Updates Keep Checking Android Custom ROM Fix ™®
That’s all. We hope this guide serves you well. If there’s anything you’d like to be added/changed on this page, PLZ Use the comment box below to contribute more ideas & Suggestions .
Like this post? PLZ Hit the share buttons below to share this article with your friends on Facebook, Google + and Twitter.
Want the latest Updates Sign up for our newsletters!
PLZ Follow Us On Flipboard 4 More Latest Updates.
Best Regards.™
Available link for download
Thursday, December 1, 2016
24 hour deal Nexus 6P phone case selfie stick and 25 gift card for only 399!
24 hour deal Nexus 6P phone case selfie stick and 25 gift card for only 399!

Looking for a new high-end smartphone? Though the Nexus 6P is aging and the new Nexus line-up is coming up, this device has been one of the most well-received pure Google devices. Many still consider it the best Android smartphone around, and popular online retailer is sweetening the deal with a very enticing offer.
You can currently buy the Nexus 6P from the official Google Store for $499, which is a fair price, but still not too easy to swallow. Instead, you can go with Newegg and save yourself $100. The retailer is selling the latest flagship Nexus for $399, but that is not all you are getting with this offer. Additionally, Newegg is throwing in a $25 gift card for their website, a phone case and a selfie stick.
- Nexus 6P review
- Best Nexus 6P cases
The Nexus 6P comes with everything you need from a smartphone, including a 5.7-inch QHD AMOLED display, a snappy Qualcomm Snapdragon 810 processor, 3 GB of RAM, 32 GB of internal storage, a 12.3 MP rear camera, an 8 MP front shooter and a large 3450 mAh battery.
Interested? You best act fast, because this deal will only be around for 24 hours, this Sunday. The offer starts this July 24th at 12 AM Pacific and extends until 11:59 PM Pacific, the same day. The only catch is that there is a 2-unit purchase limit per customer.
Are any of you signing up?
from Android Authority http://ift.tt/29W8YbS
via IFTTT
Available link for download
Tuesday, November 22, 2016
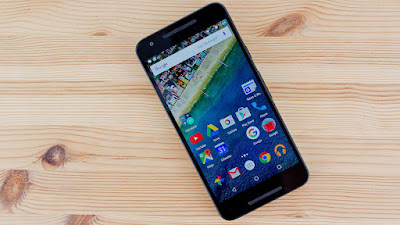
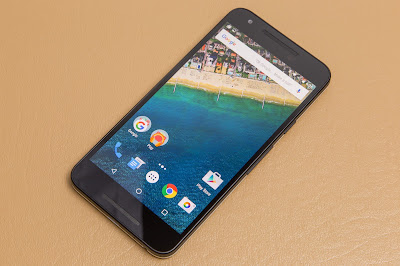
How to Update Nexus 5X to Official Android N NPD90G Developer Preview 5
How to Update Nexus 5X to Official Android N NPD90G Developer Preview 5
Android N Developer Preview 5 is now available for the Nexus 5X, Nexus 6 and Nexus 9 phones. These are the major changes in Preview 2 release of Android N, as per Google:
As we close in on the public rollout of Android 7.0 Nougat to devices later this summer, today we’re releasing Developer Preview 5, the last milestone of this preview series. Last month’s Developer Preview included the final APIs for Nougat; this preview gives developers the near-final system updates for all of the supported preview devices, helping you get your app ready for consumers.
÷ Prerequisites:
•This tutorial is only for LG Nexus 5X and we are not sure if it will work on the other variants of the Nexus 5X on other carriers.
•Your phone can be on any previous Android version or even on a custom ROM. It doesn’t matter at all. This tutorial will still work for installing Android N Developer Preview 5.
*Disclaimer:
Android Custom ROM fix ® provide various Firmware Updates and Rooting process along with Custom ROM,Modes,file are all belong to their owners/developers. The autor of this site or the developers are not responsible, if you damage or brick your device.Do it on your own risk and follow the instruction properly.
* Important:
Backup important files stored on your device before proceeding with the steps below, so that in case something goes wrong you’ll have backup of all your important files.
÷ How to Update Nexus 5X to Official Android N NPD90G Developer Preview 5 :
Step 1 – Download Android N Factory Image (bullhead-npd90g-factory-7a0ca1bc.tgz) for Nexus 5X on your PC, if you haven’t already.
Step 2 – Connect your Nexus 5X to your computer using the USB cable.
Step 3 – Please make sure Fastboot is configured and properly installed on your computer.
Step 4 – Turn OFF your phone.
Step 5 – Get into the Fastboot/Bootloader Mode on your phone. Turn ON the phone while pressing and holding the Volume Up + Volume Down + Power buttons till you see the Fastboot menu and START on top.
Step 6 – Now extract the downloaded file anywhere in your computer. Go to the folder hammerhead-NPD90G and then copy/paste all the files to your Fastboot directory.
Step 7 – From the factory image files in your Fastboot directory, do the following depending which OS you are on:
On Windows: Run the file “flash-all.bat”.
On Mac: Run the file “flash-all.sh” using Terminal.
On Linux: Run the file “flash-all.sh”.
Step 8 – That’s pretty much that you had to do for flashing the stock factory image on your Nexus 5X. Now wait and watch as the process is completed — or follow the on-screen instructions on your phone if in case you have to unlock the bootloader.
Step 9 – After the installation completes, the phone will boot now and it might take about 5 minutes to boot on your first time. So, please wait with patience!
That’s it! Your Nexus 5X should now have the official Android N NPD90G Developer Preview 5 software update installed on your phone using the stock factory image from Google! Go to Settings >About phone to verify.
For More Nexus 5X Updates Keep Checking Android Custom ROM Fix ™®
That’s all. We hope this guide serves you well. If there’s anything you’d like to be added/changed on this page, PLZ Use the comment box below to contribute more ideas & Suggestions .
Like this post? PLZ Hit the share buttons below to share this article with your friends on Facebook, Google + and Twitter.
Want the latest Updates Sign up for our newsletters!
PLZ Follow Us On Flipboard 4 More Latest Updates.
Best Regards.™
Available link for download
Sunday, November 20, 2016
How to Update Nexus 6P to Android N Developer Preview 5 NPD90G Factory Image
How to Update Nexus 6P to Android N Developer Preview 5 NPD90G Factory Image

As we close in on the public rollout of Android 7.0 Nougat to devices later this summer, today we’re releasing Developer Preview 5, the last milestone of this preview series. Last month’s Developer Preview included the final APIs for Nougat; this preview gives developers the near-final system updates for all of the supported preview devices, helping you get your app ready for consumers.
÷ Prerequisites:
•This tutorial is only for Huawei Nexus 6P and we are not sure if it will work on the other variants of the Nexus 6P on other carriers.
•Your phone can be on any previous Android version or even on a custom ROM. It doesn’t matter at all. This tutorial will still work for installing Android N Developer Preview 5.
*Disclaimer:
Android Custom ROM fix ® provide various Firmware Updates and Rooting process along with Custom ROM,Modes,file are all belong to their owners/developers. The autor of this site or the developers are not responsible, if you damage or brick your device.Do it on your own risk and follow the instruction properly.
* Important:
Backup important files stored on your device before proceeding with the steps below, so that in case something goes wrong you’ll have backup of all your important files.

÷ How to Update Nexus 6P to Android N Developer Preview 5 NPD90G Factory Image
Step 1 – Download Android N Factory Image (angler-npd90g-factory-cd9ac81e.tgz) for Nexus 6P on your PC, if you haven’t already.
Step 2 – Connect your Nexus 6P to your computer using the USB cable.
Step 3 – Please make sure Fastboot is configured and properly installed on your computer.
Step 4 – Turn OFF your phone.
Step 5 – Get into the Fastboot/Bootloader Mode on your phone. Turn ON the phone while pressing and holding the Volume Up + Volume Down + Power buttons till you see the Fastboot menu and START on top.
Step 6 – Now extract the downloaded file anywhere in your computer. Go to the folder angler-NPD90G and then copy/paste all the files to your Fastboot directory.
Step 7 – From the factory image files in your Fastboot directory, do the following depending which OS you are on:
On Windows: Run the file “flash-all.bat”.
On Mac: Run the file “flash-all.sh” using Terminal.
On Linux: Run the file “flash-all.sh”.
Step 8 – That’s pretty much that you had to do for flashing the stock factory image on your Nexus 6P. Now wait and watch as the process is completed — or follow the on-screen instructions on your phone if in case you have to unlock the bootloader.
Step 9 – After the installation completes, the phone will boot now and it might take about 5 minutes to boot on your first time. So, please wait with patience!
That’s it! Your Nexus 6P should now have the official Android N NPD90G Developer Preview 5 software update installed on your phone using the stock factory image from Google! Go to Settings >About phone to verify.

For More Nexus 6P Updates Keep Checking Android Custom ROM Fix ™®
That’s all. We hope this guide serves you well. If there’s anything you’d like to be added/changed on this page, PLZ Use the comment box below to contribute more ideas & Suggestions .
Like this post? PLZ Hit the share buttons below to share this article with your friends on Facebook, Google + and Twitter.
Want the latest Updates Sign up for our newsletters!
PLZ Follow Us On Flipboard 4 More Latest Updates.
Best Regards.™
Available link for download
Wednesday, November 16, 2016
How to Update Nexus 4 to Android 6 0 1 Marshmallow Slim6 ROM
How to Update Nexus 4 to Android 6 0 1 Marshmallow Slim6 ROM

Don’t worry we are going to share step by step guide to safely Update your Nexus 4 to Android 6.0.1 Marshmallow Slim6 ROM.
÷ Prerequisites:
•This Android 6.0.1 Slim6 ROM tutorial is only for Nexus 4 (occam) and I am not sure if it will work on the other variants of the Nexus 4 on other carriers.
•Make sure your phone is rooted and has a custom recovery like ClockworkMod installed.
•Make a Nandroid backup of your previous phone set up before proceeding – for just in case anything goes wrong.
*Disclaimer:
Android Custom ROM fix ® provide various Firmware Updates and Rooting process along with Custom ROM,Modes,file are all belong to their owners/developers. The autor of this site or the developers are not responsible, if you damage or brick your device.Do it on your own risk and follow the instruction properly.
* Important:
Backup important files stored on your device before proceeding with the steps below, so that in case something goes wrong you’ll have backup of all your important files.

÷ How to Update Nexus 4 to Android 6.0.1 Marshmallow Slim6 ROM:
Step 1 – Download Android 6.0.1 Slim6 ROM for Nexus 4 on your PC, if you haven’t already.
Step 2 – Connect and mount your Nexus 4 USB memory on your computer using the USB cable.
Step 3 – Now copy/paste the downloaded Android 6.0.1 ROM zip file to your internal SD card. Make sure the file is in the SD card root (not in any folder).
Step 4 – Then turn OFF your phone and disconnect from the USB cable.
Step 5 – Now to get in the Bootloader Mode. Turn ON the phone while pressing and holding the Volume Up + Volume Down and Power buttons.
Step 6 – Follow the navigation instructions on the screen. Select BOOTLOADER and then go to RECOVERY.
Step 7 – Once you are in ClockworkMod Recovery, select perform a full data wipe by selecting “wipe data/factory reset”. Use the Power button to select everything while in the Recovery Mode.
Step 8 – Then, perform a cache wipe by selecting “wipe cache partition”.
Step 9 – Now this is optional, but it is recommended to perform a wipe of your dalvik cache as well. You will not get into boot loops or any other errors. From CWM recovery, go to ‘advanced’ and then select “wipe dalvik cache”.
Step 10 – Then go back to the main recovery screen and select “install zip from SD card”.
Step 11 – Now select “choose zip from sdcard”. Using your volume keys, navigate to the Android 6.0.1 ROM zip file that you copied to your SD card and select it using the Power button. Confirm the installation on the next screen and the installation procedure should start now.
Step 12 – After the installation completes, go to “+++++Go Back+++++” and reboot the phone by selecting “reboot system now” from the recovery menu .

Your Nexus 4 will boot now and it might take about 5 minutes to boot on your first time. So, please wait.
That’s it! Your Nexus 4 should now have Android 6.0.1 Slim6 Marshmallow custom ROM installed on your phone! Go to Settings > About phone to verify.
For More Nexus4 Updates Keep Checking Android Custom ROM Fix ™©
That’s all. We hope this guide serves you well. If there’s anything you’d like to be added/changed on this page, PLZ Use the comment box below to contribute more ideas & Suggestions .
Like this post? PLZ Hit the share buttons below to share this article with your friends on Facebook, Google + and Twitter.
Want the latest Updates Sign up for our newsletters!
PLZ Follow Us On Flipboard 4 More Latest Updates.
Best Regards.™
Available link for download
Saturday, November 12, 2016
Google Phone app for Nexus Android One devices updated with warning for potential spam calls
Google Phone app for Nexus Android One devices updated with warning for potential spam calls

One benefit of owning a Nexus device that’s often highlighted is that you get updates directly from Google, typically giving you new features before most other Android users. There are other benefits, though, including the one that Google is focusing on today.
Google says that it’s now updating the Google Phone app on Nexus and Android One devices. With this update, you’ll get a warning when you’re receiving a phone call from a suspected spam caller.

from PhoneDog.com - Latest videos, reviews, articles, news and posts http://ift.tt/2a9QYN7
via IFTTT
Available link for download
Friday, November 4, 2016
Get a 32GB Nexus 5X for 234 99
Get a 32GB Nexus 5X for 234 99

Nexus 5X deals pop up pretty regularly, and today another one has emerged, this time offering one of the best deals we’ve seen on LG and Google’s Nexus.
The 32GB Nexus 5X is now available for $234.99 from Newegg’s Flash sales site. Both the black and white versions of the 5X are available, and free shipping is included. This sale will end on Sunday.

from PhoneDog.com - Latest videos, reviews, articles, news and posts http://ift.tt/29yjLMH
via IFTTT
Available link for download
Monday, October 31, 2016
Any way Nexus 6p to have band 12 the default
Any way Nexus 6p to have band 12 the default
from xda-developers http://ift.tt/2alMFPL
via IFTTT
Available link for download
Saturday, October 15, 2016
HTC Nexus Sailfish leak reveals 1080p display MSM8996 chipset
HTC Nexus Sailfish leak reveals 1080p display MSM8996 chipset

Twitter leaker Evan Blass is apparently in possession of a ROM dump from one of the upcoming 2017 Nexus phones. The smaller of the two rumored devices, internally known as Sailfish or the HTC S1, has just had its build.prop file shared on Twitter, uncovering a couple of device specs including display resolution and the chipset to be used.
 See also: Specs surface for alleged HTC Nexus "Sailfish"
 Keep in mind that build.prop files are incredibly easy to modify, so even though theres no reason for Blass to fake it, the details cant exactly be guaranteed to be accurate. That said, the display density value is given as 420, indicating Full HD resolution rather than QHD (as the larger-screened Marlin – or HTC M1 – is rumored to feature).
This calculation is reverse engineered from the pixel density not being high enough to represent QHD. If you plug it into a pixel density calculator at Full HD resolution you get close enough to 420 PPI on a 5.2-5.3-inch screen. As you likely recall, the Sailfish is rumored to arrive with a 5.2-inch screen (with the Marlin arriving with a 5.5-inch QHD display). So at least the math fits.
Google Nexus Sailfish / HTC S1 build.prop file http://pic.twitter.com/Q8q4EkBDff
— Evan Blass (@evleaks) July 25, 2016
The chipset in the build.prop file is listed as the MSM8996, which currently refers to the Snapdragon 820. However, we cant guarantee it is not the Snapdragon 821 as Qualcomm SoCs have shared model numbers in the past, with MSM8997 referring to multiple versions of both the Snapdragon 800 and 801.
Theres not much else of interest in the build.prop file other than security patch date on the first line and multiple mentions of finger and thumb prints scattered throughout. But if Blass has a full ROM dump you can expect to see more information coming soon, including further details on the possibility of Allo and Duo APKs (although wed need Googles servers running to make them work) and some more information on Androids new navigation buttons.
Will you be opting for Sailfish or Marlin? Is Full HD resolution still acceptable?
Dont miss: Alleged specs for HTC Marlin emerge
from Android Authority http://ift.tt/2akl3Jz
via IFTTT
Available link for download
Monday, October 10, 2016
Google brings spam call protection to some Nexus and Android One phones
Google brings spam call protection to some Nexus and Android One phones
Google is rolling out an update for the Android phone app that will warn you about spam callers. The update, currently for Nexus or Android One phones on Marshmallow, lets you block and report these numbers.

From Nexus on Google+:
Today, were beginning to update your Google Phone app with spam protection on #Nexus and #AndroidOne devices to warn you about potential spam callers and give you the ability to block and report these numbers. If you already have Caller ID turned on, spam protection will be available on your phone once your app updates to the latest version.
Spam call protection will be turned on in the phone app by default. In addition to new incoming calls, you will also be able to mark old calls as spam in your Recent calls section in the app.

from Android Central - Android Forums, News, Reviews, Help and Android Wallpapers http://ift.tt/2a6Gukn
via IFTTT
Available link for download
Thursday, October 6, 2016
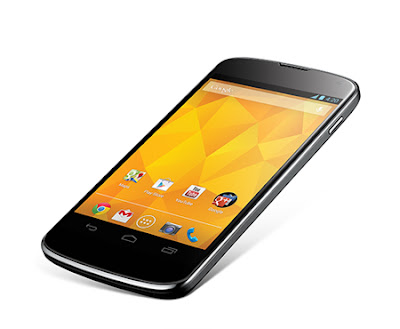
How to Install Android 6 0 1 Marshmallow TurboROM on Nexus 4 Battery life Improve
How to Install Android 6 0 1 Marshmallow TurboROM on Nexus 4 Battery life Improve
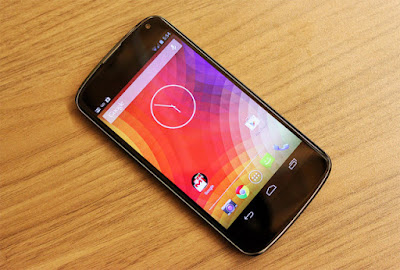
Nexus4 TurboROM custom ROM comes with tons of new features and is based on Android 6.0.1 Marshmallow. A quick list of the main features in TurboROM is given below and we are sure you’d love to use this on your Nexus 4:
* Turbo tweaks, which includes: *
– Battery bar
– Expanded desktop
– LCD density changer
– Double tap power button vibration toggle
– Double tap to sleep on lock screen
– Double tap to sleep on navigation bar
– Double tap to sleep on status bar
– Three finger swipe for screenshot
– Lock screen alpha changer (for both the bouncer and normal screen)
– Bottom left and right lock screen shortcut changer
– Middle lock screen shortcut changer
– The ability to change the color of the lock screen alarm, clock, and date
– The ability to change the font of the lock clock
– The ability to hide the lock screen alarm, clock, and date
– Lock screen weather
– Lock screen wallpaper changer
– Lock screen torch toggle
– Enable lock screen media art toggle
– Multi-window moved out of developer options into Turbo tweaks
– Memory bar in Recents
– Google search bar toggle
– Recents clear all button toggle and placement adjustments
– Immersive recents options
– SlimRecents
– SlimRecents app sidebar
– Slim’s navigation bar customization
– Auto-brightness toggle in the QS panel
– Show weather in QS header
– Brightness slider toggle in QS
– Quick pulldown in QS
– Time contextual headers in QS (including Poly HD)
– Advanced location tile toggle
– Enlarge the first row of QS tiles toggle
– The ability to set the number of QS columns (3, 4, or 5)
– The ability to arrange the QS tiles
– Status bar battery configuration
– Status bar brightness control
– Full status bar clock and date customization
– Blacklist status bar icons
– Breathing SMS, missed call, and voicemail
– Notification counter (shows the number of pending notifications in the app’s notification icon)
– Turbo ROM logo in the status bar toggle
– Full status bar weather customization
– AOKP custom system animation customization
– Power menu animation customization
– List view animation customization
– Hardware key customization
– Full volume rocker customization
– Advanced reboot
– Slim’s global menu customization....
Don’t worry we are going to share step by step guide to safely Install Android 6.0.1 Marshmallow TurboROM on your Nexus 4 .
÷ Prerequisites:
•This Android 6.0.1 TurboROM ROM tutorial is only for Nexus 4 (occam) and I am not sure if it will work on the other variants of the Nexus 4 on other carriers.
•Make sure your phone is rooted and has a custom recovery like ClockworkMod installed.
•Make a Nandroid backup of your previous phone set up before proceeding – for just in case anything goes wrong.
•Install the Google Apps package if you want the usual Google apps (Gmail, Maps, Play Store, Calendar etc.) on your phone.
*Disclaimer:
Android Custom ROM fix ® provide various Firmware Updates and Rooting process along with Custom ROM,Modes,file are all belong to their owners/developers. The autor of this site or the developers are not responsible, if you damage or brick your device.Do it on your own risk and follow the instruction properly.
* Important:
Backup important files stored on your device before proceeding with the steps below, so that in case something goes wrong you’ll have backup of all your important files.
÷ How to Install Android 6.0.1 Marshmallow TurboROM on Nexus 4 [ Battery life Improve]
Step 1 – Download Android 6.0.1 TurboROM ROM and Google Apps for Nexus 4 on your PC, if you haven’t already.
Step 2 – Connect and mount your Nexus 4 USB memory on your computer using the USB cable.
Step 3 – Now copy/paste the downloaded Android 6.0.1 ROM zip and Google Apps zip files to your internal SD card. Make sure the files are in the SD card root (not in any folder).
Step 4 – Then turn OFF your phone and disconnect from the USB cable.
Step 5 – Now to get in the Bootloader Mode. Turn ON the phone while pressing and holding the Volume Up + Volume Down and Power buttons.
Step 6 – Follow the navigation instructions on the screen. Select BOOTLOADER and then go to RECOVERY.
Step 7 – Once you are in ClockworkMod Recovery, select perform a full data wipe by selecting “wipe data/factory reset”. Use the Power button to select everything while in the Recovery Mode.
Step 8 – Then, perform a cache wipe by selecting “wipe cache partition” .
Step 9 – Now this is optional, but it is recommended to perform a wipe of your dalvik cache as well. You will not get into boot loops or any other errors. From CWM recovery, go to ‘advanced’ and then select “wipe dalvik cache”.
Step 10 – Then go back to the main recovery screen and select “install zip from SD card”.
Step 11 – Now select “choose zip from sdcard”. Using your volume keys, navigate to the Android 6.0.1 ROM zip file that you copied to your SD card and select it using the Power button. Confirm the installation on the next screen and the installation procedure should start now.
Google Apps: Repeat the above step for the Gapps zip file as well and install it on your phone.
Step 12 – After the installation completes, go to “+++++Go Back+++++” and reboot the phone by selecting “reboot system now” from the recovery menu .
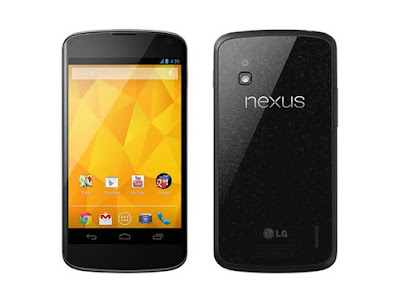
Your Nexus 4 will boot now and it might take about 5 minutes to boot on your first time. So, please wait.
That’s it! Your Nexus 4 should now have Android 6.0.1 TurboROM Marshmallow custom ROM installed on your phone! Go to Settings > About phone to verify.
For More Nexus 4 Updates Keep Checking Android Custom ROM Fix ™©
That’s all. We hope this guide serves you well. If there’s anything you’d like to be added/changed on this page, PLZ Use the comment box below to contribute more ideas & Suggestions .
Like this post? PLZ Hit the share buttons below to share this article with your friends on Facebook, Google + and Twitter.
Want the latest Updates Sign up for our newsletters!
PLZ Follow Us On Flipboard 4 More Latest Updates.
Best Regards.™
Available link for download
Wednesday, September 21, 2016
How to Update Motorola Nexus 6 to Official Android N NPD90G Developer Preview 5
How to Update Motorola Nexus 6 to Official Android N NPD90G Developer Preview 5
As we close in on the public rollout of Android 7.0 Nougat to devices later this summer, today we’re releasing Developer Preview 5, the last milestone of this preview series.

Last month’s Developer Preview included the final APIs for Nougat; this preview gives developers the near-final system updates for all of the supported preview devices, helping you get your app ready for consumers.
÷ Prerequisites:
•This tutorial is only for Motorola Nexus 6 and we are not sure if it will work on the other variants of the Nexus 6 on other carriers.
•Your phone can be on any previous Android version or even on a custom ROM. It doesn’t matter at all. This tutorial will still work for installing Android N Developer Preview 5.
*Disclaimer:
Android Custom ROM fix ® provide various Firmware Updates and Rooting process along with Custom ROM,Modes,file are all belong to their owners/developers. The autor of this site or the developers are not responsible, if you damage or brick your device.Do it on your own risk and follow the instruction properly.
* Important:
Backup important files stored on your device before proceeding with the steps below, so that in case something goes wrong you’ll have backup of all your important files.

÷ How to Update Motorola Nexus 6 to Official Android N NPD90G Developer Preview 5:
Step 1 – Download Android N Factory Image (shamu-npd90g-factory-f7a4e3a9.tgz) for Nexus 6 on your PC, if you haven’t already.
Step 2 – Connect your Nexus 6 to your computer using the USB cable.
Step 3 – Please make sure Fastboot is configured and properly installed on your computer.
Step 4 – Turn OFF your phone.
Step 5 – Get into the Fastboot/Bootloader Mode on your phone. Turn ON the phone while pressing and holding the Volume Up + Volume Down + Power buttons till you see the Fastboot menu and START on top.
Step 6 – Now extract the downloaded file anywhere in your computer. Go to the folder angler-NPD90G and then copy/paste all the files to your Fastboot directory.
Step 7 – From the factory image files in your Fastboot directory, do the following depending which OS you are on:
On Windows: Run the file “flash-all.bat”.
On Mac: Run the file “flash-all.sh” using Terminal.
On Linux: Run the file “flash-all.sh”.
Step 8 – That’s pretty much that you had to do for flashing the stock factory image on your Nexus 6. Now wait and watch as the process is completed — or follow the on-screen instructions on your phone if in case you have to unlock the bootloader.
Step 9 – After the installation completes, the phone will boot now and it might take about 5 minutes to boot on your first time. So, please wait with patience!

That’s it! Your Nexus 6 should now have the official Android N NPD90G Developer Preview 5 software update installed on your phone using the stock factory image from Google! Go to Settings >About phone to verify.
For More Nexus 6 Update Keep Checking Android Custom ROM Fix ™®
That’s all. We hope this guide serves you well. If there’s anything you’d like to be added/changed on this page, PLZ Use the comment box below to contribute more ideas & Suggestions .
Like this post? PLZ Hit the share buttons below to share this article with your friends on Facebook, Google + and Twitter.
Want the latest Updates Sign up for our newsletters!
PLZ Follow Us On Flipboard 4 More Latest Updates.
Best Regards.™
Available link for download
Sunday, September 18, 2016
How to Install Android 6 0 1 Marshmallow Pure Nexus ROM on Nexus 5 D820 Pre rooted
How to Install Android 6 0 1 Marshmallow Pure Nexus ROM on Nexus 5 D820 Pre rooted
According to XDA Member Beanstown106,Android 6.0.1 Marshmallow Pure Nexus ROM is available now for LG Nexus 5 D820 [ hammerhead].

The Pure Nexus Project aims to bring stability and features to your Nexus device, while keeping Googles vision in line and not straying too far away from that. If you are looking for a stable ROM with true tested features and minimal bugs, then this is the place to be.
÷ ROM Features:
-General
*Based on AOSP Android 6.0.1_r25(newer than r43)
*Pre-rooted with SuperSU 2.68
*SELinux Enforcing
*Busybox
*Init.d support
*Addon.d support
*Fully Working VoLTE
*Native Sprint PRL/Profile update
*Native ntfs and exfat support
*Full Layers and Theme engine support
*Google sounds from factory image not the horrible AOSP ones
*Googles marshmallow wallpapers added to wallpaper picker
*Advanced Reboot menu enabled by default
*Advanced rotation settings
*Enabled Developer settings by default
*Enabled option to use multi-window mode
*Enabled click/longclick on notification panel header items
*Disabled forced encryption
*Disabled Tethering checks
*Disable Full screen keyboard in landscape option
*Show apps being optimized during initial boot
*Bug fixs and stability improvements
*UI Improvements (fixed a bunch google forgot to materialize)
*Download Speed in download notifications
*Scrolling cache improvements
*Seek-bar animation speed and font size control
*Hostname customization
*Adb over wifi access
*Full 3-Minit battery support no mods needed
*Kitkat style silent mode is now default
*Added headset icon attached icon in statusbar
*Added PureAmbient display options
*Added Full CAF Based AppOps
*Added ability to see app version when sideloading app
*Added ability to launch app from app info sceen
*Added app package name to app info screen
*Added ability to disable battery saver color in nav/statusbars
*Added ability to launch purenexus settings from notification drawer (longpress settings icon)
*Added ability to customize Settings dashboard columns, dashboard text lines, dashboard dividers
*Added wireless charging sound for usb chargers
*Native Dialer lookup in the aosp dialer
*Increasing ringtone option
*Incall vibration options
*Proximity speakerphone option
*National Data roaming option
*Call/Message blocking
*Flip to mute/reject call option
*Link/Unlink Notification ringtone option
*Added Standalone documents ui file manager
*Added Special keys to all keyboard keys
*Added more smileys to the aosp keyboard
*Removed googles bug report option
*Removed googles SystemUpdate option
*Removed googles legal information
-PureNexus Settings
Lock Screen
*Option to customize lockscreen shortcuts
*Option to customize lockscreen weather
*Option to customize lockscreen clock font
*Long press power for torch
*double tap anywhere to sleep
*Option to disable lockscreen media art
*Scramble pin layout
*Quick pin unlock
*options to unlock straight to pin/pattern/password entry
*option to hide lockscreen clock
*option to hide lockscreen date
*option to hide lockscreen alarm text
*Option to control max notifications on the lockscreen
*option to set the alpha of lockscreen and lockscreen security bouncer
*Lockscreeen Wallpaper (add/crop/delete)
Notification Drawer
*Weather
*Force Expanded Notifications
*quick settings pulldown (left,right,always)
*smart pulldown (no ongoing, no dismissable)
*brightness slider on/off toggle
*option for time aware contexual notification header images
*option for poly hd notification header images
*fully customizable quick settings with now up to 30 custom tiles
*option to enable or disable the top two main quicksettings tiles
*option to enable 3/4/5 quick settings tiles per row
*option for advanced location in location quick setting tile
*option to enable vibration on quick settings tiles
*option to disable quick settings on secure lockscreen
Recent Apps
*Immersive recents (stock, full screen, statusbar only, navbar only)
*Clear all recents toggle
*Clear all recents location option
*Clear all recents but last app toggle
*Recent searchbar on/off toggle
*slim recents and slim recent options
Statusbar
*Battery customization (stock, landscape, circle, dotted circle, text, none)
*Battery percent options (hidden, inside the icon, next to the icon)
*Battery Bar options (location, color, style, thickness, anitmation)
*Carrier Text customization (text placement, custom text)
*Clock customization (position, am/pm, date, date position, date style, date format)
*Network traffic meter options (disabled/incoming/outgoing/both, units displayed, update interval, hide arrows, autohide, autohidethreshold)
*Status-bar options (purenexus icon, notification counter, double-tap to sleep, statusbar brightness control)
*Option to disable headset icon, vibrate/silent icon, vpn icon in statusbar
*Option to disale bluetooth icon in statusbar when not connected
Navigation Bar
*Enable/disable
*IME toggle
*Option for arrow cursor keys
*Option for double tap navbar to sleep
*Long-press back to kill toggle
*option to configure back kill delay
*Long-press recents for last app toggle
*Navigation bar size customization (width, height, length)
*Navigation bar customization (placement, buttons)
PowerMenu
*Option to disable on secure lock
*Add/remove (reboot, screenshot, screen-record, torch, airplane mode, user switcher,settings shortcut, search, voice search, lock now, sound panel)
Volume Rocker
*Volume key wake
*Volume key music control
*Volume key keyboard cursor control
*Volume button swap toggle
*Control media volume anytime toggle
*Option to allow volume down in silent to enter do not disturb
*Option to allow volume up in do not disturb to exit do not disturb
*Options to control volume steps on the fly
Display
*Expanded desktop options
*option to enable/disable wake on plug
*option to enable 3 finger swipe to screenshot
*LED controls
Media & Notifications
*option to disable camera shutter sound
*option to disable double tap camera vibration
*custom heads up options (global on/off, timeout, heads up snooze, force heads up, heads up whitelist, heads up do not disturb, heads up blacklist)
*option to disable low battery notification
*Option to disable battery saver notification
cLock Settings
*Customize the cLock widget
Tools and info
*device info
*battery history
*usage statistics
*wifi info
*build.prop editor
*fi switch tools (if project fi sim is installed)...

÷ Prerequisites:
•This tutorial is only for installing Android 6.0.1 Marshmallow Pure Nexus ROM is available now for LG Nexus 5 D820 [ hammerhead].Please do not try on any other Nexus 5 variants.
•Your phone should be rooted and haveClockworkMod recovery installed from before.
•This tutorial will wipe out all your data.Proceed at your own risk.Perform a Dalvik Cache wipe before proceeding from the recovery mode.
•Make sure you backup all your data in your phone before proceeding.
*Disclaimer:
Android Custom ROM fix ® provide various Firmware Updates and Rooting process along with Custom ROM,Modes,file are all belong to their owners/developers. The autor of this site or the developers are not responsible, if you damage or brick your device.Do it on your own risk and follow the instruction properly.
* Important:
Backup important files stored on your device before proceeding with the steps below, so that in case something goes wrong you’ll have backup of all your important files.

ROM Download & Installation Instructions via XDA
For More Nexus 5 updates Keep Checking Android Custom ROM Fix™®
Like this post? PLZ Hit the share buttons below to share this article with your friends on Facebook, Google + and Twitter.
PLZ Follow Us On Flipboard 4 More Latest Updates.
PLZ Use the comment box below to contribute more ideas & Suggestions .
Best Regards.
Available link for download
Thursday, September 15, 2016
How to Root Nexus 5X Running Android N NPD90G Developer Preview 5
How to Root Nexus 5X Running Android N NPD90G Developer Preview 5

As we close in on the public rollout of Android 7.0 Nougat to devices later this summer, today we’re releasing Developer Preview 5, the last milestone of this preview series. Last month’s Developer Preview included the final APIs for Nougat; this preview gives developers the near-final system updates for all of the supported preview devices, helping you get your app ready for consumers.
÷ Prerequisites:
•This root method is only for Android N (NPD90G) installed on Nexus 5X and I am not sure if it will work on the other variants of the Nexus 5X on other carriers.
•Your Nexus 5X bootloader should be unlocked.
Nexus 5X should be on Android N NPD90G software version.
•Make a Nandroid backup of your previous phone set up before proceeding – for just in case anything goes wrong.
•You will need a custom kernel (i.e. Despair Kernel) for this root method to work.
*Disclaimer:
Android Custom ROM fix ® provide various Firmware Updates and Rooting process along with Custom ROM,Modes,file are all belong to their owners/developers. The autor of this site or the developers are not responsible, if you damage or brick your device.Do it on your own risk and follow the instruction properly.
* Important:
Backup important files stored on your device before proceeding with the steps below, so that in case something goes wrong you’ll have backup of all your important files.

÷ How to Root Nexus 5X Running Android N (NPD90G) Developer Preview 5.
Step 1 – Download Android SDK from the Android Developers website and install. Also set it up with downloading platform-tools and USB drivers package in SDK. See: How to Set up ADB and Fastboot on Windows.
Step 2 – Enable USB Debugging mode in your Nexus 5X.
Step 3 – Download Fastboot from the following links depending on your OS and extract it in android-sdk-windowsplatform-tools directory. Create directory if not already there.
Windows: Download here
Mac: Download here.
Linux: Download here.
NOTE: Skip Steps 1, 2, 3 if you already have them.
Step 4 – Download SuperSU v2.71 for Nexus 5X on your PC, if you haven’t already.
Step 5 – Connect and mount your Nexus 5X USB memory on your computer using the USB cable.
Step 6 – Now copy/paste the BETA-SuperSU-v2.66-20160103015024.zip file to your SD card. Make sure the file is in the SD card / internal storage root (not in any folder).
Step 7 – Then turn OFF your phone.
Step 8 – Download twrp-2.8.7.0-bullhead.img and save it to your android-sdk-windowsplatform-tools directory on your computer.
Step 9 – Now go into Fastboot/Bootloader Mode on Nexus 5X. How? Press Volume Down + Power keys for a few seconds till you see some text on the screen. This is Bootloader Mode.
Step 10 – Navigate to android-sdk-windowsplatform-tools directory and open Command Prompt (Shift + Right-click > Open Command Prompt).
Step 11 – Type in the following command and press Enter.
fastboot flash recovery twrp-2.8.7.0-bullhead.img
Step 12 – Once completed, choose RECOVERY from the Fastboot menu and enter Recovery Mode.
Step 13 – In ClockworkMod recovery, scroll down to “flash zip from SD card” and press the power button to select it.
Step 14 – Press the Power button again and select “choose zip from sdcard”.
Step 15 – Now using your volume keys, navigate to BETA-SuperSU-v2.71-20160331103524.zip and select it using the Power button. Confirm the installation on the next screen and the installation procedure should start now.
Step 16 – After the installation completes, go to “+++++Go Back” and reboot the phone by selecting “reboot system now” from the Recovery menu. The phone will boot now and it might take about 5 minutes to boot on your first time. So, please wait.

That’s it! Your Nexus 5X is now rooted on Android 6.0.1 Marshmallow firmware on your phone! Check for the SuperSU app in your apps list to verify.
For More Nexus 5X Keep Checking Android Custom ROM Fix ™®
That’s all. We hope this guide serves you well. If there’s anything you’d like to be added/changed on this page, PLZ Use the comment box below to contribute more ideas & Suggestions .
Like this post? PLZ Hit the share buttons below to share this article with your friends on Facebook, Google + and Twitter.
Want the latest Updates Sign up for our newsletters!
PLZ Follow Us On Flipboard 4 More Latest Updates.
Best Regards.™
Available link for download