Showing posts with label npd90g. Show all posts
Showing posts with label npd90g. Show all posts
Monday, January 30, 2017
How to Root Nexus 6 Running Android N NPD90G Developer Preview 5
How to Root Nexus 6 Running Android N NPD90G Developer Preview 5
Android N Developer Preview 5 is now available for the Nexus 6, Nexus 6 and Nexus 9 phones. These are the major changes in final release of Android N, as per Google:

The latest Android N Developer Preview 5 NPD90G is the next upcoming major firmware release by Google. It brings some new features like multi-window mode, an enhanced doze mode, a revamped Settings screen and a quick toggle in the notifications panel. Other changes include improved notifications, improved multitasking and app switching, dark mode etc...
The latest Android N Developer Preview 5 NPD90G is the next upcoming major firmware release by Google. It brings some new features like multi-window mode, an enhanced doze mode, a revamped Settings screen and a quick toggle in the notifications panel. Other changes include improved notifications, improved multitasking and app switching, dark mode etc...
View my Flipboard Magazine.
÷ Prerequisites:
•This root method is only for Android N (NPD90G) installed on Nexus 6 and I am not sure if it will work on the other variants of the Nexus 6 on other carriers.
•Your Nexus 6 bootloader should be unlocked.
Nexus 6 should be on Android N NPD90G software version.
•Make a Nandroid backup of your previous phone set up before proceeding – for just in case anything goes wrong.
*Disclaimer:
Android Custom ROM fix ® provide various Firmware Updates and Rooting process along with Custom ROM,Modes,file are all belong to their owners/developers. The autor of this site or the developers are not responsible, if you damage or brick your device.Do it on your own risk and follow the instruction properly.
* Important:
Backup important files stored on your device before proceeding with the steps below, so that in case something goes wrong you’ll have backup of all your important files.

÷ How to Root Nexus 6 Running Android N (NPD90G) Developer Preview 5.
Step 1 – Download Android SDK from the Android Developers website and install. Also set it up with downloading platform-tools and USB drivers package in SDK.
Step 2 – Enable USB Debugging mode in your Nexus 6.
Step 3 – Download Fastboot from the following links depending on your OS and extract it in android-sdk-windowsplatform-tools directory. Create directory if not already there.
Windows: Download here
Mac: Download here.
Linux: Download here.
NOTE: Skip Steps 1, 2, 3 if you already have them.
Step 4 – Download SuperSU v2.71 for Nexus 6 on your PC, if you haven’t already.
Step 5 – Connect and mount your Nexus 6 USB memory on your computer using the USB cable.
Step 6 – Now copy/paste the BETA-SuperSU-v2.71-20160331103524.zip file to your SD card. Make sure the file is in the SD card / internal storage root (not in any folder).
Step 7 – Then turn OFF your phone.
Step 8 – twrp-3.0.0-0-shamu.img and save it to your android-sdk-windowsplatform-tools directory on your computer.
Step 9 – Now go into Fastboot/Bootloader Mode on Nexus 6. How? Press Volume Down + Power keys for a few seconds till you see some text on the screen. This is Bootloader Mode.
Step 10 – Navigate to android-sdk-windowsplatform-tools directory and open Command Prompt (Shift + Right-click > Open Command Prompt).
Step 11 – Type in the following command and press Enter.
fastboot flash recovery twrp-3.0.0-0-shamu.img
Step 12 – Once completed, choose RECOVERY from the Fastboot menu and enter Recovery Mode.
Step 13 – In ClockworkMod recovery, scroll down to “flash zip from SD card” and press the power button to select it.
Step 14 – Press the Power button again and select “choose zip from sdcard”.
Step 15 – Now using your volume keys, navigate to BETA-SuperSU-v2.71-20160331103524.zip and select it using the Power button. Confirm the installation on the next screen and the installation procedure should start now.
Step 16 – After the installation completes, go to “+++++Go Back” and reboot the phone by selecting “reboot system now” from the Recovery menu. The phone will boot now and it might take about 5 minutes to boot on your first time. So, please wait.

That’s it! Your Nexus 6 is now rooted on Android N Developer Preview 5 firmware on your phone! Check for the SuperSU app in your apps list to verify.
For More Nexus 6 latest updates Keep Checking Android Custom ROM Fix™®
That’s all. We hope this guide serves you well. If there’s anything you’d like to be added/changed on this page, PLZ Use the comment box below to contribute more ideas & Suggestions .
Like this post? PLZ Hit the share buttons below to share this article with your friends on Facebook, Google + and Twitter.
Want the latest Updates Sign up for our newsletters!
PLZ Follow Us On Flipboard 4 More Latest Updates.
Best Regards.™
÷ Prerequisites:
•This root method is only for Android N (NPD90G) installed on Nexus 6 and I am not sure if it will work on the other variants of the Nexus 6 on other carriers.
•Your Nexus 6 bootloader should be unlocked.
Nexus 6 should be on Android N NPD90G software version.
•Make a Nandroid backup of your previous phone set up before proceeding – for just in case anything goes wrong.
*Disclaimer:
Android Custom ROM fix ® provide various Firmware Updates and Rooting process along with Custom ROM,Modes,file are all belong to their owners/developers. The autor of this site or the developers are not responsible, if you damage or brick your device.Do it on your own risk and follow the instruction properly.
* Important:
Backup important files stored on your device before proceeding with the steps below, so that in case something goes wrong you’ll have backup of all your important files.
÷ How to Root Nexus 6 Running Android N (NPD90G) Developer Preview 5.
Step 1 – Download Android SDK from the Android Developers website and install. Also set it up with downloading platform-tools and USB drivers package in SDK.
Step 2 – Enable USB Debugging mode in your Nexus 6.
Step 3 – Download Fastboot from the following links depending on your OS and extract it in android-sdk-windowsplatform-tools directory. Create directory if not already there.
Windows: Download here
Mac: Download here.
Linux: Download here.
NOTE: Skip Steps 1, 2, 3 if you already have them.
Step 4 – Download SuperSU v2.71 for Nexus 6 on your PC, if you haven’t already.
Step 5 – Connect and mount your Nexus 6 USB memory on your computer using the USB cable.
Step 6 – Now copy/paste the BETA-SuperSU-v2.71-20160331103524.zip file to your SD card. Make sure the file is in the SD card / internal storage root (not in any folder).
Step 7 – Then turn OFF your phone.
Step 8 – twrp-3.0.0-0-shamu.img and save it to your android-sdk-windowsplatform-tools directory on your computer.
Step 9 – Now go into Fastboot/Bootloader Mode on Nexus 6. How? Press Volume Down + Power keys for a few seconds till you see some text on the screen. This is Bootloader Mode.
Step 10 – Navigate to android-sdk-windowsplatform-tools directory and open Command Prompt (Shift + Right-click > Open Command Prompt).
Step 11 – Type in the following command and press Enter.
fastboot flash recovery twrp-3.0.0-0-shamu.img
Step 12 – Once completed, choose RECOVERY from the Fastboot menu and enter Recovery Mode.
Step 13 – In ClockworkMod recovery, scroll down to “flash zip from SD card” and press the power button to select it.
Step 14 – Press the Power button again and select “choose zip from sdcard”.
Step 15 – Now using your volume keys, navigate to BETA-SuperSU-v2.71-20160331103524.zip and select it using the Power button. Confirm the installation on the next screen and the installation procedure should start now.
Step 16 – After the installation completes, go to “+++++Go Back” and reboot the phone by selecting “reboot system now” from the Recovery menu. The phone will boot now and it might take about 5 minutes to boot on your first time. So, please wait.
That’s it! Your Nexus 6 is now rooted on Android N Developer Preview 5 firmware on your phone! Check for the SuperSU app in your apps list to verify.
For More Nexus 6 latest updates Keep Checking Android Custom ROM Fix™®
That’s all. We hope this guide serves you well. If there’s anything you’d like to be added/changed on this page, PLZ Use the comment box below to contribute more ideas & Suggestions .
Like this post? PLZ Hit the share buttons below to share this article with your friends on Facebook, Google + and Twitter.
Want the latest Updates Sign up for our newsletters!
PLZ Follow Us On Flipboard 4 More Latest Updates.
Best Regards.™
Available link for download

Tuesday, November 22, 2016
How to Update Nexus 5X to Official Android N NPD90G Developer Preview 5
How to Update Nexus 5X to Official Android N NPD90G Developer Preview 5
Android N Developer Preview 5 is now available for the Nexus 5X, Nexus 6 and Nexus 9 phones. These are the major changes in Preview 2 release of Android N, as per Google:
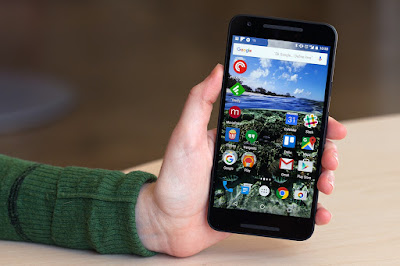
As we close in on the public rollout of Android 7.0 Nougat to devices later this summer, today we’re releasing Developer Preview 5, the last milestone of this preview series. Last month’s Developer Preview included the final APIs for Nougat; this preview gives developers the near-final system updates for all of the supported preview devices, helping you get your app ready for consumers.
View my Flipboard Magazine.
÷ Prerequisites:
•This tutorial is only for LG Nexus 5X and we are not sure if it will work on the other variants of the Nexus 5X on other carriers.
•Your phone can be on any previous Android version or even on a custom ROM. It doesn’t matter at all. This tutorial will still work for installing Android N Developer Preview 5.
*Disclaimer:
Android Custom ROM fix ® provide various Firmware Updates and Rooting process along with Custom ROM,Modes,file are all belong to their owners/developers. The autor of this site or the developers are not responsible, if you damage or brick your device.Do it on your own risk and follow the instruction properly.
* Important:
Backup important files stored on your device before proceeding with the steps below, so that in case something goes wrong you’ll have backup of all your important files.
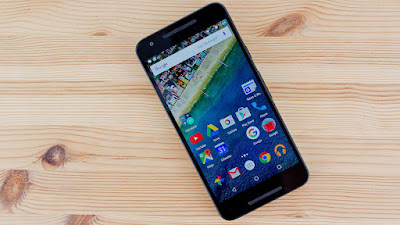
÷ How to Update Nexus 5X to Official Android N NPD90G Developer Preview 5 :
Step 1 – Download Android N Factory Image (bullhead-npd90g-factory-7a0ca1bc.tgz) for Nexus 5X on your PC, if you haven’t already.
Step 2 – Connect your Nexus 5X to your computer using the USB cable.
Step 3 – Please make sure Fastboot is configured and properly installed on your computer.
Step 4 – Turn OFF your phone.
Step 5 – Get into the Fastboot/Bootloader Mode on your phone. Turn ON the phone while pressing and holding the Volume Up + Volume Down + Power buttons till you see the Fastboot menu and START on top.
Step 6 – Now extract the downloaded file anywhere in your computer. Go to the folder hammerhead-NPD90G and then copy/paste all the files to your Fastboot directory.
Step 7 – From the factory image files in your Fastboot directory, do the following depending which OS you are on:
On Windows: Run the file “flash-all.bat”.
On Mac: Run the file “flash-all.sh” using Terminal.
On Linux: Run the file “flash-all.sh”.
Step 8 – That’s pretty much that you had to do for flashing the stock factory image on your Nexus 5X. Now wait and watch as the process is completed — or follow the on-screen instructions on your phone if in case you have to unlock the bootloader.
Step 9 – After the installation completes, the phone will boot now and it might take about 5 minutes to boot on your first time. So, please wait with patience!
That’s it! Your Nexus 5X should now have the official Android N NPD90G Developer Preview 5 software update installed on your phone using the stock factory image from Google! Go to Settings >About phone to verify.
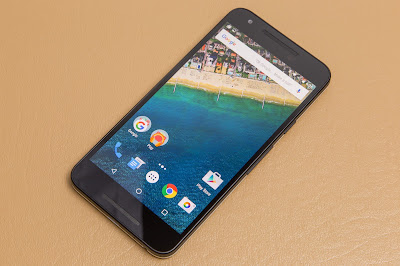
For More Nexus 5X Updates Keep Checking Android Custom ROM Fix ™®
That’s all. We hope this guide serves you well. If there’s anything you’d like to be added/changed on this page, PLZ Use the comment box below to contribute more ideas & Suggestions .
Like this post? PLZ Hit the share buttons below to share this article with your friends on Facebook, Google + and Twitter.
Want the latest Updates Sign up for our newsletters!
PLZ Follow Us On Flipboard 4 More Latest Updates.
Best Regards.™
÷ Prerequisites:
•This tutorial is only for LG Nexus 5X and we are not sure if it will work on the other variants of the Nexus 5X on other carriers.
•Your phone can be on any previous Android version or even on a custom ROM. It doesn’t matter at all. This tutorial will still work for installing Android N Developer Preview 5.
*Disclaimer:
Android Custom ROM fix ® provide various Firmware Updates and Rooting process along with Custom ROM,Modes,file are all belong to their owners/developers. The autor of this site or the developers are not responsible, if you damage or brick your device.Do it on your own risk and follow the instruction properly.
* Important:
Backup important files stored on your device before proceeding with the steps below, so that in case something goes wrong you’ll have backup of all your important files.
÷ How to Update Nexus 5X to Official Android N NPD90G Developer Preview 5 :
Step 1 – Download Android N Factory Image (bullhead-npd90g-factory-7a0ca1bc.tgz) for Nexus 5X on your PC, if you haven’t already.
Step 2 – Connect your Nexus 5X to your computer using the USB cable.
Step 3 – Please make sure Fastboot is configured and properly installed on your computer.
Step 4 – Turn OFF your phone.
Step 5 – Get into the Fastboot/Bootloader Mode on your phone. Turn ON the phone while pressing and holding the Volume Up + Volume Down + Power buttons till you see the Fastboot menu and START on top.
Step 6 – Now extract the downloaded file anywhere in your computer. Go to the folder hammerhead-NPD90G and then copy/paste all the files to your Fastboot directory.
Step 7 – From the factory image files in your Fastboot directory, do the following depending which OS you are on:
On Windows: Run the file “flash-all.bat”.
On Mac: Run the file “flash-all.sh” using Terminal.
On Linux: Run the file “flash-all.sh”.
Step 8 – That’s pretty much that you had to do for flashing the stock factory image on your Nexus 5X. Now wait and watch as the process is completed — or follow the on-screen instructions on your phone if in case you have to unlock the bootloader.
Step 9 – After the installation completes, the phone will boot now and it might take about 5 minutes to boot on your first time. So, please wait with patience!
That’s it! Your Nexus 5X should now have the official Android N NPD90G Developer Preview 5 software update installed on your phone using the stock factory image from Google! Go to Settings >About phone to verify.
For More Nexus 5X Updates Keep Checking Android Custom ROM Fix ™®
That’s all. We hope this guide serves you well. If there’s anything you’d like to be added/changed on this page, PLZ Use the comment box below to contribute more ideas & Suggestions .
Like this post? PLZ Hit the share buttons below to share this article with your friends on Facebook, Google + and Twitter.
Want the latest Updates Sign up for our newsletters!
PLZ Follow Us On Flipboard 4 More Latest Updates.
Best Regards.™
Available link for download
Sunday, November 20, 2016
How to Update Nexus 6P to Android N Developer Preview 5 NPD90G Factory Image
How to Update Nexus 6P to Android N Developer Preview 5 NPD90G Factory Image
Android N Developer Preview 5 is now available for the Nexus 5X, Nexus 6P, Nexus 6, and Nexus 9 phones and tablets. These are the major changes in Developer Preview 5 release of Android N, as per Google:

As we close in on the public rollout of Android 7.0 Nougat to devices later this summer, today we’re releasing Developer Preview 5, the last milestone of this preview series. Last month’s Developer Preview included the final APIs for Nougat; this preview gives developers the near-final system updates for all of the supported preview devices, helping you get your app ready for consumers.
As we close in on the public rollout of Android 7.0 Nougat to devices later this summer, today we’re releasing Developer Preview 5, the last milestone of this preview series. Last month’s Developer Preview included the final APIs for Nougat; this preview gives developers the near-final system updates for all of the supported preview devices, helping you get your app ready for consumers.
View my Flipboard Magazine.
÷ Prerequisites:
•This tutorial is only for Huawei Nexus 6P and we are not sure if it will work on the other variants of the Nexus 6P on other carriers.
•Your phone can be on any previous Android version or even on a custom ROM. It doesn’t matter at all. This tutorial will still work for installing Android N Developer Preview 5.
*Disclaimer:
Android Custom ROM fix ® provide various Firmware Updates and Rooting process along with Custom ROM,Modes,file are all belong to their owners/developers. The autor of this site or the developers are not responsible, if you damage or brick your device.Do it on your own risk and follow the instruction properly.
* Important:
Backup important files stored on your device before proceeding with the steps below, so that in case something goes wrong you’ll have backup of all your important files.

÷ How to Update Nexus 6P to Android N Developer Preview 5 NPD90G Factory Image
Step 1 – Download Android N Factory Image (angler-npd90g-factory-cd9ac81e.tgz) for Nexus 6P on your PC, if you haven’t already.
Step 2 – Connect your Nexus 6P to your computer using the USB cable.
Step 3 – Please make sure Fastboot is configured and properly installed on your computer.
Step 4 – Turn OFF your phone.
Step 5 – Get into the Fastboot/Bootloader Mode on your phone. Turn ON the phone while pressing and holding the Volume Up + Volume Down + Power buttons till you see the Fastboot menu and START on top.
Step 6 – Now extract the downloaded file anywhere in your computer. Go to the folder angler-NPD90G and then copy/paste all the files to your Fastboot directory.
Step 7 – From the factory image files in your Fastboot directory, do the following depending which OS you are on:
On Windows: Run the file “flash-all.bat”.
On Mac: Run the file “flash-all.sh” using Terminal.
On Linux: Run the file “flash-all.sh”.
Step 8 – That’s pretty much that you had to do for flashing the stock factory image on your Nexus 6P. Now wait and watch as the process is completed — or follow the on-screen instructions on your phone if in case you have to unlock the bootloader.
Step 9 – After the installation completes, the phone will boot now and it might take about 5 minutes to boot on your first time. So, please wait with patience!
That’s it! Your Nexus 6P should now have the official Android N NPD90G Developer Preview 5 software update installed on your phone using the stock factory image from Google! Go to Settings >About phone to verify.

For More Nexus 6P Updates Keep Checking Android Custom ROM Fix ™®
That’s all. We hope this guide serves you well. If there’s anything you’d like to be added/changed on this page, PLZ Use the comment box below to contribute more ideas & Suggestions .
Like this post? PLZ Hit the share buttons below to share this article with your friends on Facebook, Google + and Twitter.
Want the latest Updates Sign up for our newsletters!
PLZ Follow Us On Flipboard 4 More Latest Updates.
Best Regards.™
÷ Prerequisites:
•This tutorial is only for Huawei Nexus 6P and we are not sure if it will work on the other variants of the Nexus 6P on other carriers.
•Your phone can be on any previous Android version or even on a custom ROM. It doesn’t matter at all. This tutorial will still work for installing Android N Developer Preview 5.
*Disclaimer:
Android Custom ROM fix ® provide various Firmware Updates and Rooting process along with Custom ROM,Modes,file are all belong to their owners/developers. The autor of this site or the developers are not responsible, if you damage or brick your device.Do it on your own risk and follow the instruction properly.
* Important:
Backup important files stored on your device before proceeding with the steps below, so that in case something goes wrong you’ll have backup of all your important files.
÷ How to Update Nexus 6P to Android N Developer Preview 5 NPD90G Factory Image
Step 1 – Download Android N Factory Image (angler-npd90g-factory-cd9ac81e.tgz) for Nexus 6P on your PC, if you haven’t already.
Step 2 – Connect your Nexus 6P to your computer using the USB cable.
Step 3 – Please make sure Fastboot is configured and properly installed on your computer.
Step 4 – Turn OFF your phone.
Step 5 – Get into the Fastboot/Bootloader Mode on your phone. Turn ON the phone while pressing and holding the Volume Up + Volume Down + Power buttons till you see the Fastboot menu and START on top.
Step 6 – Now extract the downloaded file anywhere in your computer. Go to the folder angler-NPD90G and then copy/paste all the files to your Fastboot directory.
Step 7 – From the factory image files in your Fastboot directory, do the following depending which OS you are on:
On Windows: Run the file “flash-all.bat”.
On Mac: Run the file “flash-all.sh” using Terminal.
On Linux: Run the file “flash-all.sh”.
Step 8 – That’s pretty much that you had to do for flashing the stock factory image on your Nexus 6P. Now wait and watch as the process is completed — or follow the on-screen instructions on your phone if in case you have to unlock the bootloader.
Step 9 – After the installation completes, the phone will boot now and it might take about 5 minutes to boot on your first time. So, please wait with patience!
That’s it! Your Nexus 6P should now have the official Android N NPD90G Developer Preview 5 software update installed on your phone using the stock factory image from Google! Go to Settings >About phone to verify.
For More Nexus 6P Updates Keep Checking Android Custom ROM Fix ™®
That’s all. We hope this guide serves you well. If there’s anything you’d like to be added/changed on this page, PLZ Use the comment box below to contribute more ideas & Suggestions .
Like this post? PLZ Hit the share buttons below to share this article with your friends on Facebook, Google + and Twitter.
Want the latest Updates Sign up for our newsletters!
PLZ Follow Us On Flipboard 4 More Latest Updates.
Best Regards.™
Available link for download
Wednesday, September 21, 2016
How to Update Motorola Nexus 6 to Official Android N NPD90G Developer Preview 5
How to Update Motorola Nexus 6 to Official Android N NPD90G Developer Preview 5
As we close in on the public rollout of Android 7.0 Nougat to devices later this summer, today we’re releasing Developer Preview 5, the last milestone of this preview series.

Last month’s Developer Preview included the final APIs for Nougat; this preview gives developers the near-final system updates for all of the supported preview devices, helping you get your app ready for consumers.
View my Flipboard Magazine.
÷ Prerequisites:
•This tutorial is only for Motorola Nexus 6 and we are not sure if it will work on the other variants of the Nexus 6 on other carriers.
•Your phone can be on any previous Android version or even on a custom ROM. It doesn’t matter at all. This tutorial will still work for installing Android N Developer Preview 5.
*Disclaimer:
Android Custom ROM fix ® provide various Firmware Updates and Rooting process along with Custom ROM,Modes,file are all belong to their owners/developers. The autor of this site or the developers are not responsible, if you damage or brick your device.Do it on your own risk and follow the instruction properly.
* Important:
Backup important files stored on your device before proceeding with the steps below, so that in case something goes wrong you’ll have backup of all your important files.

÷ How to Update Motorola Nexus 6 to Official Android N NPD90G Developer Preview 5:
Step 1 – Download Android N Factory Image (shamu-npd90g-factory-f7a4e3a9.tgz) for Nexus 6 on your PC, if you haven’t already.
Step 2 – Connect your Nexus 6 to your computer using the USB cable.
Step 3 – Please make sure Fastboot is configured and properly installed on your computer.
Step 4 – Turn OFF your phone.
Step 5 – Get into the Fastboot/Bootloader Mode on your phone. Turn ON the phone while pressing and holding the Volume Up + Volume Down + Power buttons till you see the Fastboot menu and START on top.
Step 6 – Now extract the downloaded file anywhere in your computer. Go to the folder angler-NPD90G and then copy/paste all the files to your Fastboot directory.
Step 7 – From the factory image files in your Fastboot directory, do the following depending which OS you are on:
On Windows: Run the file “flash-all.bat”.
On Mac: Run the file “flash-all.sh” using Terminal.
On Linux: Run the file “flash-all.sh”.
Step 8 – That’s pretty much that you had to do for flashing the stock factory image on your Nexus 6. Now wait and watch as the process is completed — or follow the on-screen instructions on your phone if in case you have to unlock the bootloader.
Step 9 – After the installation completes, the phone will boot now and it might take about 5 minutes to boot on your first time. So, please wait with patience!

That’s it! Your Nexus 6 should now have the official Android N NPD90G Developer Preview 5 software update installed on your phone using the stock factory image from Google! Go to Settings >About phone to verify.
For More Nexus 6 Update Keep Checking Android Custom ROM Fix ™®
That’s all. We hope this guide serves you well. If there’s anything you’d like to be added/changed on this page, PLZ Use the comment box below to contribute more ideas & Suggestions .
Like this post? PLZ Hit the share buttons below to share this article with your friends on Facebook, Google + and Twitter.
Want the latest Updates Sign up for our newsletters!
PLZ Follow Us On Flipboard 4 More Latest Updates.
Best Regards.™
÷ Prerequisites:
•This tutorial is only for Motorola Nexus 6 and we are not sure if it will work on the other variants of the Nexus 6 on other carriers.
•Your phone can be on any previous Android version or even on a custom ROM. It doesn’t matter at all. This tutorial will still work for installing Android N Developer Preview 5.
*Disclaimer:
Android Custom ROM fix ® provide various Firmware Updates and Rooting process along with Custom ROM,Modes,file are all belong to their owners/developers. The autor of this site or the developers are not responsible, if you damage or brick your device.Do it on your own risk and follow the instruction properly.
* Important:
Backup important files stored on your device before proceeding with the steps below, so that in case something goes wrong you’ll have backup of all your important files.
÷ How to Update Motorola Nexus 6 to Official Android N NPD90G Developer Preview 5:
Step 1 – Download Android N Factory Image (shamu-npd90g-factory-f7a4e3a9.tgz) for Nexus 6 on your PC, if you haven’t already.
Step 2 – Connect your Nexus 6 to your computer using the USB cable.
Step 3 – Please make sure Fastboot is configured and properly installed on your computer.
Step 4 – Turn OFF your phone.
Step 5 – Get into the Fastboot/Bootloader Mode on your phone. Turn ON the phone while pressing and holding the Volume Up + Volume Down + Power buttons till you see the Fastboot menu and START on top.
Step 6 – Now extract the downloaded file anywhere in your computer. Go to the folder angler-NPD90G and then copy/paste all the files to your Fastboot directory.
Step 7 – From the factory image files in your Fastboot directory, do the following depending which OS you are on:
On Windows: Run the file “flash-all.bat”.
On Mac: Run the file “flash-all.sh” using Terminal.
On Linux: Run the file “flash-all.sh”.
Step 8 – That’s pretty much that you had to do for flashing the stock factory image on your Nexus 6. Now wait and watch as the process is completed — or follow the on-screen instructions on your phone if in case you have to unlock the bootloader.
Step 9 – After the installation completes, the phone will boot now and it might take about 5 minutes to boot on your first time. So, please wait with patience!
That’s it! Your Nexus 6 should now have the official Android N NPD90G Developer Preview 5 software update installed on your phone using the stock factory image from Google! Go to Settings >About phone to verify.
For More Nexus 6 Update Keep Checking Android Custom ROM Fix ™®
That’s all. We hope this guide serves you well. If there’s anything you’d like to be added/changed on this page, PLZ Use the comment box below to contribute more ideas & Suggestions .
Like this post? PLZ Hit the share buttons below to share this article with your friends on Facebook, Google + and Twitter.
Want the latest Updates Sign up for our newsletters!
PLZ Follow Us On Flipboard 4 More Latest Updates.
Best Regards.™
Available link for download
Thursday, September 15, 2016
How to Root Nexus 5X Running Android N NPD90G Developer Preview 5
How to Root Nexus 5X Running Android N NPD90G Developer Preview 5
Android N Developer Preview 5 is now available for the Nexus 5X, Nexus 6 and Nexus 9 phones. These are the major changes in Preview 2 release of Android N, as per Google:

As we close in on the public rollout of Android 7.0 Nougat to devices later this summer, today we’re releasing Developer Preview 5, the last milestone of this preview series. Last month’s Developer Preview included the final APIs for Nougat; this preview gives developers the near-final system updates for all of the supported preview devices, helping you get your app ready for consumers.
As we close in on the public rollout of Android 7.0 Nougat to devices later this summer, today we’re releasing Developer Preview 5, the last milestone of this preview series. Last month’s Developer Preview included the final APIs for Nougat; this preview gives developers the near-final system updates for all of the supported preview devices, helping you get your app ready for consumers.
View my Flipboard Magazine.
÷ Prerequisites:
•This root method is only for Android N (NPD90G) installed on Nexus 5X and I am not sure if it will work on the other variants of the Nexus 5X on other carriers.
•Your Nexus 5X bootloader should be unlocked.
Nexus 5X should be on Android N NPD90G software version.
•Make a Nandroid backup of your previous phone set up before proceeding – for just in case anything goes wrong.
•You will need a custom kernel (i.e. Despair Kernel) for this root method to work.
*Disclaimer:
Android Custom ROM fix ® provide various Firmware Updates and Rooting process along with Custom ROM,Modes,file are all belong to their owners/developers. The autor of this site or the developers are not responsible, if you damage or brick your device.Do it on your own risk and follow the instruction properly.
* Important:
Backup important files stored on your device before proceeding with the steps below, so that in case something goes wrong you’ll have backup of all your important files.

÷ How to Root Nexus 5X Running Android N (NPD90G) Developer Preview 5.
Step 1 – Download Android SDK from the Android Developers website and install. Also set it up with downloading platform-tools and USB drivers package in SDK. See: How to Set up ADB and Fastboot on Windows.
Step 2 – Enable USB Debugging mode in your Nexus 5X.
Step 3 – Download Fastboot from the following links depending on your OS and extract it in android-sdk-windowsplatform-tools directory. Create directory if not already there.
Windows: Download here
Mac: Download here.
Linux: Download here.
NOTE: Skip Steps 1, 2, 3 if you already have them.
Step 4 – Download SuperSU v2.71 for Nexus 5X on your PC, if you haven’t already.
Step 5 – Connect and mount your Nexus 5X USB memory on your computer using the USB cable.
Step 6 – Now copy/paste the BETA-SuperSU-v2.66-20160103015024.zip file to your SD card. Make sure the file is in the SD card / internal storage root (not in any folder).
Step 7 – Then turn OFF your phone.
Step 8 – Download twrp-2.8.7.0-bullhead.img and save it to your android-sdk-windowsplatform-tools directory on your computer.
Step 9 – Now go into Fastboot/Bootloader Mode on Nexus 5X. How? Press Volume Down + Power keys for a few seconds till you see some text on the screen. This is Bootloader Mode.
Step 10 – Navigate to android-sdk-windowsplatform-tools directory and open Command Prompt (Shift + Right-click > Open Command Prompt).
Step 11 – Type in the following command and press Enter.
fastboot flash recovery twrp-2.8.7.0-bullhead.img
Step 12 – Once completed, choose RECOVERY from the Fastboot menu and enter Recovery Mode.
Step 13 – In ClockworkMod recovery, scroll down to “flash zip from SD card” and press the power button to select it.
Step 14 – Press the Power button again and select “choose zip from sdcard”.
Step 15 – Now using your volume keys, navigate to BETA-SuperSU-v2.71-20160331103524.zip and select it using the Power button. Confirm the installation on the next screen and the installation procedure should start now.
Step 16 – After the installation completes, go to “+++++Go Back” and reboot the phone by selecting “reboot system now” from the Recovery menu. The phone will boot now and it might take about 5 minutes to boot on your first time. So, please wait.

That’s it! Your Nexus 5X is now rooted on Android 6.0.1 Marshmallow firmware on your phone! Check for the SuperSU app in your apps list to verify.
For More Nexus 5X Keep Checking Android Custom ROM Fix ™®
That’s all. We hope this guide serves you well. If there’s anything you’d like to be added/changed on this page, PLZ Use the comment box below to contribute more ideas & Suggestions .
Like this post? PLZ Hit the share buttons below to share this article with your friends on Facebook, Google + and Twitter.
Want the latest Updates Sign up for our newsletters!
PLZ Follow Us On Flipboard 4 More Latest Updates.
Best Regards.™
÷ Prerequisites:
•This root method is only for Android N (NPD90G) installed on Nexus 5X and I am not sure if it will work on the other variants of the Nexus 5X on other carriers.
•Your Nexus 5X bootloader should be unlocked.
Nexus 5X should be on Android N NPD90G software version.
•Make a Nandroid backup of your previous phone set up before proceeding – for just in case anything goes wrong.
•You will need a custom kernel (i.e. Despair Kernel) for this root method to work.
*Disclaimer:
Android Custom ROM fix ® provide various Firmware Updates and Rooting process along with Custom ROM,Modes,file are all belong to their owners/developers. The autor of this site or the developers are not responsible, if you damage or brick your device.Do it on your own risk and follow the instruction properly.
* Important:
Backup important files stored on your device before proceeding with the steps below, so that in case something goes wrong you’ll have backup of all your important files.
÷ How to Root Nexus 5X Running Android N (NPD90G) Developer Preview 5.
Step 1 – Download Android SDK from the Android Developers website and install. Also set it up with downloading platform-tools and USB drivers package in SDK. See: How to Set up ADB and Fastboot on Windows.
Step 2 – Enable USB Debugging mode in your Nexus 5X.
Step 3 – Download Fastboot from the following links depending on your OS and extract it in android-sdk-windowsplatform-tools directory. Create directory if not already there.
Windows: Download here
Mac: Download here.
Linux: Download here.
NOTE: Skip Steps 1, 2, 3 if you already have them.
Step 4 – Download SuperSU v2.71 for Nexus 5X on your PC, if you haven’t already.
Step 5 – Connect and mount your Nexus 5X USB memory on your computer using the USB cable.
Step 6 – Now copy/paste the BETA-SuperSU-v2.66-20160103015024.zip file to your SD card. Make sure the file is in the SD card / internal storage root (not in any folder).
Step 7 – Then turn OFF your phone.
Step 8 – Download twrp-2.8.7.0-bullhead.img and save it to your android-sdk-windowsplatform-tools directory on your computer.
Step 9 – Now go into Fastboot/Bootloader Mode on Nexus 5X. How? Press Volume Down + Power keys for a few seconds till you see some text on the screen. This is Bootloader Mode.
Step 10 – Navigate to android-sdk-windowsplatform-tools directory and open Command Prompt (Shift + Right-click > Open Command Prompt).
Step 11 – Type in the following command and press Enter.
fastboot flash recovery twrp-2.8.7.0-bullhead.img
Step 12 – Once completed, choose RECOVERY from the Fastboot menu and enter Recovery Mode.
Step 13 – In ClockworkMod recovery, scroll down to “flash zip from SD card” and press the power button to select it.
Step 14 – Press the Power button again and select “choose zip from sdcard”.
Step 15 – Now using your volume keys, navigate to BETA-SuperSU-v2.71-20160331103524.zip and select it using the Power button. Confirm the installation on the next screen and the installation procedure should start now.
Step 16 – After the installation completes, go to “+++++Go Back” and reboot the phone by selecting “reboot system now” from the Recovery menu. The phone will boot now and it might take about 5 minutes to boot on your first time. So, please wait.
That’s it! Your Nexus 5X is now rooted on Android 6.0.1 Marshmallow firmware on your phone! Check for the SuperSU app in your apps list to verify.
For More Nexus 5X Keep Checking Android Custom ROM Fix ™®
That’s all. We hope this guide serves you well. If there’s anything you’d like to be added/changed on this page, PLZ Use the comment box below to contribute more ideas & Suggestions .
Like this post? PLZ Hit the share buttons below to share this article with your friends on Facebook, Google + and Twitter.
Want the latest Updates Sign up for our newsletters!
PLZ Follow Us On Flipboard 4 More Latest Updates.
Best Regards.™
Available link for download
Tuesday, September 6, 2016
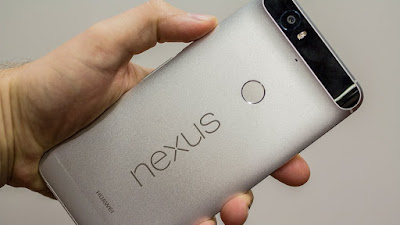
How to Root Nexus 6P Running Android N NPD90G Developer Preview 5
How to Root Nexus 6P Running Android N NPD90G Developer Preview 5
Great news for Nexus 6P Users Running Android N NPD90G Developer Preview 5 Factory Image as now they can root the device easily.
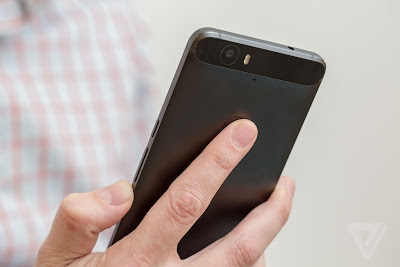
You can find out how to apply it right now via this easy tutorial .
View my Flipboard Magazine.
÷ Prerequisites:
•This root method is only for Android N (NPD90G) installed on Nexus 6P and I am not sure if it will work on the other variants of the Nexus 6P on other carriers.
•Your Nexus 6P bootloader should be unlocked.
Nexus 6P should be on Android N NPD90G software version.
•Make a Nandroid backup of your previous phone set up before proceeding – for just in case anything goes wrong.
*Disclaimer:
Android Custom ROM fix ® provide various Firmware Updates and Rooting process along with Custom ROM,Modes,file are all belong to their owners/developers. The autor of this site or the developers are not responsible, if you damage or brick your device.Do it on your own risk and follow the instruction properly.
* Important:
Backup important files stored on your device before proceeding with the steps below, so that in case something goes wrong you’ll have backup of all your important files.
÷ How to Root Nexus 6P Running Android N NPD90G Developer Preview 5:
Step 1 – Download Android SDK from the Android Developers website and install. Also set it up with downloading platform-tools and USB drivers package in SDK.
Step 2 – Enable USB Debugging mode in your Nexus 6P.
Step 3 – Download Fastboot from the following links depending on your OS and extract it in android-sdk-windowsplatform-tools directory. Create directory if not already there.
Windows: Download here.
Mac: Download here.
Linux: Download here.
NOTE: Skip Steps 1, 2, 3 if you already have them.
Step 4 – Download SuperSU v2.71 for Nexus 6P on your PC, if you haven’t already.
Step 5 – Connect and mount your Nexus 6P USB memory on your computer using the USB cable.
Step 6 – Now copy/paste the BETA-SuperSU-v2.71-20160331103524.zip file to your SD card. Make sure the file is in the SD card / internal storage root (not in any folder).
Step 7 – Then turn OFF your phone.
Step 8 – Download twrp-3.0.2-0-angler.img and save it to your android-sdk-windowsplatform-tools directory on your computer.
Step 9 – Now go into Fastboot/Bootloader Mode on Nexus 6P. How? Press Volume Down + Power keys for a few seconds till you see some text on the screen. This is Bootloader Mode.
Step 10 – Navigate to android-sdk-windowsplatform-tools directory and open Command Prompt (Shift + Right-click > Open Command Prompt).
Step 11 – Type in the following command and press Enter.
fastboot flash recovery twrp-3.0.2-0-angler.img
Step 12 – Once completed, choose RECOVERY from the Fastboot menu and enter Recovery Mode.
Step 13 – In ClockworkMod recovery, scroll down to “flash zip from SD card” and press the power button to select it.
Step 14 – Press the Power button again and select “choose zip from sdcard”.
Step 15 – Now using your volume keys, navigate to BETA-SuperSU-v2.71-20160331103524.zip and select it using the Power button. Confirm the installation on the next screen and the installation procedure should start now.
Step 16 – After the installation completes, go to “+++++Go Back” and reboot the phone by selecting “reboot system now” from the Recovery menu. The phone will boot now and it might take about 5 minutes to boot on your first time. So, please wait.
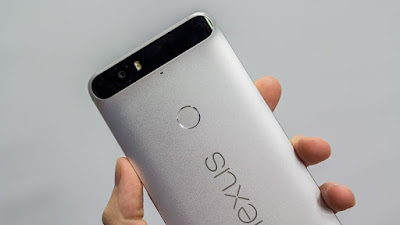
That’s it! Your Nexus 6P is now rooted on Android N Developer Preview 5 firmware on your phone! Check for the SuperSU app in your apps list to verify.
For More Nexus 6 P Updates Keep Checking Android Custom ROM Fix ™®
That’s all. We hope this guide serves you well. If there’s anything you’d like to be added/changed on this page, PLZ Use the comment box below to contribute more ideas & Suggestions .
Like this post? PLZ Hit the share buttons below to share this article with your friends on Facebook, Google + and Twitter.
Want the latest Updates Sign up for our newsletters!
PLZ Follow Us On Flipboard 4 More Latest Updates.
Best Regards.™
÷ Prerequisites:
•This root method is only for Android N (NPD90G) installed on Nexus 6P and I am not sure if it will work on the other variants of the Nexus 6P on other carriers.
•Your Nexus 6P bootloader should be unlocked.
Nexus 6P should be on Android N NPD90G software version.
•Make a Nandroid backup of your previous phone set up before proceeding – for just in case anything goes wrong.
*Disclaimer:
Android Custom ROM fix ® provide various Firmware Updates and Rooting process along with Custom ROM,Modes,file are all belong to their owners/developers. The autor of this site or the developers are not responsible, if you damage or brick your device.Do it on your own risk and follow the instruction properly.
* Important:
Backup important files stored on your device before proceeding with the steps below, so that in case something goes wrong you’ll have backup of all your important files.
÷ How to Root Nexus 6P Running Android N NPD90G Developer Preview 5:
Step 1 – Download Android SDK from the Android Developers website and install. Also set it up with downloading platform-tools and USB drivers package in SDK.
Step 2 – Enable USB Debugging mode in your Nexus 6P.
Step 3 – Download Fastboot from the following links depending on your OS and extract it in android-sdk-windowsplatform-tools directory. Create directory if not already there.
Windows: Download here.
Mac: Download here.
Linux: Download here.
NOTE: Skip Steps 1, 2, 3 if you already have them.
Step 4 – Download SuperSU v2.71 for Nexus 6P on your PC, if you haven’t already.
Step 5 – Connect and mount your Nexus 6P USB memory on your computer using the USB cable.
Step 6 – Now copy/paste the BETA-SuperSU-v2.71-20160331103524.zip file to your SD card. Make sure the file is in the SD card / internal storage root (not in any folder).
Step 7 – Then turn OFF your phone.
Step 8 – Download twrp-3.0.2-0-angler.img and save it to your android-sdk-windowsplatform-tools directory on your computer.
Step 9 – Now go into Fastboot/Bootloader Mode on Nexus 6P. How? Press Volume Down + Power keys for a few seconds till you see some text on the screen. This is Bootloader Mode.
Step 10 – Navigate to android-sdk-windowsplatform-tools directory and open Command Prompt (Shift + Right-click > Open Command Prompt).
Step 11 – Type in the following command and press Enter.
fastboot flash recovery twrp-3.0.2-0-angler.img
Step 12 – Once completed, choose RECOVERY from the Fastboot menu and enter Recovery Mode.
Step 13 – In ClockworkMod recovery, scroll down to “flash zip from SD card” and press the power button to select it.
Step 14 – Press the Power button again and select “choose zip from sdcard”.
Step 15 – Now using your volume keys, navigate to BETA-SuperSU-v2.71-20160331103524.zip and select it using the Power button. Confirm the installation on the next screen and the installation procedure should start now.
Step 16 – After the installation completes, go to “+++++Go Back” and reboot the phone by selecting “reboot system now” from the Recovery menu. The phone will boot now and it might take about 5 minutes to boot on your first time. So, please wait.
That’s it! Your Nexus 6P is now rooted on Android N Developer Preview 5 firmware on your phone! Check for the SuperSU app in your apps list to verify.
For More Nexus 6 P Updates Keep Checking Android Custom ROM Fix ™®
That’s all. We hope this guide serves you well. If there’s anything you’d like to be added/changed on this page, PLZ Use the comment box below to contribute more ideas & Suggestions .
Like this post? PLZ Hit the share buttons below to share this article with your friends on Facebook, Google + and Twitter.
Want the latest Updates Sign up for our newsletters!
PLZ Follow Us On Flipboard 4 More Latest Updates.
Best Regards.™
Available link for download
Subscribe to:
Posts (Atom)