Sunday, February 19, 2017
How to Install Android 6 0 1 Marshmallow Tekcafe v5 3 v30A ROM on AT T LG G3 D850
How to Install Android 6 0 1 Marshmallow Tekcafe v5 3 v30A ROM on AT T LG G3 D850
According to XDA member Truongthevinh, Android 6.0.1 Marshmallow Tekcafe v5.3 [ v30A] ROM is now released for AT&T LG G3 D850.

÷ ROM Info:
Android 6.0 (MRA58K) + some 6.0.1 patches
Based on LG v30A build 16052016
Updated Google security patches to May, 2016
Add supersu v2.76
Full UX 5.0 from latest LG G5 v10d base
Multi-ariants support
Battery life, performance and memory improvements.


÷ Changelog:
Changelog V5.3:
- Marshmallow 6.0 D855 V30A 16/05/2016
- Fixes and stability improvements, more battery life
- Updated Full app with latest LG G5 v10d base
- Added QSlide and QRemote quick toggles
- Added LED quick toggle
- Added SuperSU 2.76
- Added Play 360 VR Video G5
- Added LG Remote Call G5
- Added Smart Doctor from LG G5
- Added Mirror Link with car from G5
Changelog V5.2:
- Update Marshmallow 6.0 D855 V30A 16/05/2016
- Patch Security Android: 01/05/2016
- Added Xposed v85 in Aroma
- Updated some latest LG G5 apps
- New stock boot for D855(30K), F400(30G),D850(30K), D852(30D), VS985(47A)
- New kernel port for D851,us990, ls990
- Added Apn setting
- Fix copy Clip Tray
- Fix Qmemo
- Netfix: OK (for USA user)
- More Stable System
Changelog V5.1:
- Update Marshmallow 6.0 D855 V30K (26/04/2016)
- Updated and synced with latest LG G5 v10c base
- New stock boot for D855 (30K), D851 (30D)
- New kernel for all variants
- Fix thermal
Changelog V5.0:
- Update Marshmallow 6.0 D855 V30F
- Full LG G5 UX 5.0 and LG G5 Apps
- New stock boot for D855, D851, F400, D852, VS985
- New kernel for all variants
- New root - SuperSU 2.65
- Add ViPER4Android FX Audio Mod in Aroma
- Call Recorder in Aroma
- Navibar 32 dpi in Aroma
- Weather deodex for Support Install Xposed v80
- LG G3 LS990, US990: bug: NFC...
÷ Prerequisites:
•This tutorial is only for installing Android 6.0.1 Marshmallow Tekcafe v5.3 [ v30A] ROM on AT&T LG G3 D850.Please do not try on any other LG G3 Variants.
•Your phone should have a custom recovery installed in order to install this NanoROM ROM on your phone.
•We will be using TWRP Recovery for this tutorial.
•This tutorial will wipe out all your data. Make sure you backup all your data in your phone before proceeding.
•Perform a Dalvik Cache wipe before proceeding from the Recovery Mode.
*Disclaimer:
Android Custom ROM fix ® provide various Firmware Updates and Rooting process along with Custom ROM,Modes,file are all belong to their owners/developers. The autor of this site or the developers are not responsible, if you damage or brick your device.Do it on your own risk and follow the instruction properly.
* Important:
Backup important files stored on your device before proceeding with the steps below, so that in case something goes wrong you’ll have backup of all your important files.


You can find out how to apply it right now via XDA.
For More LG G3 Updates Keep Checking Android custom ROM Fix ™®
That’s all. We hope this guide serves you well. If there’s anything you’d like to be added/changed on this page, PLZ Use the comment box below to contribute more ideas & Suggestions .
Like this post? PLZ Hit the share buttons below to share this article with your friends on Facebook, Google + and Twitter.
Want the latest Updates Sign up for our newsletters!
PLZ Follow Us On Flipboard 4 More Latest Updates.
Best Regards.™
Available link for download

Saturday, February 18, 2017
Bacon Root Toolkit Latest Setup V1 0 3 Download Free
Bacon Root Toolkit Latest Setup V1 0 3 Download Free

Now you can download latest and full setup of Bacon Root Toolkit from below download links. If downloading links are not working or you are unable to download please contact us via commenting we will change or update download links. We are always sharing free and official site download links so you can manage it easily.
Downloading links
Bacon Root Toolkit Setup
Available link for download
Sunday, February 5, 2017
JBL Charge 3 and Clip 2 prove theres still innovation in Bluetooth speakers
JBL Charge 3 and Clip 2 prove theres still innovation in Bluetooth speakers

You can find Bluetooth speakers anywhere — but JBLs latest stand out.
No matter your needs, theres a Bluetooth speaker out there to match — and you dont have to look hard to find one, either. For most people, their only real need is "the cheapest price possible" — but many will pay a bit for better features, quality and sound. And thats where JBL comes in, with the latest iterations of two of its Bluetooth speakers — the Charge 3 and Clip 2.
JBL isnt in the race to the bottom. Its hoping to stay on the higher end with high quality materials and of course sound, with some great features that can help turn a Bluetooth speaker experience from an "every once and a while" thing to an every-day useful accessory. Lets take a look at the JBL Charge 3 and Clip 2 speakers.
JBL Charge 3

The JBL Charge 3 is designed to be the center of the party or fill a room with sound, and thats immediately apparent with its size — larger than your average reusable water bottle, and weighing in at about 1.75 pounds. That weight comes from a sturdy, IPX7 waterproof enclosure that protects dual 10W speakers along with huge passive radiators on the ends that drive up the bass level.
With this much output you shouldnt be surprised that the Charge 3 has a 6000 mAh battery inside, which can offer you 20 hours of playback over Bluetooth. You probably arent going to use it for that long (or heck, even half that long) between charges, so JBL also gives you the option of tapping into that power with a full-sized USB port on the back that can be used to charge your phone at 2A from 5V, which is a typical rate for a non-Fast Charge AC adapter.
Its extremely handy if youve been streaming music from your phone to the speaker, but also nice to have for anyone else whos with you that needs a quick top-up. The speaker gives you a visual indication of its charge state with a set of LEDs in the base, and charges itself over Micro-USB with a cable and 5V/2.3A wall plug in the box if you need one.
Because of its size and weight you arent likely to be carrying the Charge 3 around much — its mostly going to stay put on a coffee table or brought out to the pool or picnic table when you need music for a group. I actually mostly kept it at my desk for daily music listening, both from my computer over a 3.5mm cable and my phone over Bluetooth — and it performed far better than my set of Logitech computer speakers, at a fraction of the size and complexity. Indoors there was no reason to ever get it above about 50% volume, and I rarely needed to max it out to get the music loud enough outside, even for a big group of people.
It sounds as good as youd expect at $150, and has a bunch of extra features.
At $150 this isnt exactly an impulse purchase (nor is it JBLs most expensive Bluetooth speaker), but if theres one thing that companies like JBL, Jawbone, Bose and countless others have shown us its that people are willing to pay a pretty penny for a really good, loud wireless speaker with some extra features. Thats exactly what you get with the Charge 3. Not only does it produce full sound with lots of bass out of a relatively small package (compared to big wired speakers), its also tough and completely waterproof so you never have to worry about what happens to it. It also goes above and beyond to let you tap into its battery to charge your phone, which can prove pivotal in keeping the tunes going late into the night.
It wont be worth the money to everyone, but its hard to argue that JBL isnt giving you plenty for your money here if youre looking for a big wireless speaker. (And if you want to save a bit, maybe consider the last-gen Charge 2+ for about $99.)
See at Amazon
JBL Clip 2

For as cool as the Charge 3 speaker is, Im a bigger fan of the small JBL Clip 2 and I think itll be one that more people will actually consider buying and using on a regular basis.
This little $60 speaker is roughly the size of a hockey puck but still offers some great sound from its single 3W speaker — even up to high volumes without distorting. It connects over Bluetooth, of course, and offers easy-to-press buttons around the edges for play/pause and volume control — you can also use a built-in microphone for calls via your connected phone. Better yet, theres also a built-in foot-long 3.5mm cable to plug in — that neatly wraps around and stores in the speaker — which is super useful when youre passing the speaker around at a get-together and or dont want to deal with Bluetooth pairing.
The speaker is built to take a beating, and feels like you could drive a nail with it if you needed to (but seriously, dont do that). Its also fully IPX7 waterproof, with a robust rubber door over the Micro-USB charging port, allowing it to handle dirt and even full submersion in water. Its rugged abilities are exemplified by the carabiner thats attached to the side of the Clip 2 (the name makes more sense now, huh?) that lets you hook it on things wherever you go.
When a speaker is built this well, it goes with you and you use it more.
I clipped it on the outside of my messenger bag or backpack to carry it places, not being worried about it getting bumped and knocked around. I clipped it to my pants pocket so I could listen to music around the house as I took care of some chores, and found it particularly useful to hook on the shower curtain in the morning for podcast listening in the shower.
JBL claims eight hours of music playback, and I found that to be perfect for a weeks worth of casual listening off and on around the house. It also powered through several hours of Bluetooth music streaming for my Fourth of July party with battery to spare — and again, I never had to worry about it getting bumped or dropped.
I found the rugged Clip 2 to be infinitely more useful than other standard Bluetooth speakers that are more fragile and dont have a clip, and because of its design elements I carried it around and used it more than any other speaker Ive had. Its more expensive than the dime-a-dozen Bluetooth speakers online, but you get something for it — and with how much more youre likely to use it, its worth it.
See at Amazon

from Android Central - Android Forums, News, Reviews, Help and Android Wallpapers http://ift.tt/2anC8lI
via IFTTT
Available link for download
Action Launcher 3 updated with Marshmallow based launcher improvements Google Now integration root and more
Action Launcher 3 updated with Marshmallow based launcher improvements Google Now integration root and more

An update to Action Launcher 3 is currently rolling out with the usual assortment of improvements, feature tweaks, and fixes... but theres more going on here. This isnt just any update—the latest version of Action Launcher 3 moves to a Marshmallow launcher code base and adds (root-only) Google Now integration.
Heres the full changelog.
- NEW: Update base code to Android 6.0.1s Launcher3 code. Notable usability enhancements include the addition of fast scroll in the All Apps drawer, a much improved widget picker and infinite paged folders and more.
Action Launcher 3 updated with Marshmallow-based launcher improvements, Google Now integration (root), and more was written by the awesome team at Android Police.


from Android Police – Android News, Apps, Games, Phones, Tablets http://ift.tt/2ag93bT
via IFTTT
Available link for download
Saturday, February 4, 2017
How to Install TWRP Image on OnePlus 3
How to Install TWRP Image on OnePlus 3

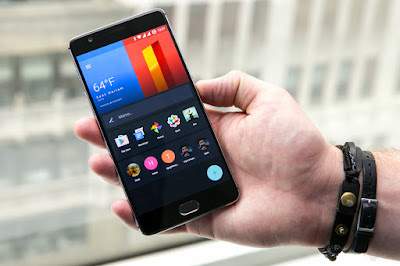
OnePlus 3 was released on June 14th, 2016.The phone sports all the high-end features and specification but has a very budget friendly price tag which definitely attracts buyers.Now OnePlus 3 has a full metal body and one of the most important updates is RAM.OnePlus 3 now has 6GB of RAM which is unbelievable
Thanks to XDA Developer "Naman Bhalla" for sharing the recovery file.Now users can easily flash the TWRP recovery file using fastboot commands.Then they can flash the latest SuperSu root file to get root access on OnePlus 3.Donot worry we are going to share step by step guide on How to Install TWRP Recovery on OnePlus 3.
÷ Prerequisites:
•Make sure bootloader of OnePlus 3 is unlocked
•Warranty may be void of your device if you follow the procedures given on this page. You only are responsible for your device. We won’t be liable if any damage occurs to your device and/or its components.
•Make sure your device has more than 50% battery life
•The TWRP version is not tested yet.

*Disclaimer:
Android Custom ROM fix ® provide various Firmware Updates and Rooting process along with Custom ROM,Modes,file are all belong to their owners/developers. The autor of this site or the developers are not responsible, if you damage or brick your device.Do it on your own risk and follow the instruction properly.
* Important:
Backup important files stored on your device before proceeding with the steps below, so that in case something goes wrong you’ll have backup of all your important files.
÷ How to Install TWRP Image on OnePlus 3:
1- First Download a TWRP recovery .img file for your for OnePlus 3.
2- Setup ADB and Fastboot on your PC.
3- Enable USB debugging on your device.
4- Open the folder where your TWRP Recovery .img file is saved.
5- Now open a command window inside that folder. To do that, “Shift + Right click” on any empty white space inside the folder and then select “Open command window here” from the context menu.
6- Connect your device to the PC. And type the following into the command window we opened in step 4 above to boot your device into bootloader/fastboot mode:
adb reboot bootloader
? If your asks for permission to “Allow USB debugging”, tap OK.
7- Once your device boots into bootloader mode, issue the following command into command window to flash the TWRP recovery .img file:
fastboot flash recovery twrp-2.8.x.x-xxx.img
? Here modify twrp.img with the name of your TWRP recovery .img file, OR change your TWRP recovery filename to twrp.img and use the ]
command above.
8- Once TWRP is successfully flashed on your device, issue the following command to reboot:
fastboot reboot
Done!!! Now you have TWRP on your OnePlus 3.
For More OnePlus 3 Updates Keep Checking Android Custom ROM Fix ™®
That’s all. We hope this guide serves you well. If there’s anything you’d like to be added/changed on this page, PLZ Use the comment box below to contribute more ideas & Suggestions .
Like this post? PLZ Hit the share buttons below to share this article with your friends on Facebook, Google + and Twitter.
Want the latest Updates Sign up for our newsletters!
PLZ Follow Us On Flipboard 4 More Latest Updates.
Best Regards.™
Available link for download
iOS 9 3 3 rolling out to iPhone and iPad
iOS 9 3 3 rolling out to iPhone and iPad

Apparently Apple is in a “Update all the things!” mood today, because after pushing out iOS 10 beta and watchOS updates, it’s now rolling out a fresh version of iOS 9.

from PhoneDog.com - Latest videos, reviews, articles, news and posts http://ift.tt/2ab5BBY
via IFTTT
Available link for download
Thursday, January 26, 2017
Blackberry Q10 Latest OS Firmware Flash File V10 3 1 Download Free
Blackberry Q10 Latest OS Firmware Flash File V10 3 1 Download Free

Now you can download latest flash files of Blackberry Q10 from below downloading links. If downloading links are not working or you are facing trouble during downloading or flashing please contact us via commenting we will update downloading links.
Downloading links
STL100-1
STL100-2
STL100-3
STL100-4
Available link for download
Wednesday, January 18, 2017
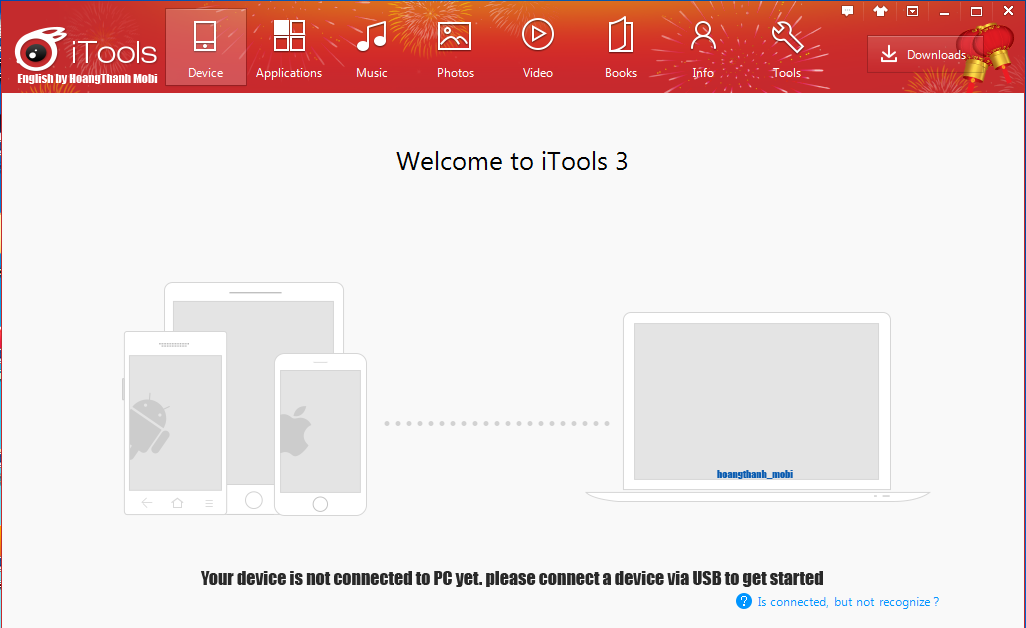
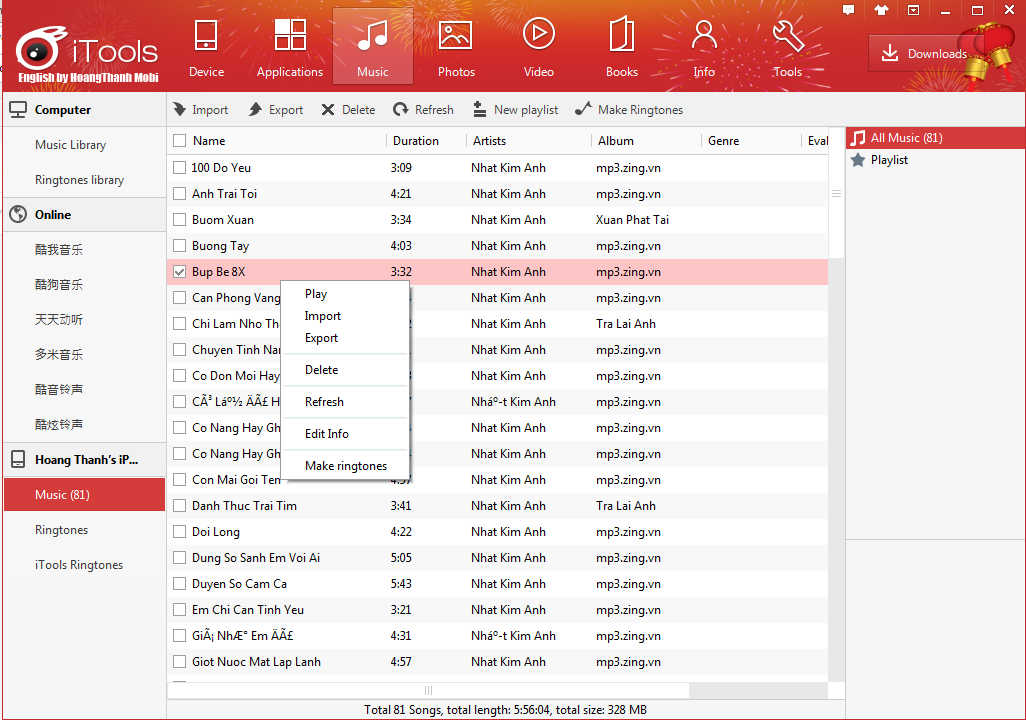
iTools iphone English version 3 2 0 6 official Update Download
iTools iphone English version 3 2 0 6 official Update Download
=========================
- Several bugs fixed
- Support IE proxy
- Optimized bookmark management interface
- Unified music player to global
- New function: application to open
Download: iTools EN Setup_3.2.0.6 12 MB NEW
Download: iTools EN Setup_3.2.0.0 12 MB OLD
Download: iTools EN Setup_3.1.9.6 12 MB OLD
Download: iTools EN Setup_3.1.9.5 12 MB OLD
Download: iTools EN Setup_3.1.9.4 12 MB OLD
Download: iTools EN Setup_3.1.9.1 12 MB OLD
Download: iTools EN Setup_3.1.8.9 12 MB OLD
Download: iTools EN Setup_3.1.8.5 12 MB OLD
Download: iTools EN Setup_3.1.8.0 12 MB OLD
Download: iTools EN Setup_3.1.7.9 12 MB OLD
Download: iTools EN Setup_3.1.7.7 12 MB OLD
Download: iTools EN Setup_3.1.7.6 12 MB OLD
Download: iTools EN Setup_3.1.7.3 12 MB OLD
Available link for download
Heres How To Avoid The 3 Most Common Affiliate Mistakes
Heres How To Avoid The 3 Most Common Affiliate Mistakes
 Affiliate marketing is one of the most effective and powerful ways of earning some money online. This program gives everybody a chance to make a profit through the Internet. Since these affiliate marketing programs are easy to join, implement and pays a commission on a regular basis, more an more people are now willing in this business.
However, like all businesses, there are lots of pitfalls in the affiliate marketing business. Committing some of the most common mistakes will cost the marketers a large portion taken from the profit they are making everyday. That is why it is better to avoid them than be regretful in the end.
Mistake number 1: Choosing the wrong affiliate.
Many people want to earn from affiliate marketing as fast as possible. In their rush to be part of one, they tend to choose a bandwagon product. This is the kind of products that the program thinks is “hot”. They choose the product that is in demand without actually considering if the product appeals to them. This is not a very wise move obviously.
Instead of jumping on the bandwagon, try top choose a product in which you are truly interested in. For any endeavor to succeed, you should take some time to plan and figure out your actions.
Pick a product that appeals to you. Then do some research about that product to see if they are in demand. Promoting a product you are more passionate about is easier than promoting one for the sake of the earnings only.
Mistake number 2: Joining too many affiliate programs.
Since affiliate programs are very easy to join, you might be tempted to join multiples of affiliate programs to try and maximize the earnings you will be getting. Besides you may think that there is nothing wrong and nothing to lose by being part of many affiliate programs.
True, that is a great way to have multiple sources of income. However, joining multiple programs and attempting to promote them all at the same time will prevent you from concentrating on each one of them.
The result? The maximum potential of your affiliate program is not realized and the income generated will not exactly be as huge as you were thinking initially it would. The best way to get excellent result is by joining just one program that pays a 40% commission at least. Then give it your best effort by promoting your products enthusiastically. As soon as you see that it is already making a reasonable profit, then maybe you can now join another affiliate program.
The technique is to do it slowly but surely. There is really no need to rush into things, especially with affiliate marketing. With the way things are going, the future is looking real bright and it seems affiliate marketing will be staying for a long time too.
Mistake number 3: Not buying the product or using the service.
As an affiliate, you main purpose is to effectively and convincingly promote a product or service and to find customers. For you to achieve this purpose, you must be able to relay to the customers that certain product and service. It is therefore difficult for you to do this when you yourself have not tried these things out. Thus, you will fail to promote and recommend them convincingly. You will also fail to create a desire in your customers to avail any of what you are offering.
Try the product or service personally first before you sign up as an affiliate to see if it is really delivering what it promises. If you have done so, then you are one of the credible and living testaments aware of its advantages and disadvantages. Your customers will then feel the sincerity and truthfulness in you and this will trigger them to try them out for themselves.
Many affiliate marketers makes these mistakes and are paying dearly for their actions. To not fall into the same situation they have been in, try to do everything to avoid making the same mistakes.
Time is the key. Take the time to analyze your marketing strategy and check if youa re in the right track. If done properly, you will be able to maximize your affiliate marketing program and earn higher profits.
Available link for download
Thursday, January 5, 2017
Fast Burst Camera v4 3 1 Apk Full App Free Download
Fast Burst Camera v4 3 1 Apk Full App Free Download
Requirements: 2.2 and up
Overview: This is the fastest camera app available for Android.

( on low-end devices, 5-10 photos per second is possible )
Zero shutter lag – pictures are taken as soon as shutter button is pressed.
- sports shots
- pictures of kids or pets
- party camera
- taking a burst of pictures in an important situation, and pick the best later
- analyse your golf swingframe-by-frame
- Parkour shots
- get as much light as possible – especially when capturing things or people in motion
- keep the camera steady
- hold the shoot button for continuous bursts, and pick the good shots later
Fixed issue with saving photos on some devices
https://play.google.com/store/apps/details?id=com.spritefish.fastburstcameraAvailable link for download
Tuesday, January 3, 2017
IMEI SN Writer Tool Software Setup V1 5 3 Free Download
IMEI SN Writer Tool Software Setup V1 5 3 Free Download

Now you can download latest setup of IMEI SN writer software from below downloading links. The downloading we have shred from its official server. If you are facing trouble during downloading or installation feel free to contact us via commenting we will help you if possible thing for us.
Downloading links
Download IMEI SN Writer
Password: bakar_siddeik@yahoo.com
Available link for download
Sunday, December 25, 2016
Calculator Converter Pro v4 3 5 Apk Full App
Calculator Converter Pro v4 3 5 Apk Full App
Requirements: Android 2.2+
Overview: 6-In-1 Tool: Calculator, Currency Converter, Measurement Converter, Mortgage Calculator, Tipping Calculator, andGraphing Calculator

UPDATED WITH NEW DESIGN AND FEATURES!!
~~~~~~~~~~~~~~~~~~~~~~~~~~~~~
6-In-1 Tool: Calculator, Currency Converter, Measurement Converter, Mortgage Calculator, Tipping Calculator, and Graphing Calculator
~~~~~~~~~~~~~~~~~~~~~~~~~~~~~
“What the stock ICS calculator should have been” -TalkAndroid.com (http://goo.gl/u3i5I)
–
“The best Android calculator app” -Androinica.com (http://goo.gl/NJwNL)
–
“Everything the Android calculator should have been” -Droiddog.com (http://goo.gl/FCr6e)
–
“A tool with a clean UI inspired by Android” -AndroidPolice.com (http://goo.gl/PmpBR)
~~~~~~~~~~~~~~~~~~~~~~~~~~~~
- CALCULATOR: Clean design with advanced functions for Pro users
- CURRENCY CONVERTER: Real-time conversion of 160+ world currencies
- MEASUREMENT CONVERTER: Convert units of length, area, temperature, volume, weight, time, cooking, density, volume, force, energy, power, and more.
- MORTGAGE CALCULATOR: Calculation interest and loan payments for monthly or bi-weekly loans
- TIPPING CALCULATOR: Split the bill with friends or quickly figure out the tip on the go
- GRAPHING CALCULATOR: Plot and draw sophisticated graphs (Pro users only)
v4.3.5:
1) Currency loading now done in background
https://play.google.com/store/apps/details?id=com.apextechnology.calculationsAvailable link for download
Saturday, December 24, 2016
How to Update Xperia M4 Aqua E2303 to Marshmallow 6 0 1 Firmware 26 3 A 0 131
How to Update Xperia M4 Aqua E2303 to Marshmallow 6 0 1 Firmware 26 3 A 0 131

Apart from the new features included in Marshmallow, the official changelog confirms addition of a new camera interface, Xperia Messaging and Direct Share. However, users who have installed the update report the lack of Marshmallow’s adoptable storage feature.
÷ Prerequisites:
This only for Sony Xperia M4 Model / E2303
Codename/Tulip.
*Disclaimer:
Android Custom ROM fix ® provide various Firmware Updates and Rooting process along with Custom ROM,Modes,file are all belong to their owners/developers. The autor of this site or the developers are not responsible, if you damage or brick your device.Do it on your own risk and follow the instruction properly.
* Important:
Backup important files stored on your device before proceeding with the steps below, so that in case something goes wrong you’ll have backup of all your important files.

÷ How to Update Xperia M4 Aqua E2303 to Marshmallow 6.0.1 Firmware 26.3.A.0.131 :
1- Download Xperia M4 Aqua E2303 to Marshmallow 6.0.1 Firmware 26.3.A.0.131 .
For More Keep Checking Android Custom ROM Fix ™®

That’s all. We hope this guide serves you well. If there’s anything you’d like to be added/changed on this page, PLZ Use the comment box below to contribute more ideas & Suggestions .
Like this post? PLZ Hit the share buttons below to share this article with your friends on Facebook, Google + and Twitter.
Want the latest Updates Sign up for our newsletters!
PLZ Follow Us On Flipboard 4 More Latest Updates.
Best Regards.™
Available link for download
Thursday, December 22, 2016
How to Install Android 6 0 1 Marshmallow Phronesis ROM On Galaxy Note 3 LTE N9005
How to Install Android 6 0 1 Marshmallow Phronesis ROM On Galaxy Note 3 LTE N9005
Samsung Galaxy Note 3 LTE N9005 Phronesis custom ROM comes with tons of new features and is based on Android 6.0.1 Marshmallow.

Don’t worry we are going to share step by step guide to safely Install Android 6.0.1 Marshmallow Phronesis ROM On your Galaxy Note 3 LTE N9005.
÷ Prerequisites:
•This tutorial is only for installing Phronesis Android 6.0.1 ROM on Samsung Galaxy Note 3 LTE N9005. Please do not try on any other Galaxy Note 3 variants.
•Your phone should be rooted and have ClockworkMod recovery installed from before.
•This tutorial will wipe out all your data. Proceed at your own risk.
•Perform a Dalvik Cache wipe before proceeding from the recovery mode.
•Samsung KIES will NOT detect your phone after installing this ROM because it is a custom firmware.
•Make sure you backup all your data in your phone before proceeding.
*Disclaimer:
Android Custom ROM fix ® provide various Firmware Updates and Rooting process along with Custom ROM,Modes,file are all belong to their owners/developers. The autor of this site or the developers are not responsible, if you damage or brick your device.Do it on your own risk and follow the instruction properly.
* Important:
Backup important files stored on your device before proceeding with the steps below, so that in case something goes wrong you’ll have backup of all your important files.

How to Install Android 6.0.1 Marshmallow Phronesis ROM On Galaxy Note 3 LTE N9005 :
Step 1 – Download Phronesis Android 6.0.1 ROM for Galaxy Note 3 to your computer.
Step 2 – Connect and mount your Galaxy Note 3 USB memory on your computer using the USB cable.
Step 3 – Now copy/paste the downloaded Android 6.0.1 ROM zip file to your SD card. Make sure the file is in the SD card root (not in any folder).
Step 4 – Then turn OFF your phone and disconnect from the USB cable.
Step 5 – Now to get in the Recovery Mode. Switch ON the phone while pressing and holding Volume Up + Home + Power buttons together.
Step 6 – Once you are in ClockworkMod Recovery, select perform a full data wipe by selecting “wipe data/factory reset”. Use the Power button to select everything while in the Recovery Mode.
Step 7 – Then, perform a cache wipe by selecting “wipe cache partition” .
Step 8 – Now this is optional, but it is recommended to perform a wipe of your dalvik cache as well. You will not get into boot loops or any other errors. From CWM recovery, go to ‘advanced’ and then select “wipe dalvik cache”.
Step 9 – Then go back to the main recovery screen and select “install zip from SD card”.
Step 10 – Now select “choose zip from sdcard”. Using your volume keys, navigate to the Android 6.0.1 ROM zip file that you copied to your SD card and select it using the Power button. Confirm the installation on the next screen and the installation procedure should start now.
Step 11 – After the installation completes, go to “+++++Go Back+++++” and reboot the phone by selecting “reboot system now” from the recovery menu.

Your Galaxy Note 3 LTE N9005 will boot now and it might take about 5 minutes to boot on your first time. So, please wait.
That’s it! Your Galaxy Note 3 should now have Phronesis Android 6.0.1 Marshmallow custom ROM installed on your phone! Go to Settings > About phone to verify.
For More Samsung Galaxy Note 3 Updates Keep Checking Android Custom ROM Fix ™®
That’s all. We hope this guide serves you well. If there’s anything you’d like to be added/changed on this page, PLZ Use the comment box below to contribute more ideas & Suggestions .
Like this post? PLZ Hit the share buttons below to share this article with your friends on Facebook, Google + and Twitter.
Want the latest Updates Sign up for our newsletters!
PLZ Follow Us On Flipboard 4 More Latest Updates.
Best Regards.™
Available link for download
Monday, December 19, 2016
Improvements to Sign In with Google Play services 8 3
Improvements to Sign In with Google Play services 8 3
Posted by Laurence Moroney, Developer Advocate
With Google Play services 8.3, we’ve been hard at work to provide a greatly improved sign-in experience for developers that want to build apps that sign their users in with Google. To help you better understand some of these changes, this is the first in a series of blog posts about what’s available to you as a developer. In this post, we’ll discuss the changes to the user experience, and how you can use them in your app, as well as updates to the API to make coding Sign-In with Google more straightforward. On Android Marshmallow, this new Sign-In API has removed any requirement for device permissions, so there is no need to request runtime access to the accounts on the device, as was the case with the old API.
User Experience Improvements
We’ve gotten lots of feedback from developers about the user experience of using Google’s social sign-in button. Many of you noted that it took too many steps and was confusing for users. Typically, the experience is that the user touches a sign in button, and they are asked to choose an account. If that account doesn’t have a Google+ profile, they need to create one, and after that they have to give permissions based on the type of information that the app is asking for. Finally, they get to sign in to the app.
With the new API, the default set of permissions that the app requests has been reduced to basic profile information and optionally email address as demonstrated here. This introduces opportunities for much streamlined user experience: the first improvement here is in the presentation of the button itself. We had received feedback that the Google+ branding on the Sign-In button made it feel like the user would need to share Google+ data, which most apps don’t use. As such, the SignInButton has been rebranded with the reduced scopes -- it now reads ‘Sign In with Google’, and follows the standard Google branding for use with basic profile information.

After this, the user flow is also more straightforward. Instead of subsequent screens where a Google account is picked based on the email addresses registered on the device, followed by a potential ‘Create Google+ Profile’ dialog, followed by a permissions consent dialog, like this:
 |  |  |
The user experience has changed to a single step, where the user chooses their account and gives consent. If they don’t have a Google+ profile, they don’t need to create one, eliminating that step. Additional consent dialogs come later, and are best requested in context so that the user understand why you might ask for access to their calendar or contact, and they are only prompted at the time that this data is needed.
 |  |  |
We hope that a streamlined, one-tap, non-social sign-in option with additional OAuth permissions requested in context will help improve your sign-in rates and make it a breeze to sign-in with Google.
Check out some live apps that use the new API, including Instacart, NPR One, and Bring!
 |  |
In the next post we’ll build on this by looking at some of the changes in the API to make coding apps that use Sign-In with Google even easier.

Available link for download
Friday, December 16, 2016
How to Install Official TWRP 3 0 2 Custom Recovery Image on OnePlus 3
How to Install Official TWRP 3 0 2 Custom Recovery Image on OnePlus 3
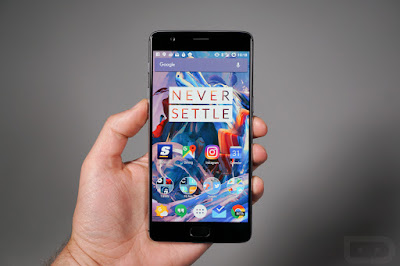
You can install it immediately on your phone via this quick and simple guide.
÷ Prerequisites:
•This TWRP Recovery tutorial is only for unlocked OnePlus 3. Please don’t try this on any other variants of the phone.
•Make sure you backup all your data in your phone before proceeding.
•This will void your warranty.
•You need to have working Fastboot / ADB on your computer.
•Bootloader should be unlocked.
*Disclaimer:
Android Custom ROM fix ® provide various Firmware Updates and Rooting process along with Custom ROM,Modes,file are all belong to their owners/developers. The autor of this site or the developers are not responsible, if you damage or brick your device.Do it on your own risk and follow the instruction properly.
* Important:
Backup important files stored on your device before proceeding with the steps below, so that in case something goes wrong you’ll have backup of all your important files.
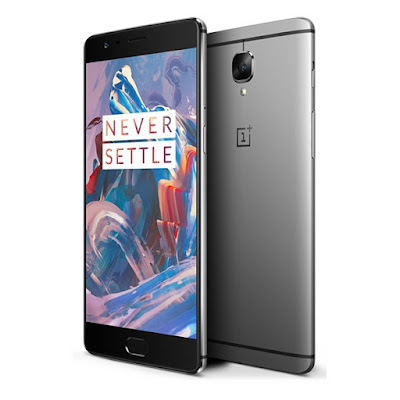
÷ How to Install Official TWRP 3.0.2 Custom Recovery Image on OnePlus 3:
Step 1 – Download Fastboot / ADB package and extract it anywhere in your computer.
Step 2 – Turn OFF your phone.
Step 3 – Connect your OnePlus 3 to your computer using a USB cable.
Step 4 – Download TWRP (oneplus3-twrp-recovery.img) and save it into the same directory as the extracted Fastboot/ADB package files.
Step 5 – Now go into Fastboot/Bootloader Mode on OnePlus 3. How? Press Volume Up + Power keys for a few seconds till you see some text on the screen. This is Bootloader Mode.
Step 6 – Navigate to the same directory now as where you have Fastboot (i.e. Step 1) and on Windows: Open Command Prompt (Shift + Right-click > Open Command Prompt). For Mac OS X and Linux, use Terminal to navigate to this directory.
Step 7 – Type in the following command and press Enter.
fastboot flash recovery twrp-3.0.2-0-oneplus3.img
Step 8 – Enter Recovery Mode (TWRP recovery) now. Turn OFF your phone. Now press and hold the Volume Down + Power keys together until the OnePlus logo shows up. Once it does, release the Power button while still holding the Volume Down button until a screen similar to the following screenshot shows up.
That’s it! You should now be in the TWRP Recovery from where you can choose whatever function you want to perform.
For More One Plus 3 latest Updates Keep Checking Android Custom ROM Fix ™®
That’s all. We hope this guide serves you well. If there’s anything you’d like to be added/changed on this page, PLZ Use the comment box below to contribute more ideas & Suggestions .
Like this post? PLZ Hit the share buttons below to share this article with your friends on Facebook, Google + and Twitter.
Want the latest Updates Sign up for our newsletters!
PLZ Follow Us On Flipboard 4 More Latest Updates.
Best Regards.™
Available link for download
Saturday, December 10, 2016
Apple pushing iOS 10 beta 3 update to developers watchOS 2 2 2 to the public
Apple pushing iOS 10 beta 3 update to developers watchOS 2 2 2 to the public

Heads up, iOS 10 testers, because there’s a new update for you to try.
iOS 10 beta 3 is now available for download. To grab it, you’ll need to be registered with Apple’s developer program, then download it over the air by going into Settings > General > Software Update or by getting it through Apple’s developer web portal.

from PhoneDog.com - Latest videos, reviews, articles, news and posts http://ift.tt/2anPOw7
via IFTTT
Available link for download