Showing posts with label z5. Show all posts
Showing posts with label z5. Show all posts
Tuesday, February 14, 2017
Flashtool How to flash the Sony Xperia Z5 Compact with stock ROM Flashtool
Flashtool How to flash the Sony Xperia Z5 Compact with stock ROM Flashtool
Over the past couple of days, I have been experiencing various issues with flashtool. Using the internets help and many hours of my time I managed to fix most of these problems that occurred for me. Although there are hundreds of Flashtool step by step instructions, I thought it would be best for an updated and more in depth on what you should be aware of first before clicking "Flash".
Firstly, I do not take responsibility for any device broken or damaged since there is ALWAYS a minute chance of your device bricking.
Lets start, shall we?
Things Needed
Okay to start off.. Yes, this should work with other phones however I am not providing the stock roms for those, it takes a simple google search to find them ie. "Sony Xperia Z5 Stock Rom ftf"
You dont need the latest stock rom either since you can update once the phone is setup depending on if you have access to OTA updates (Over the Air).
Step 1.
Download flashtool if you havent already. If you have an older version of flashtool, uninstall it and make sure all old files are gone for good and also be sure the new one is fully installed. I prefer to use the magnet link on the website (for torrents) since using uploaded.net takes forever.
Step 2a.
If youre on Windows 8/8.1 then please take note to this specific paragraph, any other OS skip to 2b Windows 8/8.1 like to have its security tight, so they block you from installing drivers with unsigned certificates to "keep your computer from harm" but just go ahead and follow the instructions to allow your computer install these drivers. If the drivers arent installed correctly, then you wont be flashing anything today :p Okay, go to Settings>General and then click on Restart Now under Advanced Startup.
This will restart your PC. It will then take you to a screen that gives you various options. On Windows 8 you will see Troubleshoot and on Windows 8.1 you will see Start-up Settings. Select either that appears. This will take you to another page that will ask to restart windows in order to use some advanced startup features, just click Restart. If it already takes you to the page without restart, or if your computer just restarted and youre getting the options of what to select, make sure you select Disable driver signature enforcement.
Your computer should now restart with driver signature enforcement disabled. Now, go ahead and carry on with the instructions in 2b!
Step 2b.
Navigate to the drivers folder where you installed Flashtool. If you cant remember where you installed it, the default directory should be in "C:Flashtool". Open Flashtool-drivers.exe and install:
Now we have successfully installed the drivers for flashtool and our device! :D
Step 3.
Find the stock rom you downloaded, copy and paste it into your firmwares folder in flashtool. For me, this is in "C:UsersMatty.flashToolfirmwares". People have been saying to delete the folders inside the firmwares folder, do not do this as the flash might not work.
Step 4.
Note
If youre running 64bit, I recommend you to not use Flashtool64.exe at first, just use the standard Flashtool.exe. If you dont get an icon on your desktop from the setup, just navigate to the folder in the directory you installed it in, then right click and click send to desktop so you can access it easy :)
Step 5.
Open Flashtool from your newly created shortcut on your desktop. Click the Flash icon, then click Flashmode, then hit Ok. Click your Firmware on the left to start off with. You might have to hit the firmware dropdown until it gets to the actual firmware like so:
If you want to remove all your data, where it says Wipe, hit all the boxes. (APPS_LOG, DIAG, SSD, USERDATA). Then click Flash. You will now see "Preparing files for flashing" on your screen. Be very patient, and in the meantime, turn your phone off ready to enter Flashmode. Make sure your phone is switched off and NOT plugged.
When you see this box come up on your computer, Its probably time to connect the USB to your computer, and enter flashmode on your phone.
Plug the USB into your computer
(TRY USB 2.0 FIRST, SOME REASON NO USB 3.0 PORT WORKED FOR ME+MANY OTHER PEOPLE HAD PROBLEMS WITH USB 3.0 I.E loader.sin errors)
Entering Flash Mode
Hold the Volume Down button and plug the USB cable from your computer into your phone. You should hear the Windows noise it makes to say the device is connected to the PC. If any extra drivers are needed to complete the flash it could take longer for the flash to start. You should then see a constant green light in the top right of your device, gently put it somewhere without unplugging the charger and let Flashtool do the hard work :)
Step 6.
Leave the device for no longer than 30 minutes. However, if youre unsure be safe and leave it for a full hour, go out have a nice brew, do a tap and dance and come back and it should be done. The only reason it would get stuck is because you unplugged the phone during the Flash, or if the cable somewhat died throughout the operation. If so, repeat the instructions in hope your device will be as good as new :)
Flashtool will now let you know when it is done. It will say "Flashing finished, please uplug and start your phone."
If it says that, hooray! You have successfully flashed your phone with stock rom!
If not and you get an error before it even wants to flash, or throughout the process you get an error, post it below and Ill take a look. Im not very good but I know quite a few errors.
END OF TUTORIAL :)
I just thought Id help the community out in a way that I can, since Im bad at like everything else lol.
Peace folks :highfive: :cyclops:
Firstly, I do not take responsibility for any device broken or damaged since there is ALWAYS a minute chance of your device bricking.
Lets start, shall we?
Things Needed
- Z5 Compact ;)
- Original Cable (or any cable actually that is working and can transfer files)
- Flashtool 0.9.22.3
- Sony Xperia Z5 Compact Stock Rom
Okay to start off.. Yes, this should work with other phones however I am not providing the stock roms for those, it takes a simple google search to find them ie. "Sony Xperia Z5 Stock Rom ftf"
You dont need the latest stock rom either since you can update once the phone is setup depending on if you have access to OTA updates (Over the Air).
Step 1.
Download flashtool if you havent already. If you have an older version of flashtool, uninstall it and make sure all old files are gone for good and also be sure the new one is fully installed. I prefer to use the magnet link on the website (for torrents) since using uploaded.net takes forever.
Step 2a.
If youre on Windows 8/8.1 then please take note to this specific paragraph, any other OS skip to 2b Windows 8/8.1 like to have its security tight, so they block you from installing drivers with unsigned certificates to "keep your computer from harm" but just go ahead and follow the instructions to allow your computer install these drivers. If the drivers arent installed correctly, then you wont be flashing anything today :p Okay, go to Settings>General and then click on Restart Now under Advanced Startup.

This will restart your PC. It will then take you to a screen that gives you various options. On Windows 8 you will see Troubleshoot and on Windows 8.1 you will see Start-up Settings. Select either that appears. This will take you to another page that will ask to restart windows in order to use some advanced startup features, just click Restart. If it already takes you to the page without restart, or if your computer just restarted and youre getting the options of what to select, make sure you select Disable driver signature enforcement.

Your computer should now restart with driver signature enforcement disabled. Now, go ahead and carry on with the instructions in 2b!
Step 2b.
Navigate to the drivers folder where you installed Flashtool. If you cant remember where you installed it, the default directory should be in "C:Flashtool". Open Flashtool-drivers.exe and install:
- Flashmode Drivers
- Fastboot Drivers
- Z5 Compact Device Driver (Or whatever your device is)
Now we have successfully installed the drivers for flashtool and our device! :D
Step 3.
Find the stock rom you downloaded, copy and paste it into your firmwares folder in flashtool. For me, this is in "C:UsersMatty.flashToolfirmwares". People have been saying to delete the folders inside the firmwares folder, do not do this as the flash might not work.
Step 4.
Note
If youre running 64bit, I recommend you to not use Flashtool64.exe at first, just use the standard Flashtool.exe. If you dont get an icon on your desktop from the setup, just navigate to the folder in the directory you installed it in, then right click and click send to desktop so you can access it easy :)
Step 5.
Open Flashtool from your newly created shortcut on your desktop. Click the Flash icon, then click Flashmode, then hit Ok. Click your Firmware on the left to start off with. You might have to hit the firmware dropdown until it gets to the actual firmware like so:

If you want to remove all your data, where it says Wipe, hit all the boxes. (APPS_LOG, DIAG, SSD, USERDATA). Then click Flash. You will now see "Preparing files for flashing" on your screen. Be very patient, and in the meantime, turn your phone off ready to enter Flashmode. Make sure your phone is switched off and NOT plugged.
When you see this box come up on your computer, Its probably time to connect the USB to your computer, and enter flashmode on your phone.

Plug the USB into your computer
(TRY USB 2.0 FIRST, SOME REASON NO USB 3.0 PORT WORKED FOR ME+MANY OTHER PEOPLE HAD PROBLEMS WITH USB 3.0 I.E loader.sin errors)
Entering Flash Mode
Hold the Volume Down button and plug the USB cable from your computer into your phone. You should hear the Windows noise it makes to say the device is connected to the PC. If any extra drivers are needed to complete the flash it could take longer for the flash to start. You should then see a constant green light in the top right of your device, gently put it somewhere without unplugging the charger and let Flashtool do the hard work :)
Step 6.
Leave the device for no longer than 30 minutes. However, if youre unsure be safe and leave it for a full hour, go out have a nice brew, do a tap and dance and come back and it should be done. The only reason it would get stuck is because you unplugged the phone during the Flash, or if the cable somewhat died throughout the operation. If so, repeat the instructions in hope your device will be as good as new :)
Flashtool will now let you know when it is done. It will say "Flashing finished, please uplug and start your phone."

If it says that, hooray! You have successfully flashed your phone with stock rom!
If not and you get an error before it even wants to flash, or throughout the process you get an error, post it below and Ill take a look. Im not very good but I know quite a few errors.
END OF TUTORIAL :)
I just thought Id help the community out in a way that I can, since Im bad at like everything else lol.
Peace folks :highfive: :cyclops:
from xda-developers http://ift.tt/2aEzLdz
via IFTTT
Available link for download

Friday, November 4, 2016
How to Update OnePlus3 to Android 6 0 1 Marshmallow XOSP 6 3 ROM Xperia Z5 Features
How to Update OnePlus3 to Android 6 0 1 Marshmallow XOSP 6 3 ROM Xperia Z5 Features
According to XDA member jithumon, Android 6.0.1 Marshmallow XOSP 6.3 ( Xperia Open Source Project) ROM is now Released for One Plus 3.

÷ ROM Features:
Based on CM 13.0
Removed many unnecessary apps and stuff as well as CM ones
StatusBar Clock font style
StatusBar Clock font size
Added StatusBar Date & style options
Added option for date style/position, left-right of clock
Xperia Z5 inspired LockScreen style
Xperia Fonts
Xperia Battery Text prototype
Time Contextual Headers
XOSP Universal dialog for Shutdown/Reboot and Dexopting Process
XOSPOTA
Stock Kernel
Snap Camera
ViPER Audio Engine
Theme Chooser
Xperia based Bootanimation
Custom Framework and SystemUI Xperia drawables
XOSPFileManager
Xperia Z5 sounds
Xperia X Wallpapers
XOSPSetupWizard
Custom Materialized
Stock Browser is custom themed
Contacts is custom themed (Much more Xperia Style)
Dialer is custom themed (Much more Xperia Style)
Status bar logo
Navigation Bar ON/OFF
NavBar dimensions
SlimDim
HW Keys ON/OFF
SlimSeek Bar
Status bar Network Traffic indicator
RAM Bar in recents options
Toast Animations
Long Press back to kill in Development Settings
Ability to hide the Super SU status bar icon
Dashboard Columns
Dashboard double lines toggle
Double Tap to sleep anywhere on the lockscreen
On-the-go Mode
Double tap to sleep on navigation bar
SystemApp remover
Omni inbuilt SystemUI Screen recording
SuperSU
Xperia Apps
Xperia Z5 Home app
Album App
PhotoEditor
PhotoAnalyzer
Xperia Keyboard (aka textinput-tng)
Music (former WALKMAN)
Video
SemCalendar
AudioRecorder (Material Version)
ClockWidgets
Sketch
SmartConnect
WallpaperPicker (For Xperia X custom wallpapers)
Weather App
Wheater Widget
Walkman Widget
Track ID
SomcPodcast
SemcDLNA...
÷ ROM Features:
Based on CM 13.0
Removed many unnecessary apps and stuff as well as CM ones
StatusBar Clock font style
StatusBar Clock font size
Added StatusBar Date & style options
Added option for date style/position, left-right of clock
Xperia Z5 inspired LockScreen style
Xperia Fonts
Xperia Battery Text prototype
Time Contextual Headers
XOSP Universal dialog for Shutdown/Reboot and Dexopting Process
XOSPOTA
Stock Kernel
Snap Camera
ViPER Audio Engine
Theme Chooser
Xperia based Bootanimation
Custom Framework and SystemUI Xperia drawables
XOSPFileManager
Xperia Z5 sounds
Xperia X Wallpapers
XOSPSetupWizard
Custom Materialized
Stock Browser is custom themed
Contacts is custom themed (Much more Xperia Style)
Dialer is custom themed (Much more Xperia Style)
Status bar logo
Navigation Bar ON/OFF
NavBar dimensions
SlimDim
HW Keys ON/OFF
SlimSeek Bar
Status bar Network Traffic indicator
RAM Bar in recents options
Toast Animations
Long Press back to kill in Development Settings
Ability to hide the Super SU status bar icon
Dashboard Columns
Dashboard double lines toggle
Double Tap to sleep anywhere on the lockscreen
On-the-go Mode
Double tap to sleep on navigation bar
SystemApp remover
Omni inbuilt SystemUI Screen recording
SuperSU
Xperia Apps
Xperia Z5 Home app
Album App
PhotoEditor
PhotoAnalyzer
Xperia Keyboard (aka textinput-tng)
Music (former WALKMAN)
Video
SemCalendar
AudioRecorder (Material Version)
ClockWidgets
Sketch
SmartConnect
WallpaperPicker (For Xperia X custom wallpapers)
Weather App
Wheater Widget
Walkman Widget
Track ID
SomcPodcast
SemcDLNA...
View my Flipboard Magazine.
÷ Prerequisites:
•Your phone should have a custom recovery installed in order to install this NanoROM ROM on your phone.
•We will be using TWRP Recovery for this tutorial.
•This tutorial will wipe out all your data. Make sure you backup all your data in your phone before proceeding.
•Perform a Dalvik Cache wipe before proceeding from the Recovery Mode.
*Disclaimer:
Android Custom ROM fix ® provide various Firmware Updates and Rooting process along with Custom ROM,Modes,file are all belong to their owners/developers. The autor of this site or the developers are not responsible, if you damage or brick your device.Do it on your own risk and follow the instruction properly.
* Important:
Backup important files stored on your device before proceeding with the steps below, so that in case something goes wrong you’ll have backup of all your important files.
You can find out how to apply it right now via XDA.

For More One Plus 3 Updates Keep Checking Android custom ROM Fix ™®
That’s all. We hope this guide serves you well. If there’s anything you’d like to be added/changed on this page, PLZ Use the comment box below to contribute more ideas & Suggestions .
Like this post? PLZ Hit the share buttons below to share this article with your friends on Facebook, Google + and Twitter.
Want the latest Updates Sign up for our newsletters!
PLZ Follow Us On Flipboard 4 More Latest Updates.
Best Regards.™
÷ Prerequisites:
•Your phone should have a custom recovery installed in order to install this NanoROM ROM on your phone.
•We will be using TWRP Recovery for this tutorial.
•This tutorial will wipe out all your data. Make sure you backup all your data in your phone before proceeding.
•Perform a Dalvik Cache wipe before proceeding from the Recovery Mode.
*Disclaimer:
Android Custom ROM fix ® provide various Firmware Updates and Rooting process along with Custom ROM,Modes,file are all belong to their owners/developers. The autor of this site or the developers are not responsible, if you damage or brick your device.Do it on your own risk and follow the instruction properly.
* Important:
Backup important files stored on your device before proceeding with the steps below, so that in case something goes wrong you’ll have backup of all your important files.
You can find out how to apply it right now via XDA.
For More One Plus 3 Updates Keep Checking Android custom ROM Fix ™®
That’s all. We hope this guide serves you well. If there’s anything you’d like to be added/changed on this page, PLZ Use the comment box below to contribute more ideas & Suggestions .
Like this post? PLZ Hit the share buttons below to share this article with your friends on Facebook, Google + and Twitter.
Want the latest Updates Sign up for our newsletters!
PLZ Follow Us On Flipboard 4 More Latest Updates.
Best Regards.™
Available link for download
Tuesday, October 11, 2016
How to Update Sony Xperia Z5 E6653 to Android 6 0 1 Marshmallow Firmware 32 2 A 0 253
How to Update Sony Xperia Z5 E6653 to Android 6 0 1 Marshmallow Firmware 32 2 A 0 253
A new firmware update is now rolling for the Sony Xperia Z5 which moves the build number from 32.2.A.0.224 to version 32.2.A.0.253. The update includes a number of bug fixes as well as improved handling of Bluetooth devices.
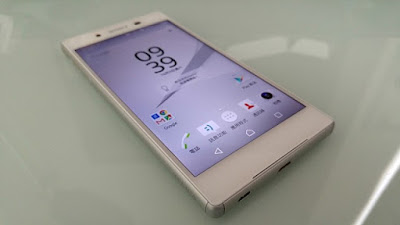
Don’t worry we are going to share step by step guide to safely update your Xperia Z5 E6653 to Android 6.0.1 Marshmallow Firmware 32.2.A.0.253.
View my Flipboard Magazine.
÷ Prerequisites:
This Tutorial is only for Sony Xperia Z5 E6653 variant.
*Disclaimer:
Android Custom ROM fix ® provide various Firmware Updates and Rooting process along with Custom ROM,Modes,file are all belong to their owners/developers. The autor of this site or the developers are not responsible, if you damage or brick your device.Do it on your own risk and follow the instruction properly.
* Important:
Backup important files stored on your device before proceeding with the steps below, so that in case something goes wrong you’ll have backup of all your important files.

÷ How to Update Sony Xperia Z5 E6653 to Android 6.0.1 Marshmallow Firmware 32.2.A.0.253:
1- Download and install latest Flashtool .
2- Download Android 6.0.1 Marshmallow Firmware 32.2.A.0.253 for Sony XPERIA Z5
3- Paste the ftf file downloaded in step c) to folder „Firmware“ included in the XPERIA Flashtool
4- Open the XPERIA Flashtool, click on flash and choose downloaded firmware, than click ok. Important - if you do not want to delete any data of your phone, just uncheck flashing userdata.sin file. All data will remain in your phone, but sometimes it can cause additional troubles. So it is better (and I recommend that) to do the backup of your personal data, than proceed with clean instalation and then restore your personal data.
5- Turn off your phone and when Flashtool shows pop up window, connect phone to PC with holding volume down button
6- after few minutes all is done and your phone gets the new firmware.
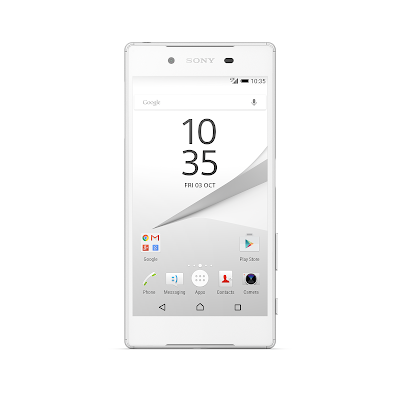 That’s it! Your XPERIA Z5 should now have Marshmallow 6.0.1 firmware 32.2.A.0.253. on your phone! Go to Settings > About phone to verify.
For More Sony Xperia Z5 Update Keep Checking Android Custom ROM Fix ™®
That’s all. We hope this guide serves you well. If there’s anything you’d like to be added/changed on this page, PLZ Use the comment box below to contribute more ideas & Suggestions .
Like this post? PLZ Hit the share buttons below to share this article with your friends on Facebook, Google + and Twitter.
Want the latest Updates Sign up for our newsletters!
PLZ Follow Us On Flipboard 4 More Latest Updates.
Best Regards.™
÷ Prerequisites:
This Tutorial is only for Sony Xperia Z5 E6653 variant.
*Disclaimer:
Android Custom ROM fix ® provide various Firmware Updates and Rooting process along with Custom ROM,Modes,file are all belong to their owners/developers. The autor of this site or the developers are not responsible, if you damage or brick your device.Do it on your own risk and follow the instruction properly.
* Important:
Backup important files stored on your device before proceeding with the steps below, so that in case something goes wrong you’ll have backup of all your important files.
÷ How to Update Sony Xperia Z5 E6653 to Android 6.0.1 Marshmallow Firmware 32.2.A.0.253:
1- Download and install latest Flashtool .
2- Download Android 6.0.1 Marshmallow Firmware 32.2.A.0.253 for Sony XPERIA Z5
3- Paste the ftf file downloaded in step c) to folder „Firmware“ included in the XPERIA Flashtool
4- Open the XPERIA Flashtool, click on flash and choose downloaded firmware, than click ok. Important - if you do not want to delete any data of your phone, just uncheck flashing userdata.sin file. All data will remain in your phone, but sometimes it can cause additional troubles. So it is better (and I recommend that) to do the backup of your personal data, than proceed with clean instalation and then restore your personal data.
5- Turn off your phone and when Flashtool shows pop up window, connect phone to PC with holding volume down button
6- after few minutes all is done and your phone gets the new firmware.
For More Sony Xperia Z5 Update Keep Checking Android Custom ROM Fix ™®
That’s all. We hope this guide serves you well. If there’s anything you’d like to be added/changed on this page, PLZ Use the comment box below to contribute more ideas & Suggestions .
Like this post? PLZ Hit the share buttons below to share this article with your friends on Facebook, Google + and Twitter.
Want the latest Updates Sign up for our newsletters!
PLZ Follow Us On Flipboard 4 More Latest Updates.
Best Regards.™
Available link for download
Saturday, August 27, 2016
How to Install Android 6 0 1 MX Rom Marshmallow on Xperia Z2 Z5 Features
How to Install Android 6 0 1 MX Rom Marshmallow on Xperia Z2 Z5 Features
Sony Xperia Z2 MX Rom custom ROM comes with tons of new features and is based on Android 6.0.1 Marshmallow. A quick list of the main features in MX Rom is given below and we are sure you’d love to use this on your Xperia Z2.

– Add X theme
– Add X textinput
– Add X wallpaper
– Add X UpdateCenter
– Add X theme selector
– Add X bootanimation
– Add more X dump apps
– Add new flat Icon
– Add Sony xlound?
– Add Sony DESS HX
– Add Sony S_Force Sound…
– Add SonY multiple clock
– Add new personality theme
– Add Z5 ImageEnhancer
– Add Z5 Photoanalyzer
– Add Assertive Display
– Add IN.DT support
– Add APN auto settings
– Add a full touch TWRP
– Add update SuperSU-v2.76
– Add update busybox support
– Latest version of the music
– Latest version of the video
– Latest version of the home-release
– Latest version of the Graivity box
– Latest version of the audio recorder
– Latest version of the audio lifelog
– Latest XOSED framework .V86
– Settings build self management;
– Settings build CPU information;
– Settings construction of hair glass background;
– Settings building call vibration, etc.;
– Whole deodexed
– Whole zipalign
– To streamline the useless APP
– Virtual key size 40 DPI
– Removal of data traffic on the prompt
– Removal of data traffic is prohibited tips
– Repair status bar battery signal interval
– Update the GPS connection problem, GPS positioning faster
– Improved display adjustment
– Improved memory control
– Optimized status bar display
– Fix the REC failure problem
– Fixed Mobile Radio Active Bug
– SystemUI remove excess Smail;
– SystemUI time status bar lock screen;
– Repair and improve the power of the last version of the standby power;

?Z5 features:?
* add Z5 All theme
* add Z4 Bootanimation
* add Z5 Theme wallpaper
* add Z5 Messaging App
* add Z5 Telephone App
* add Z5 Phonebook App
* add Z5 Backup and Restore
* add Z5 Weather App
* add Z5 Calculator
* add Z5 White balance
* add Z5 New TochBlock
* add Z5 New theme-manager
* add Z5 New ActiveClipper
* add Z5 New text message
* add Z5 New phone
* add Z5 New mail
* add Z5 New weather
* add Z5 New contacts
* add Z5 HOME luchener
* add Z5 Photo analyzer
* add Z5 Photo Editor
* add Z5 Screen Recording
* add Z5 Wallaper and sound picker
* add Z5 Update Center
* add Z5 SmartSearch app
* add Z5 Small apps Framework
* add Z5 Widget-Launcher etc.
* add Z5 New Small Apps
* add Z5 X-Reality
* add Z5 System media Files
* add Z5 Super-Vivid
* add Z5 IntelligentBacklight
—Camera modification part—
* add a new camera
* automatic mode to open 2000W pixels
* 2000W pixel open scene HDR mode
* Increase in macro, infinity and other functions.
* open manual shutter speed, manual exposure
—Add some Advanced Settings—
-Advanced Autostart
-Advanced ram manage
-Advanced Supersuser
-Advanced Xposed installer
-Advanced Network settings
-Advanced Serajr Xperia Xposed
-Advanced Serajr Xperia blurred
-Advanced CPU Control
-Advanced CPU Stats
-Advanced CALL SHOCK
-Advanced Battery information
-performance tuning network settings
-performance tuning from start management
-performance tuning CPU control statistics.
View my Flipboard Magazine.
÷ Prerequisites:
•This tutorial is only for installing Android 6.0.1 MX Rom ROM on Sony Xperia Z2. Please do not try on any other Xperia Z2 variants.
•Your phone should be rooted and have ClockworkMod recovery installed from before.
•This tutorial will wipe out all your data. Proceed at your own risk.
•Perform a Dalvik Cache wipe before proceeding from the recovery mode.
•Sony PC Companion will NOT detect your phone after installing this ROM because it is a custom firmware.
•Bootloader should be unlocked or you will not be able to install this ROM.
•Make sure you backup all your data in your phone before proceeding.
*Disclaimer:
Android Custom ROM fix ® provide various Firmware Updates and Rooting process along with Custom ROM,Modes,file are all belong to their owners/developers. The autor of this site or the developers are not responsible, if you damage or brick your device.Do it on your own risk and follow the instruction properly.
* Important:
Backup important files stored on your device before proceeding with the steps below, so that in case something goes wrong you’ll have backup of all your important files.
÷ How to Install Android 6.0.1 MX Rom Marshmallow on Xperia Z2 [ Z5 Features].
Step 1 – Download MX Rom Android 6.0.1 ROM for Sony Xperia Z2 to your computer and extract boot.img from the zip file separately.
Step 2 – Connect and mount your Sony Xperia Z2 USB (mass) memory on your computer using the USB cable.
Step 3 – Now copy/paste the downloaded Android 6.0.1 ROM zip file to your SD card. Make sure the file is in the SD card root.
Step 4 – Copy/paste the boot.img file to android-sdk-windowsplatform-tools directory.
Step 5 – Then turn OFF your phone.
Step 6 – Now to get into the Bootloader Mode. Press and hold the Volume Up button while connecting it again with the USB cable. Your phone LED will turn blue and it will get into the Bootloader Mode.
Step 7 – Once in the Fastboot mode (on your phone), navigate to android-sdk-windowsplatform-tools directory (on your computer) and open Command Prompt (Shift + Right-click > Open Command Prompt).
Step 8 – Type the following command and press Enter.
fastboot flash boot boot.img
Step 9 – Then, type the following command and press Enter.
Step 10 – Now to get in the Recovery Mode. Switch ON the phone while pressing the Volume Up or Volume Down buttons a few times when you see the LED light turn pink or any other colour. Alternatively, read this: How to Enter Recovery Mode on Any Android Phone.
Step 11 – Once you are in ClockworkMod Recovery, select perform a full data wipe by selecting “wipe data/factory reset”. Use the Power button to select everything while in the Recovery Mode.
Step 12 – Then, perform a cache wipe by selecting “wipe cache partition”.
Step 13 – Now this is optional, but it is recommended to perform a wipe of your dalvik cache as well. You will not get into boot loops or any other errors. From CWM recovery, go to ‘advanced’ and then select “wipe dalvik cache”.
Step 14 – Then go back to the main recovery screen and select “install zip from SD card”.
Step 15 – Now select “choose zip from sdcard”. Using your volume keys, navigate to the Android 6.0.1 ROM zip file that you copied to your SD card and select it using the Power button. Confirm the installation on the next screen and the installation procedure should start now.
Step 16 – After the installation completes, go to “+++++Go Back+++++” and reboot the phone by selecting “reboot system now” from the recovery menu .

Your Xperia Z2 will boot now and it might take about 5 minutes to boot on your first time. So, please wait.
That’s it! Your Xperia Z2 should now have Android 6.0.1 MX Rom Marshmallow custom ROM installed on your phone! Go to Settings > About phone to verify.
For More Sony Xperia Z2 Updates Keep Checking Android Custom ROM Fix.
That’s all. We hope this guide serves you well. If there’s anything you’d like to be added/changed on this page, PLZ Use the comment box below to contribute more ideas & Suggestions .
Like this post? PLZ Hit the share buttons below to share this article with your friends on Facebook, Google + and Twitter.
Want the latest Updates Sign up for our newsletters!
PLZ Follow Us On Flipboard 4 More Latest Updates.
Best Regards.™
÷ Prerequisites:
•This tutorial is only for installing Android 6.0.1 MX Rom ROM on Sony Xperia Z2. Please do not try on any other Xperia Z2 variants.
•Your phone should be rooted and have ClockworkMod recovery installed from before.
•This tutorial will wipe out all your data. Proceed at your own risk.
•Perform a Dalvik Cache wipe before proceeding from the recovery mode.
•Sony PC Companion will NOT detect your phone after installing this ROM because it is a custom firmware.
•Bootloader should be unlocked or you will not be able to install this ROM.
•Make sure you backup all your data in your phone before proceeding.
*Disclaimer:
Android Custom ROM fix ® provide various Firmware Updates and Rooting process along with Custom ROM,Modes,file are all belong to their owners/developers. The autor of this site or the developers are not responsible, if you damage or brick your device.Do it on your own risk and follow the instruction properly.
* Important:
Backup important files stored on your device before proceeding with the steps below, so that in case something goes wrong you’ll have backup of all your important files.
÷ How to Install Android 6.0.1 MX Rom Marshmallow on Xperia Z2 [ Z5 Features].
Step 1 – Download MX Rom Android 6.0.1 ROM for Sony Xperia Z2 to your computer and extract boot.img from the zip file separately.
Step 2 – Connect and mount your Sony Xperia Z2 USB (mass) memory on your computer using the USB cable.
Step 3 – Now copy/paste the downloaded Android 6.0.1 ROM zip file to your SD card. Make sure the file is in the SD card root.
Step 4 – Copy/paste the boot.img file to android-sdk-windowsplatform-tools directory.
Step 5 – Then turn OFF your phone.
Step 6 – Now to get into the Bootloader Mode. Press and hold the Volume Up button while connecting it again with the USB cable. Your phone LED will turn blue and it will get into the Bootloader Mode.
Step 7 – Once in the Fastboot mode (on your phone), navigate to android-sdk-windowsplatform-tools directory (on your computer) and open Command Prompt (Shift + Right-click > Open Command Prompt).
Step 8 – Type the following command and press Enter.
fastboot flash boot boot.img
Step 9 – Then, type the following command and press Enter.
Step 10 – Now to get in the Recovery Mode. Switch ON the phone while pressing the Volume Up or Volume Down buttons a few times when you see the LED light turn pink or any other colour. Alternatively, read this: How to Enter Recovery Mode on Any Android Phone.
Step 11 – Once you are in ClockworkMod Recovery, select perform a full data wipe by selecting “wipe data/factory reset”. Use the Power button to select everything while in the Recovery Mode.
Step 12 – Then, perform a cache wipe by selecting “wipe cache partition”.
Step 13 – Now this is optional, but it is recommended to perform a wipe of your dalvik cache as well. You will not get into boot loops or any other errors. From CWM recovery, go to ‘advanced’ and then select “wipe dalvik cache”.
Step 14 – Then go back to the main recovery screen and select “install zip from SD card”.
Step 15 – Now select “choose zip from sdcard”. Using your volume keys, navigate to the Android 6.0.1 ROM zip file that you copied to your SD card and select it using the Power button. Confirm the installation on the next screen and the installation procedure should start now.
Step 16 – After the installation completes, go to “+++++Go Back+++++” and reboot the phone by selecting “reboot system now” from the recovery menu .
Your Xperia Z2 will boot now and it might take about 5 minutes to boot on your first time. So, please wait.
That’s it! Your Xperia Z2 should now have Android 6.0.1 MX Rom Marshmallow custom ROM installed on your phone! Go to Settings > About phone to verify.
For More Sony Xperia Z2 Updates Keep Checking Android Custom ROM Fix.
That’s all. We hope this guide serves you well. If there’s anything you’d like to be added/changed on this page, PLZ Use the comment box below to contribute more ideas & Suggestions .
Like this post? PLZ Hit the share buttons below to share this article with your friends on Facebook, Google + and Twitter.
Want the latest Updates Sign up for our newsletters!
PLZ Follow Us On Flipboard 4 More Latest Updates.
Best Regards.™
Available link for download
Subscribe to:
Posts (Atom)