Tuesday, January 31, 2017
Awful 5 GHZ WIFI performance L 29
Awful 5 GHZ WIFI performance L 29
I am getting only 86 Mbps near my Router, whatever setting I play with. On 2.4 I am getting 65 Mbps.
My 2x2 Ultrabook [Yoga 900], just besides the phone, gets 866 Mbps.
Anyone getting good speeds using the mate 8 or are we all in this together?
My phone has the latest B320 firmware
from xda-developers http://ift.tt/2a6eE1z
via IFTTT
Available link for download
Friday, November 25, 2016
Game Performance Vertex Array Objects
Game Performance Vertex Array Objects
Posted by Shanee Nishry
Previously, we showed how you can use vertex layout qualifiers to increase the performance and determinism of your OpenGL application. In this post, we’ll show another useful technique that will help you produce increased performance and cleaner code when drawing objects.
Binding the vertex buffer
Before drawing onto the screen, you need to bind your vertex data (e.g. positions, normals, UVs) to the corresponding vertex shader attributes. To do that, you need to bind the vertex buffer, enable the generic vertex attribute, and use glVertexAttribPointer to describe the layout of the buffer.
Therefore, a draw call might look like this:
const GLuint ATTRIBUTE_LOCATION_POSITIONS = 0; const GLuint ATTRIBUTE_LOCATION_TEXTUREUV = 1; const GLuint ATTRIBUTE_LOCATION_NORMALS = 2; // Bind shader program, uniforms and textures // ... // Bind the vertex buffer glBindBuffer( GL_ARRAY_BUFFER, vertex_buffer_object ); // Set the vertex attributes glEnableVertexAttribArray( ATTRIBUTE_LOCATION_POSITIONS ); glVertexAttribPointer( ATTRIBUTE_LOCATION_POSITIONS, 3, GL_FLOAT, GL_FALSE, 32, 0 ); glEnableVertexAttribArray( ATTRIBUTE_LOCATION_TEXTUREUV ); glVertexAttribPointer( ATTRIBUTE_LOCATION_TEXTUREUV, 2, GL_FLOAT, GL_FALSE, 32, 12 ); glEnableVertexAttribArray( ATTRIBUTE_LOCATION_NORMALS ); glVertexAttribPointer( ATTRIBUTE_LOCATION_NORMALS, 3, GL_FLOAT, GL_FALSE, 32, 20 ); // Draw elements glDrawElements( GL_TRIANGLES, count, GL_UNSIGNED_SHORT, 0 );
There are several reasons why we might not like this code very much. The first is that we need to cache the layout of the vertex buffer to enable and disable the right attributes before drawing. This means we are either hard-coding or saving some amount of data for a nearly meaningless task.
The second reason is performance. Having to tell the drivers which attributes to individually activate is suboptimal. It would be best if we could precompile this information and deliver it all at once.
Lastly, and purely for aesthetics, our draw call is cluttered by long boilerplate code. It would be nice to get rid of it.
| Did you know there is another reason why someone might frown on this code? The code is making use of layout qualifiers which is great! But, since it’s already using OpenGL ES 3+, it would be even better if the code also used Geometry Instancing. By batching many instances of a mesh into a single draw call, you can really boost performance. |
So how can we improve on the above code?
Vertex Array Objects (VAOs)
If you are using OpenGL ES 3 or higher, you should use Vertex Array Objects (or "VAOs") to store your vertex attribute state.
Using a VAO allows the drivers to compile the vertex description format for repeated use. In addition, this frees you from having to cache the vertex format needed for glVertexAttribPointer, and it also results in less per-draw boilerplate code.
Creating Vertex Array Objects
The first thing you need to do is create your VAO. This is created once per mesh, alongside the vertex buffer object and is done like this:
const GLuint ATTRIBUTE_LOCATION_POSITIONS = 0; const GLuint ATTRIBUTE_LOCATION_TEXTUREUV = 1; const GLuint ATTRIBUTE_LOCATION_NORMALS = 2; // Bind the vertex buffer object glBindBuffer( GL_ARRAY_BUFFER, vertex_buffer_object ); // Create a VAO GLuint vao; glGenVertexArrays( 1, &vao ); glBindVertexArray( vao ); // Set the vertex attributes as usual glEnableVertexAttribArray( ATTRIBUTE_LOCATION_POSITIONS ); glVertexAttribPointer( ATTRIBUTE_LOCATION_POSITIONS, 3, GL_FLOAT, GL_FALSE, 32, 0 ); glEnableVertexAttribArray( ATTRIBUTE_LOCATION_TEXTUREUV ); glVertexAttribPointer( ATTRIBUTE_LOCATION_TEXTUREUV, 2, GL_FLOAT, GL_FALSE, 32, 12 ); glEnableVertexAttribArray( ATTRIBUTE_LOCATION_NORMALS ); glVertexAttribPointer( ATTRIBUTE_LOCATION_NORMALS, 3, GL_FLOAT, GL_FALSE, 32, 20 ); // Unbind the VAO to avoid accidentally overwriting the state // Skip this if you are confident your code will not do so glBindVertexArray( 0 );
You have probably noticed that this is very similar to our previous code section except that we now have the addition of:
// Create a vertex array object GLuint vao; glGenVertexArrays( 1, &vao ); glBindVertexArray( vao );
These lines create and bind the VAO. All glEnableVertexAttribArray and glVertexAttribPointer calls after that are recorded in the currently bound VAO, and that greatly simplifies our per-draw procedure as all you need to do is use the newly created VAO.
Using the Vertex Array Object
The next time you want to draw using this mesh all you need to do is bind the VAO using glBindVertexArray.
// Bind shader program, uniforms and textures // ... // Bind Vertex Array Object glBindVertexArray( vao ); // Draw elements glDrawElements( GL_TRIANGLES, count, GL_UNSIGNED_SHORT, 0 );
You no longer need to go through all the vertex attributes. This makes your code cleaner, makes per-frame calls shorter and more efficient, and allows the drivers to optimize the binding stage to increase performance.
| Did you notice we are no longer calling glBindBuffer? This is because calling glVertexAttribPointer while recording the VAO references the currently bound buffer even though the VAO does not record glBindBuffer calls on itself. |
Want to learn more how to improve your game performance? Check out our Game Performance article series. If you are building on Android you might also be interested in the Android Performance Patterns.
Available link for download
Friday, November 11, 2016
How to Boost OnePlus 3 Performance Fix Memory Issues
How to Boost OnePlus 3 Performance Fix Memory Issues
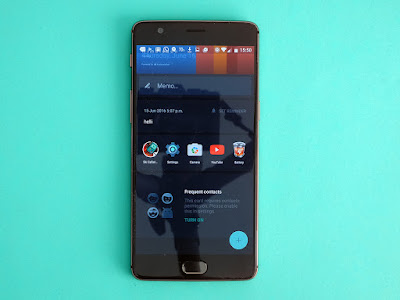
The OnePlus 3 is the best phone buy in the world right now, and deserves to be at the top of your list if you want a great smartphone, but cant quite afford those flagship prices. At £309, this phone deserves to cost Samsung and Apple at least a few million sales.
OnePlus 3 memory management is such that it’s optimized for better battery life, and thereby not making the full use of its powerful 6GB RAM module. That strategy is good for the average user, but for those who want to get the most of that huge memory available on the OnePlus 3, the folks over at xda have a fix for you.
To fix/adjust OnePlus 3 memory management or say boost its performance, you just need to change value of a single line — ro.sys.fw.bg_apps_limit in device’ build.prop file from 20 to 42.
You Can Find out How to Apply it Right Now via This Easy Tutorial:
*Disclaimer:
Android Custom ROM fix ® provide various Firmware Updates and Rooting process along with Custom ROM,Modes,file are all belong to their owners/developers. The autor of this site or the developers are not responsible, if you damage or brick your device.Do it on your own risk and follow the instruction properly.
* Important:
Backup important files stored on your device before proceeding with the steps below, so that in case something goes wrong you’ll have backup of all your important files.

÷ How to Boost OnePlus 3 Performance & Fix Memory Issues:
1- Root your OnePlus 3.
? Root access is required to be able to modify build.prop file.
2- Download/install BuildProp Editor app from the Play Store to your OnePlus 3.
3- Open BuildProp Editor app » tap the search icon on top bar » and type in ro.sys.fw » select ro.sys.fw.bg_apps_limit » change the value to 42 and tap on save.
? When it asks for root permission, GRANT it.
4- Reboot your OnePlus 3.
That’s it. You should now see a performance boost on your OnePlus 3 and be able to run more apps in the background without any issues.

For More OnePlus 3 Updates Keep Checking Android Custom ROM Fix ™®
That’s all. We hope this guide serves you well. If there’s anything you’d like to be added/changed on this page, PLZ Use the comment box below to contribute more ideas & Suggestions .
Like this post? PLZ Hit the share buttons below to share this article with your friends on Facebook, Google + and Twitter.
Want the latest Updates Sign up for our newsletters!
PLZ Follow Us On Flipboard 4 More Latest Updates.
Best Regards.™
Available link for download
Wednesday, October 26, 2016
Google Play Developer Console introduces Universal App Campaigns and User Acquisition performance reporting
Google Play Developer Console introduces Universal App Campaigns and User Acquisition performance reporting
Posted by Frederic Mayot, Google Play team
At Google I/O in May, we previewed some new and powerful tools to help you further grow your business and improve decision making based on smarter insights on Google Play. We are happy to announce that, today, these features are live in the Developer Console.
User Acquisition: AdWords Campaigns
With just a few simple steps, universal app campaigns lets you easily set up ad campaigns from within the Google Play Developer Console and promote your app across Google Play, Google Search, YouTube and the Google Display Network. You will now be able to more effectively find and grow your install base with the help of Google’s unparalleled reach.

Universal app campaigns automatically pull in images, video, and descriptions from your Google Play store listing to generate ad formats that look great wherever they are placed. From there, our systems automatically optimize your campaigns and experiment with different creatives and bids to maximize app install volume as close as possible to your target cost-per-install.
"With universal app campaigns, we only had to set up one campaign that drove more than 10,000 new installs in one month and install volume is continuing to trend up over time. Were also seeing a 20% lower CPI compared to other channels." – José Maria Pertusa, CMO of Linio
To get started with your first campaign, select the User Acquisition tab for your app in the Developer Console and choose ‘AdWords Campaigns.’
User Acquisition: Performance report
When you’re growing an audience for your app, you’ll want to understand where your most valuable users are coming from. The new performance report on the User Acquisition tab in the Developer Console lets you see how people are finding your Play Store listing, how many install your app, and how many go on to make purchases.

The performance report also tracks marketing links tagged with UTM tags, so you’ll be able to get more granular detail on how well your promotion is doing. Once you’ve got visitors to your Play Store listing, you’ll want to start thinking of ways to increase the number of visitors turning into installers. The new Store Listing Experiments feature can help you run A/B tests to do just that.
How to get started in the Developer Console
To learn how to take advantage of these new features in the Developer Console, watch the DevByte video below in which I explain how to set up your first universal app campaign and how to view the new data offered on the performance tab.
We hope you’ll use these user acquisition tools to grow a valuable audience for your app or game. We continue to improve our features for developers based on your feedback – like the recent improvements to beta testing and Store Listing Experiments – in order to help you grow your app or game business globally on Google Play.
Available link for download
Saturday, October 8, 2016
Deal Alert Grab an unlocked Xperia X Performance for 579 99 on eBay
Deal Alert Grab an unlocked Xperia X Performance for 579 99 on eBay
When Ryan looked at the Xperia X Performance last month, his verdict was that it had a nice display, decent specs, but deal breakers like the lack of a fingerprint scanner and the poor camera left a sour taste in his mouth. That was nothing though compared to the shock of the price of the phone. $700. There are many, many better phones selling for that much and even less, so Sonys value proposition just seems ridiculous.
Read More[Deal Alert] Grab an unlocked Xperia X Performance for $579.99 on eBay was written by the awesome team at Android Police.
from Android Police – Android News, Apps, Games, Phones, Tablets http://ift.tt/2a5JGNn
via IFTTT
Available link for download
Saturday, September 3, 2016
How to Update Rooted OnePlus 3 to Oxygen OS 3 1 3 Firmware Camera HDR Performance Tuning
How to Update Rooted OnePlus 3 to Oxygen OS 3 1 3 Firmware Camera HDR Performance Tuning
OnePlus has started rolling out Official OnePlus 3 Oxygen OS 3.1.3 Firmware Update.This OTA Update comes with loads of bug fixes and stability improvement.The Update is available via OTA (Over-the-air).You can manually check for the update.We highly recommend upgrading your device to this firmware.
÷ NEW FEATURES IN OXYGEN OS 3.1.3:
•Camera HDR performance tuning
•Bluetooth and NFC connectivity improvements
•Bug fixes in general telephony
•Bug fixes in Google and OnePlus apps
More Info via OnePlus Forum .
÷ Prerequisites:
•This tutorial is only for installing Oxygen OS 3.1.3 Firmware on Rooted OnePlus 3. Please do not try on any other One Plus variants.
•Your phone should be rooted and haveClockworkMod recovery installed from before.
•This tutorial will wipe out all your data.Proceed at your own risk.Perform a Dalvik Cache wipe before proceeding from the recovery mode.
•Make sure you backup all your data in your phone before proceeding.
*Disclaimer:
Android Custom ROM fix ® provide various Firmware Updates and Rooting process along with Custom ROM,Modes,file are all belong to their owners/developers. The autor of this site or the developers are not responsible, if you damage or brick your device.Do it on your own risk and follow the instruction properly.
* Important:
Backup important files stored on your device before proceeding with the steps below, so that in case something goes wrong you’ll have backup of all your important files.

÷ How to: Update Rooted OnePlus 3 to Oxygen OS 3.1.3 Firmware [ Camera HDR Performance Tuning].
Step 1 – Download Oxygen OS 3.1.3 Firmware for your OnePlus 3 to your computer.
Step 2 – Connect and mount your OnePlus 3 USB memory on your computer using the USB cable.
Step 3 – Now copy/paste the downloaded Android 6.0.1 ROM zip file and Google Appszip files to your SD card. Make sure the files are in the SD card root (not in any folder).
Step 4 – Then turn OFF your phone and disconnect from the USB cable.
Step 5 – Now to get in the Recovery Mode. Switch ON the phone while pressing and holding Volume Up + Home + Power buttons together
Step 6 – Once you are in ClockworkModRecovery, select perform a full data wipe by selecting “wipe data/factory reset”. Use the Power button to select everything while in the Recovery Mode.
Step 7 – Then, perform a cache wipe by selecting “wipe cache partition” .

Step 8 – Now this is optional, but it is recommended to perform a wipe of your dalvik cache as well. You will not get into boot loops or any other errors. From CWM recovery, go to ‘advanced’ and then select “wipe dalvik cache”.
Step 9 – Then go back to the main recovery screen and select “install zip from SD card”.
Step 10 – Now select “choose zip from sdcard”. Using your volume keys, navigate to the Android 6.0.1 ROM zip file that you copied to your SD card and select it using the Power button. Confirm the installation on the next screen and the installation procedure should start now.
Step 11 – After the installation completes, go to “+++++Go Back+++++” and reboot the phone by selecting “reboot system now” from the recovery menu.
Your OnePlus 3 will boot now and it might take about 5 minutes to boot on your first time. So, please wait.
That’s it Your OnePlus 3 should now have Oxygen OS 3.1.3 Firmware installed on your phone! Go to Settings > About phone to verify.
For More One Plus3 Brand New Firmware & Custom ROM keep checking AndroidCustomROM Fix ™®
Like this post? PLZ Hit the share buttons below to share this article with your friends on Facebook, Google + and Twitter.
PLZ Follow Us On Flipboard 4 More latest custom ROM fix.
PLZ Use the comment box below to contribute more ideas & Suggestions .
Best Regards.
Available link for download