Monday, February 13, 2017
How to Install Android 6 0 1 Marshmallow Nexify ROM V3 on T Mobile Galaxy Note 5 SM N920T
How to Install Android 6 0 1 Marshmallow Nexify ROM V3 on T Mobile Galaxy Note 5 SM N920T
According to XDA Member TechGuy081, Android 6.0.1 Marshmallow Nexify ROM V3 Available now for T-Mobile Samsung Galaxy Note 5 SM- N920T.

Nexify Rom Its Made To Make Your Note 5 Close To Stock Android MM Keep In Mind This Wont Make Your Device Be Stock Android I Just Removed Apps (Like Bloatware) From Samsung So You Can Download Google Apps To Replace Stock Apps, Like Clock App, Calculator With Googles Or Your Own!
•Rom Features
- Based on N920TUVU2DPD1 Firmware
- Deodexed all Apps
- Rooted with SuperSU 2.74
- Auto Wipe Cache, Dalvik Cache and Format System
- System Optimization
- Tweaks in Build.prop
- Removed Knox
- Removed As Many Apps As Possible
- Removed Safe Volume Warning
- Ad Away
- Private Mode Working
- 5 Reboot Menu
- Added Dolby Atmos
- Ultra Data Saving Working
- Battery Tweaks
- App Lock
- Gray Status Bar Removed
- Stock MM Emojis.

Change Log:
• June 16
-Initial Release V1
• June 26
- V2
-Special Thanks To @Battlehero
- Reboot Menu Fixed
- Gray Status Bar Removed
- Updated some apps
- Fixed Bugs
- Samsung keyboard Replaced By Googles
- Added Stock MM Emojis
• July 7
- Fixed alot of bugs you asked for
- Nfc And Payment, VPN functionality , Live Walpaper Picker, Hardware Buttons Fixed, Auto Brightness Fixed
- Removed Emergency From power Menu
- Removed Some More Bloat
- Removed Carrier Text In Lock-screen
- Removed Slide To Unlock in Lock-screen
- App Signature Check Removed Now You Can Install Old Apps Over New Versions
- Touchlight Key Enabled In Settings
- Animation Set to 0.25
- OutdoorMode
- Knox Removed
- All Apps In Multiwindow Mode
- And More!
÷ Prerequisites:
•This tutorial is only for installing Android 6.0.1 Marshmallow Nexify ROM V3 on T-Mobile Samsung Galaxy Note 5 SM- N920T.Please do not try on any other Galaxy Note 5 Variants.
•Your phone should have a custom recovery installed in order to install this NanoROM ROM on your phone.
•We will be using TWRP Recovery for this tutorial.
•This tutorial will wipe out all your data. Make sure you backup all your data in your phone before proceeding.
•Samsung KIES will NOT detect your phone after installing this ROM because it is a custom firmware
•Perform a Dalvik Cache wipe before proceeding from the Recovery Mode.
*Disclaimer:
Android Custom ROM fix ® provide various Firmware Updates and Rooting process along with Custom ROM,Modes,file are all belong to their owners/developers. The autor of this site or the developers are not responsible, if you damage or brick your device.Do it on your own risk and follow the instruction properly.
* Important:
Backup important files stored on your device before proceeding with the steps below, so that in case something goes wrong you’ll have backup of all your important files.
You can find out how to apply it right now via XDA.

For More Samsung Galaxy Note 5 Updates Keep Checking Android custom ROM Fix ™®
That’s all. We hope this guide serves you well. If there’s anything you’d like to be added/changed on this page, PLZ Use the comment box below to contribute more ideas & Suggestions .
Like this post? PLZ Hit the share buttons below to share this article with your friends on Facebook, Google + and Twitter.
Want the latest Updates Sign up for our newsletters!
PLZ Follow Us On Flipboard 4 More Latest Updates.
Best Regards.™
Available link for download
Sunday, February 12, 2017
5 Amazing Christmis Card Maker Apps for Android
5 Amazing Christmis Card Maker Apps for Android
1.Christmas Cards Lite

Christmas is coming! Share your photos this Christmas with all your loved ones.
New: Support pinch and zoom.
In three simple steps:
- Select a photo from your gallery or take a new one from your camera.
- Select the frame that you want to apply.
- Share the postcard with your loved ones.
The application requires few permission to run:
Your location (network-based) and network communication: It needs this to show relevant ads for you. This is a ad-based application.
Hardware control and storage: It needs this to take pictures from you camera and store it in the SD card.
If you have any issue with the app, please, send us an email with the problem. Well do our best to solve it.
- Install it on your android Smartphone
2.Greeting Cards

This app has powerful functions and very easy to use.
*** APP FEATURES ***
?? 4 Categories, 15 Beautiful Cards ??
** Add your message in seconds
** Edit photo in seconds
** Save to local photo album
** Add Your Signature (Finger doodle)
** Share to Facebook, Flickr, Tumblr, or via Email
** Paint functionality - Special Effects added.
** One click Share to All Friends on Facebook.
- Install it on your android smartphone
3.Christmas Photo Frames

??? Make the most beautiful Christmas Card EVER!!! ???
"The best Christmas Photo Frames on market!!"
"Christmas Photo Frames" is a collection of more than 100 lovely photo frames of Christmas for you to decorating your lovely photos. It has the same function as the Lovely Photo Frames, Love Camera, and some other apps. You can use the app with photos taken using other camera apps like: Line Camera, Instagram, Camera 360,...
Features:
* Import photo from gallery or take photo by camera
** Take photo live with frames
*** Gallery: browse the created photo.
*** Add Text, Balloon, Stickers to photo.
- Install it on your Android Smartphone
4.Christmas Cards
Christmas Cards help you create amazing Christmas Photo with wonderful frames and stickers. Your beautiful memories can be made more wonderful with beautiful frame layouts, tons of stickers and beautiful fonts and much more. The only limit is your imagination.

*** Key Features in a glance
* Amazing Christmas themes frames
* Over 50 Christmas Frames
* Over 150 wondferful Stickers
?* Over 20 text fonts and 4 text styles (Normal, Shadow, Embossed and Border)
* Easy use, zoom and pan to resize your photos
* Powerful photo editor including the following featues:
+ One-tap auto enhance
+ Gorgeous photo effects and frames
+ Fun stickers
+ Color balance
+ Crop, rotate, and straighten your photo
+ Adjust brightness, contrast, color temperature, and saturation
+ Sharpen and blur
+ Color temperature ("Warmth")
+ Color Splash
+ Focus (Tilt Shift)
+ Draw and add text
+ Create your own memes
+ Cosmetic tools: fix redeye, remove blemishes and whiten teeth
- Install it on your android smartphone
5.Christmas Cards

The cards are presented in the following categories:
1. Traditional
2. Contemporary
3. Humorous, Funny
4. Cute
5. New Year
With over 100 cards to choose from there is something for everyone’s taste. Your recipients will be delighted.
Our home page features a delightful daily countdown to Christmas commencing 30th November, counting down the 25 days until Christmas. The build up to Christmas becomes more exciting. Every day will update with a new image featuring a wonderful piece of art with an animal theme. Various creatures from our animal kingdom gather one by one over the 25 days before Christmas to help decorate the Christmas tree. The countdown continues into the New Year.
These beautiful pieces or artwork have been designed specifically for this application.
You can also utilise the event calendar to organise your Christmas commitments.
Here’s wishing you a very Merry Christmas and a Happy New Year 2015!
Enjoy!
- Install it on your Android Smartphone
Available link for download
Monday, February 6, 2017
Como Instalar Rom Galaxy Note 5 Duos N920CD Marshmallow
Como Instalar Rom Galaxy Note 5 Duos N920CD Marshmallow

- ARCHIVOS NECESARIOS :
- Controlador USB [DESCARGAR] o Kies [DESCARGAR]
- Odin v3 [DESCARGAR]
- Rom, Firmware Samsung Galaxy Note 5 Duos N920C / N920CD [DESCARGAR]
- Bateria por lo menos al 50%
- PASOS A SEGUIR :
- Instale el controlador USB de Samsung o Kies en su ordenador
- Extraer el firmware Samsung Galaxy con rar victoria para encontrar el archivo .md5
- Apagar el celular
- Pasos a seguir (Download mode). Tener el dispositivo completamente apagado Mantener presionado durante 5 segundo Volumen Abajo + Home + Power Aparecerá un mensaje de Warning (pero no se alarmen), presionar Volumen Arriba para ingresar a Download Mode, con Volumen Abajo el Young booteará normal
- Abrir Odin (el que descargaron arriba)
- Ver que la opción Re-Partition NO esté seleccionada
- Conectar por cable USB el Galaxy Note 5 Duos N920C a la computadora, Odin debe reconocer al dispositivo, nos daremos cuenta porque abajo de donde dice ID:CON aparecerá el cuadro sombreado de amarillo.
- Click en el botón PDA y seleccionar PDA_XXXXX.md5
- Ver que la opción Re-Partition NO esté seleccionada
- Click en Start
- Esperar a que salga PASS en fondo verde en Odin
- Listo!
Si por algún motivo se te queda booteando en el logo de Samsung, apaga el celular, reinicia en Recovery Mode Galaxy y realiza un wipe data y wipe cache.
Available link for download
Friday, February 3, 2017
Google Camera gets twist gesture in Nougat Dev Preview 5
Google Camera gets twist gesture in Nougat Dev Preview 5
Motorola fans are probably already familiar with this one. The Moto X and its ilk arrived with the ability to launch the default camera app using a rapid double-twist gesture thats almost exactly like what you would do if your watch gets stuck too high up on your wrist. If youre inside the camera, then performing this motion would swap between front and rear camera with a satisfying haptic rush. Now Google Camera v4.1 on the fifth Nougat developers preview is getting a similar feature.
Although you cant launch the app cold with this gesture, you are able to swap between cameras. It can be a little counter-intuitive at first, but once youve done it a few times, using this method rather than tapping the icon on the screen becomes second nature.
This is only one of the most prominent features to arrive for Google Camera with Nougat. The app is also getting a slew of user interface adjustments that include more intuitive options and cleaner animations. Were also getting the ability to pause video recordings, a feature that has been a long time coming.
Check out our coverage on the Nougat Dev Preview to get yourself on the cutting edge of the Android operating system, and click the button below to snag the latest version of the Google Camera from the Google Play Store. Give the twisting gesture a spin, then let us know in the comments if its something youll be using on the regular.
from Android Authority http://ift.tt/29VlFaC
via IFTTT
Available link for download
Wednesday, February 1, 2017
Asansam Box Latest Version V2 6 5 Full Setup Download Free
Asansam Box Latest Version V2 6 5 Full Setup Download Free

Disclaimer:
We can provide a latest versions any tool if you people feel difficulty during downloading of installing files. So you people will must contact us we will ready to help you.Asansam Box Version V2.6.5 Download free
Available link for download
Tuesday, January 31, 2017
Awful 5 GHZ WIFI performance L 29
Awful 5 GHZ WIFI performance L 29
I am getting only 86 Mbps near my Router, whatever setting I play with. On 2.4 I am getting 65 Mbps.
My 2x2 Ultrabook [Yoga 900], just besides the phone, gets 866 Mbps.
Anyone getting good speeds using the mate 8 or are we all in this together?
My phone has the latest B320 firmware
from xda-developers http://ift.tt/2a6eE1z
via IFTTT
Available link for download
Monday, January 30, 2017
Alcatel Idol 4 launching at Cricket on August 5 with VR goggles 199 99 price
Alcatel Idol 4 launching at Cricket on August 5 with VR goggles 199 99 price

After launching the Idol 3 last year, Cricket is once again teaming with Alcatel to offer the Idol 4.
from PhoneDog.com - Latest videos, reviews, articles, news and posts http://ift.tt/29Rs7Ra
via IFTTT
Available link for download
How to Root Nexus 6 Running Android N NPD90G Developer Preview 5
How to Root Nexus 6 Running Android N NPD90G Developer Preview 5

The latest Android N Developer Preview 5 NPD90G is the next upcoming major firmware release by Google. It brings some new features like multi-window mode, an enhanced doze mode, a revamped Settings screen and a quick toggle in the notifications panel. Other changes include improved notifications, improved multitasking and app switching, dark mode etc...
÷ Prerequisites:
•This root method is only for Android N (NPD90G) installed on Nexus 6 and I am not sure if it will work on the other variants of the Nexus 6 on other carriers.
•Your Nexus 6 bootloader should be unlocked.
Nexus 6 should be on Android N NPD90G software version.
•Make a Nandroid backup of your previous phone set up before proceeding – for just in case anything goes wrong.
*Disclaimer:
Android Custom ROM fix ® provide various Firmware Updates and Rooting process along with Custom ROM,Modes,file are all belong to their owners/developers. The autor of this site or the developers are not responsible, if you damage or brick your device.Do it on your own risk and follow the instruction properly.
* Important:
Backup important files stored on your device before proceeding with the steps below, so that in case something goes wrong you’ll have backup of all your important files.

÷ How to Root Nexus 6 Running Android N (NPD90G) Developer Preview 5.
Step 1 – Download Android SDK from the Android Developers website and install. Also set it up with downloading platform-tools and USB drivers package in SDK.
Step 2 – Enable USB Debugging mode in your Nexus 6.
Step 3 – Download Fastboot from the following links depending on your OS and extract it in android-sdk-windowsplatform-tools directory. Create directory if not already there.
Windows: Download here
Mac: Download here.
Linux: Download here.
NOTE: Skip Steps 1, 2, 3 if you already have them.
Step 4 – Download SuperSU v2.71 for Nexus 6 on your PC, if you haven’t already.
Step 5 – Connect and mount your Nexus 6 USB memory on your computer using the USB cable.
Step 6 – Now copy/paste the BETA-SuperSU-v2.71-20160331103524.zip file to your SD card. Make sure the file is in the SD card / internal storage root (not in any folder).
Step 7 – Then turn OFF your phone.
Step 8 – twrp-3.0.0-0-shamu.img and save it to your android-sdk-windowsplatform-tools directory on your computer.
Step 9 – Now go into Fastboot/Bootloader Mode on Nexus 6. How? Press Volume Down + Power keys for a few seconds till you see some text on the screen. This is Bootloader Mode.
Step 10 – Navigate to android-sdk-windowsplatform-tools directory and open Command Prompt (Shift + Right-click > Open Command Prompt).
Step 11 – Type in the following command and press Enter.
fastboot flash recovery twrp-3.0.0-0-shamu.img
Step 12 – Once completed, choose RECOVERY from the Fastboot menu and enter Recovery Mode.
Step 13 – In ClockworkMod recovery, scroll down to “flash zip from SD card” and press the power button to select it.
Step 14 – Press the Power button again and select “choose zip from sdcard”.
Step 15 – Now using your volume keys, navigate to BETA-SuperSU-v2.71-20160331103524.zip and select it using the Power button. Confirm the installation on the next screen and the installation procedure should start now.
Step 16 – After the installation completes, go to “+++++Go Back” and reboot the phone by selecting “reboot system now” from the Recovery menu. The phone will boot now and it might take about 5 minutes to boot on your first time. So, please wait.

That’s it! Your Nexus 6 is now rooted on Android N Developer Preview 5 firmware on your phone! Check for the SuperSU app in your apps list to verify.
For More Nexus 6 latest updates Keep Checking Android Custom ROM Fix™®
That’s all. We hope this guide serves you well. If there’s anything you’d like to be added/changed on this page, PLZ Use the comment box below to contribute more ideas & Suggestions .
Like this post? PLZ Hit the share buttons below to share this article with your friends on Facebook, Google + and Twitter.
Want the latest Updates Sign up for our newsletters!
PLZ Follow Us On Flipboard 4 More Latest Updates.
Best Regards.™
Available link for download
Wednesday, January 25, 2017
Handy Photo v1 0 5 Apk Full App Free Download
Handy Photo v1 0 5 Apk Full App Free Download
Requirements: 2.3 and up
Overview: Welcome to creative photo editing!

Edit your photo with the Handy Photo’s complete set of truly powerful tools and obtain the results that will definitely impress you and all those viewing your works of art.
* Uncrop your photos in a unique way *
The tool is called Magic not accidentally. It enables the users to uniquely uncrop photos. No other app could do it. The Magic Crop is unique for one more reason. It allows straightening a crooked horizon without sacrificing the photo’s original size.
* Let the objects in your photos come alive *
Is it possible to move the objects in your photos in just a few taps? The answer is yes when it comes to the Move Me tool. Carry the object to any other place or photo and be satisfied that it suits there to a tee.
* Perform photo retouching in the best possible way *
Remove all undesired objects and blemishes from your photos in a tap. Mobile retouching has never been so fast and easy.
* Color and tone balance your photos *
Thanks to a complete toolset for adjusting color and tone of photos, you can properly balance your images’ Brightness, Contrast, Saturation, Warmth, Shadows, Highlights, etc. levels to make the photos look vivid and natural.
* Apply stunning photo filters *
A total of more than twenty filters, namely Black and White, Bleach Bypass, Color Standout, Cross Process, Dramatic, Duotone, Fog, Glow, Golden, HDR, Halftone, Ink, Lomo, Old Photo, Polarization, Polaroid, Sepia, Sketch, Smart Contrast, Tilt Shift, Tiny Planet, Vignette, and Vintage, are always at your disposal in case you feel like changing the atmosphere of any of your photos. All they are equally amazing, easy to adjust and apply, and flexible to work with.
* Add marvelous textures *
Create the atmosphere of your photo stories yourself with the Handy Photo’s pack of terrific textures (more than 90). Apply them to enhance your photos and make them truly You can select from the following groups of textures: Cloth, Clouds, Frost and Ice, Grunge, Paper, Water, Wood.
The textures are adjustable, so make some settings to the texture you have selected, apply it, and you will become even more fascinated with your photo.
* Add attention-grabbing frames *
Before showing your photo to the whole world, it’s quite important to appropriately frame it. The Handy Photo’s excellent collection of frames serves just that purpose. Put the final touches on your photos by adding the following frames to them: Carton, Film, Grunge, Photo Album, Polaroid, and Retro Photo.
* THE APP FEATURES *
? Move Me technology for intellectual objects extraction and moving
? Magic Crop tool with unique photo “un-cropping” function
? The best retouching technology for mobile platforms
? Impressive collection of professionalphoto filters
? Complete sets of high quality textures and frames
? 100% size image viewing
? Up to 36 MP support
? Optimized for multi-core and GPU processors
? Stylish and intuitive UI
Brought to you by the developers of TouchRetouch!
* DEVICES SUPPORT *
All devices running Android 2.3 or newer and supporting ARMv7.
Depending on the amount of total RAM available, the following resolution images processing is allowed:
2 GB of RAM – 24 MP
1 GB of RAM – 16 MP
786 Mb of RAM – 12 MP
512 Mb of RAM – 8 MP
less than 512 MP of RAM – 5 MP
- Fixed save picture issue;
- Open pictures from dropbox added.
https://play.google.com/store/apps/details?id=com.advasoft.handyphoto Available link for download
Saturday, January 14, 2017
How to Install Android 6 0 1 Marshmallow Crisscross ROM V2 0 on Galaxy Note 5 SM N920I Pre rooted
How to Install Android 6 0 1 Marshmallow Crisscross ROM V2 0 on Galaxy Note 5 SM N920I Pre rooted
According to XDA member asc1977, Android 6.0.1 Marshmallow Crisscross ROM V2.0 [ 2ZPFB] is available now for Samsung Galaxy Note 5 SM- N920I.

÷ Rom Features:
Base: TW UX Beta firmware
Product code: SM-N920CZKASKC
PDA: N920SKSU2ZPFB
CSC: N920SSKC2ZPFB
Builddate: Wed Jun 29 19:54:40 KST 2016
Android version: 6.0.1
Kernel: 3.10.61-8273648
- Pre-rooted BETA-SuperSU-v2.76
- Knox removed
- Custom dev boot- and shutdownanimation
- Reboot recovery in MM reboot menue with a switch
- EmergencyMode in Reboot menue show/hide with a switch
- Removed confirm buttons in reboot menue
- Default animation scales set to 0,25x
- Removed high volume warning for headphones
- Disabled signature check
- App Lock option
- Shutter Sound option in camera settings
- Hidden Software Update Menue in About device
- Show NFC Icon if on in statusbar
- Call Recording Button
- Forced Enable Security Save in SmartManager
- Enabled Support Recent App Protection
- Show Data usage in expanded SystemUI near brightness auto check
- 3MinitBattery or StockBattery with a switch
- Left or Right Signal and Wifi with a switch
- Carrier Label on Statusbar with a switch and color option
- Power Saving Mode Ongoing Notification removeable with a switch
- Battery Bar in Statusbar with switch for show/hide
- Recemt Panel Lock (apps should not deleted if locked)
- Removed gray status bar when activated PowerSaveMode
- Removed Alpha Channel from status bar icons
- option to Increase Lock Screen visible notifications
- AdAway, OGGYouTubeDownloader and BetterBatteryStats in Rom
- Whitepages /identify unsaved numbers
- Colorize Lockscreen Clock & Date in real time with switch for seconds
- single swipe down right side for expanded quickpannel view with a switch
- next alarm on lockscreen(needs set one time alarm on/off to work right) with switch in RomControl for show/hide
- Gradient Statusbar (on first boot is black, set your own color or transparency)
- all apps multiwindow
- all notifications remoneable with switch on/off in RomControl app
- build.prop tweak for a faster boot- and shutdown animation
- build.prop tweak to remove ring delay
- build.prop tweak for power saving
- build.prop tweak to remove Knox from About Device info
- build.prop tweak to remove no sim card in phone message
- build.prop tweak to fix black screen after call
- build.prop tweak for google DNS
- build.prop tweak for 3G signal optimization
- build.prop tweak for internet speed enhancement
- build.prop tweak to fix app issues
- build.prop tweak to improve voice call clarity
- build.prop tweak to disable android device check in
- build.prop tweak for faster scrolling
- build.prop tweak for Wifi fix that dont forget passwort
- Quicklaunchpanel in recent apps with switch in RomControl app
- Custom image background for notification panel with settings in RomControl app
- Colorizer for Data Usage text in Expanded view in RomControl app
- Virtual lock, home and recent button for statusbar with on/off toggles in RomControl app
- support to colorize expanded view background in rom control app
- support to colorize notification background in rom control app
- USB Plug/Unplug wake up disabled
- Activated Installing app older versions over newer
- Disabled Signature Check.

÷ Aromamanager Menue options:
Run Rom Installation
-Wipe option
-Debloatmenue
-Option to remove boot- and shutdown sound
Kernel Chooser
-PF4 Kernel (Kernel is not seandroid enforcing)
-PFB Kernel
÷ RomControl App Menue options:
Reboot Menue Settings
--Hide/Show Reboot Recovery
--Hide/Show Emergency Mode
÷Systemui Settings:
-Signal Statusbar
--Signal Position left/right
-Battery Statusbar
--StockBattery show/hide
--3MinitBattery show/hide
--BatteryBar
----BatteryBar show/hide
----BatteryBar charging animation
----BatteryBar Style
----Thickness of BatteryBar
----Color of BatteryBar
-Carrier Label Statusbar
--Carrier Label Color
--Carrier Label Left of Wifi/Data
--Carier Label between Wifi and Data
--Carrier Label Right of Wifi/Data
-Notifications
--Ongoing Power save notifications show/hide
--Increase Lock Screen visible notifications
--Choose color of notification background
-Lockscreen
--Text Color hours
--Text Color minutes
--Text Color seconds
--Text Color date
--Show(hidde seconds
--Hide next alarm
--Color next alarm
-Expanded view
--Single swipe down right side for expanded quickpannel view
--All notifications remoneable on/off
---Expanded view colors
----Switch to enable color notification background
----Color of Data Usage text
----Switch to enable color expanded view background
----Choose color of expanded view background
--Custom Notification Panel Background
---Select image
---Image opacity
---Custom Background on/off
-Recent Panel options
--Show/hide Quicklaunchpanel
-Virtual Buttons
--Lock Button
---Right Side
---Left Side
---Center
--Home Button
---Right Side
---Left Side
---Center
--Recent Button
---Right Side
---Left Side
---Center
Set Theme
--Light/Dark Theme of RomControll App.

÷ Changelog V2.1:
- added switch in RomControl to show/hide next alarm on lockscreen
- added Quicklaunchpanel in recent apps
- added switch for Quichlaunchpanel in RomControl App
- added Custom image background for notification panel with RomControl
- added colorizer for Data Usage text in Expanded view
- added virtual lock, home and recent button for statusbar with on/off toggles in RomControl app
- fixed AppLock
- updated to newest SuperSu V2.76
- added SuperSu apk to system/priv-app
- Private mode fixed
- Photo editor fixed
- added support to colorize expanded view background in rom control app
- added support to colorize notification background in rom control app
- USB Plug/Unplug wake up disabled
- Activated Installing app older versions over newer
- Disabled Signature Check
- Added Kernel Chooser to Armoa (PF4 or PFB Kernel)...
÷ Prerequisites:
•This tutorial is only for installing Android 6.0.1 Marshmallow Crisscross ROM V2.0 [ 2ZPFB] on Samsung Galaxy Note 5 SM- N920I.Please do not try on any other Galaxy Note 5 Variants.
•Your phone should have a custom recovery installed in order to install this NanoROM ROM on your phone.
•We will be using TWRP Recovery for this tutorial.
•This tutorial will wipe out all your data. Make sure you backup all your data in your phone before proceeding.
•Samsung KIES will NOT detect your phone after installing this ROM because it is a custom firmware
•Perform a Dalvik Cache wipe before proceeding from the Recovery Mode.
*Disclaimer:
Android Custom ROM fix ® provide various Firmware Updates and Rooting process along with Custom ROM,Modes,file are all belong to their owners/developers. The autor of this site or the developers are not responsible, if you damage or brick your device.Do it on your own risk and follow the instruction properly.
* Important:
Backup important files stored on your device before proceeding with the steps below, so that in case something goes wrong you’ll have backup of all your important files.
You can find out how to apply it right now via XDA.
For More Samsung Galaxy Note 5 Updates Keep Checking Android custom ROM Fix ™®
That’s all. We hope this guide serves you well. If there’s anything you’d like to be added/changed on this page, PLZ Use the comment box below to contribute more ideas & Suggestions .
Like this post? PLZ Hit the share buttons below to share this article with your friends on Facebook, Google + and Twitter.
Want the latest Updates Sign up for our newsletters!
PLZ Follow Us On Flipboard 4 More Latest Updates.
Best Regards.™
Available link for download
Friday, January 13, 2017
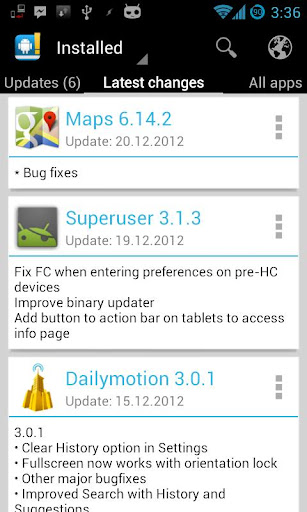
Changelog Droid Premium v3 5 5c Apk Full App
Changelog Droid Premium v3 5 5c Apk Full App
Requirements: Android 2.0+
Overview: Watch all the changes of your apps AFTER or BEFORE updating them!
 |
Changelog Droid will check the Play Store in the background and notify you when updates are available.
Add apps that you haven’t installed by simply sharing them from the Play Store to Changelog Droid and keep track of updates without wasting storage space.
Use Changelog Droid to launch or uninstall apps, open the system’s info page or go directly to the Play Store to update your apps.
Changelog Droid will build a complete version history so you can keep track of every change made to your apps.
- Update notification and manual update check
- Version history containing all changelogs
- Observe apps that you don’t have installed
- Blacklist apps that you don’t want to update
- Quick Search for all of your apps
- Access Network State: Check connection status.
- Read Phone State: Needed for MobFox SDK
- Get Accounts, Use Credentials, Manage Accounts: Get authentication token for the Google account, required for accessing the Play Store
- Receive Boot Completed: Registering background service for update checking.
- Wake Lock: Assure that internet is connected when checking for updates in background.
- Read Logs: Obtaining the Android ID from the GTalk Status Monitor.
- Google Services: Obtain Android ID automatically
- Vibrate: Vibrate for notifications
- Crash fix
- Fixed blurred icons
- Discuss the new features here: https://plus.google.com/117433846956…ts/TQFUnYH2EN5
https://play.google.com/store/apps/details?id=com.cypressworks.changelogviewer.premium Size: 1.08 MB
Download zippyshareAvailable link for download
Sunday, January 8, 2017
How to Install Android 6 0 1 Marshmallow ViperROM MM on T Mobile Galaxy Note 5 SM N920T
How to Install Android 6 0 1 Marshmallow ViperROM MM on T Mobile Galaxy Note 5 SM N920T
According to XDA Member asif.malick, Android 6.0.1 Marshmallow ViperROM MM is a now released for T-Mobile Samsung Galaxy Note 5 SM- N920T.

÷ ROM Features:
Based on Latest N920CXXS2BPE4 Firmware
-Deodexed all Apps
-Rooted with BETA-SuperSU-v2.68
-BusyBox
-Auto Wipe Cache, Dalvik Cache and Format System
-System Optimization
-Removed Knox
-Removed Social Apps
-Speed meter
-Added Rounded recent apps windows
-Added Rounded Notifications
-Add quick launcher in recent app
-Advanced power menu
-Exit in Internet Explorer
- Xposed working
- S7 Edge Panel
- 3 virtual keys, right left, home
- quick connect added
- Microsoft Apps Removed
- Disable SMS to MMS converting
- Shutter Sound in camera settings
- Enable Camera During Call
- Call Recording
- Message notification popup
- Call and SMS blocking menu in settings
- Show Data usage in expanded SystemUI near brightness auto check
- Force Enable Security Save in SmartManager...
÷ Prerequisites:
•This tutorial is only for installing Android 6.0.1 Marshmallow ViperROM MM for T-Mobile Samsung Galaxy Note 5 SM- N920T. Please do not try on any other Galaxy Note 5 Variants.
•Your phone should have a custom recovery installed in order to install this NanoROM ROM on your phone.
•We will be using TWRP Recovery for this tutorial.
•This tutorial will wipe out all your data. Make sure you backup all your data in your phone before proceeding.
•Samsung KIES will NOT detect your phone after installing this ROM because it is a custom firmware.
•Perform a Dalvik Cache wipe before proceeding from the Recovery Mode.
*Disclaimer:
Android Custom ROM fix ® provide various Firmware Updates and Rooting process along with Custom ROM,Modes,file are all belong to their owners/developers. The autor of this site or the developers are not responsible, if you damage or brick your device.Do it on your own risk and follow the instruction properly.
* Important:
Backup important files stored on your device before proceeding with the steps below, so that in case something goes wrong you’ll have backup of all your important files.

You can find out how to apply it right now via XDA.
For MoreVerizon Samsung Galaxy Note 5SM- N920T Updates Keep Checking Android custom ROM Fix ™®
That’s all. We hope this guide serves you well. If there’s anything you’d like to be added/changed on this page, PLZ Use the comment box below to contribute more ideas & Suggestions .
Like this post? PLZ Hit the share buttons below to share this article with your friends on Facebook, Google + and Twitter.
Want the latest Updates Sign up for our newsletters!
PLZ Follow Us On Flipboard 4 More Latest Updates.
Best Regards.™
Available link for download
Tuesday, January 3, 2017
IMEI SN Writer Tool Software Setup V1 5 3 Free Download
IMEI SN Writer Tool Software Setup V1 5 3 Free Download

Now you can download latest setup of IMEI SN writer software from below downloading links. The downloading we have shred from its official server. If you are facing trouble during downloading or installation feel free to contact us via commenting we will help you if possible thing for us.
Downloading links
Download IMEI SN Writer
Password: bakar_siddeik@yahoo.com
Available link for download
Wednesday, December 28, 2016
Android Studio 1 5
Android Studio 1 5
Posted by, Jamal Eason, Product Manager, Android Android Studio 1.5 is now available in the stable release channel. The latest release is focused on delivering more stability, with most of the enhancements being made under the hood (along with addressing several bugs). |  |
Some of the specific bug fixes, include the ability to use short names when code-completing custom views.

In addition to the stability improvements and bug fixes, we’ve added a new feature to the memory profiler. It can now assist you in detecting some of the most commonly known causes of leaked activities.

There are also several new lint checks. Heres one below which warns you if you are attempting to override resources referenced from the manifest.

If you’re already using Android Studio, you can check for updates from the navigation menu (Help ? Check for Update [Windows/Linux] , Android Studio ? Check for Updates [OS X]). For new users, you can learn more about Android Studio, or download the stable version from the Android Studio site.
As always, we welcome your feedback on how we can help you. You can also connect with the Android developer tools team via Google+. And don’t worry about what’s in the box from the video. It’s nothing. Really. Forget I mentioned it.

Available link for download
Sunday, December 25, 2016
Calculator Converter Pro v4 3 5 Apk Full App
Calculator Converter Pro v4 3 5 Apk Full App
Requirements: Android 2.2+
Overview: 6-In-1 Tool: Calculator, Currency Converter, Measurement Converter, Mortgage Calculator, Tipping Calculator, andGraphing Calculator

UPDATED WITH NEW DESIGN AND FEATURES!!
~~~~~~~~~~~~~~~~~~~~~~~~~~~~~
6-In-1 Tool: Calculator, Currency Converter, Measurement Converter, Mortgage Calculator, Tipping Calculator, and Graphing Calculator
~~~~~~~~~~~~~~~~~~~~~~~~~~~~~
“What the stock ICS calculator should have been” -TalkAndroid.com (http://goo.gl/u3i5I)
–
“The best Android calculator app” -Androinica.com (http://goo.gl/NJwNL)
–
“Everything the Android calculator should have been” -Droiddog.com (http://goo.gl/FCr6e)
–
“A tool with a clean UI inspired by Android” -AndroidPolice.com (http://goo.gl/PmpBR)
~~~~~~~~~~~~~~~~~~~~~~~~~~~~
- CALCULATOR: Clean design with advanced functions for Pro users
- CURRENCY CONVERTER: Real-time conversion of 160+ world currencies
- MEASUREMENT CONVERTER: Convert units of length, area, temperature, volume, weight, time, cooking, density, volume, force, energy, power, and more.
- MORTGAGE CALCULATOR: Calculation interest and loan payments for monthly or bi-weekly loans
- TIPPING CALCULATOR: Split the bill with friends or quickly figure out the tip on the go
- GRAPHING CALCULATOR: Plot and draw sophisticated graphs (Pro users only)
v4.3.5:
1) Currency loading now done in background
https://play.google.com/store/apps/details?id=com.apextechnology.calculationsAvailable link for download
Monday, December 19, 2016
Kingo Android Root 1 4 5 Apk Free Download
Kingo Android Root 1 4 5 Apk Free Download

- · Speedier execution
- · Save battery life
- · Access root-just applications
- · Expel bearer bloatware
- · Adjustable appearance
- · Achieve administrator level consent.
Download link:
Available link for download
Thursday, December 15, 2016
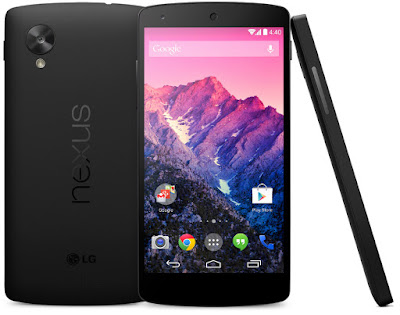
How to Install Android 6 0 1 Marshmallow Pure White ROM on Nexus 5
How to Install Android 6 0 1 Marshmallow Pure White ROM on Nexus 5
Nexus 5 Pure White custom ROM comes with tons of new features and is based on Android 6.0.1 Marshmallow. A quick list of the main features in Pure White is given below and we are sure you’d love to use this on your Nexus 5:
Base Factory Image Google MOB30P 6.0.1
Layers fully supported
Odex
Stock kernel MOB30P
Ads disabled
Audio enhancements
New Statusbar icon
New Softkey
Ambient display
N notifications
Reduced navbar
Used daily~super stable
General improvements
Google home
Google now
LockClock
Apollo music
Aosp Browser
GoogleCamera
Gallery Aosp
Video Player
Aosp keyboard
Aosp calendar
Calendar sync
Omni calendar widget
Aosp Mms
Aosp email
Stk sim....

÷ Prerequisites:
•This Android 6.0.1 Pure White ROM tutorial is only for Nexus 5 (hammerhead) and I am not sure if it will work on the other variants of the Nexus 5 on other carriers.
•Make sure your phone is rooted and has a custom recovery like ClockworkMod installed.
•Make a Nandroid backup of your previous phone set up before proceeding – for just in case anything goes wrong.
*Disclaimer:
Android Custom ROM fix ® provide various Firmware Updates and Rooting process along with Custom ROM,Modes,file are all belong to their owners/developers. The autor of this site or the developers are not responsible, if you damage or brick your device.Do it on your own risk and follow the instruction properly.
* Important:
Backup important files stored on your device before proceeding with the steps below, so that in case something goes wrong you’ll have backup of all your important files.
÷ How to Install Android 6.0.1 Marshmallow Pure White ROM on Nexus 5 :
Step 1 – Download Android 6.0.1 Pure White ROM for Nexus 5 on your PC, if you haven’t already.
Step 2 – Connect and mount your Nexus 5 USB memory on your computer using the USB cable.
Step 3 – Now copy/paste the downloaded Android 6.0.1 ROM zip file to your internal SD card. Make sure the file is in the SD card root (not in any folder).
Step 4 – Then turn OFF your phone and disconnect from the USB cable.
Step 5 – Now to get in the Bootloader Mode. Turn ON the phone while pressing and holding the Volume Up + Volume Down and Power buttons.
Step 6 – Follow the navigation instructions on the screen. Select BOOTLOADER and then go to RECOVERY.
Step 7 – Once you are in ClockworkMod Recovery, select perform a full data wipe by selecting “wipe data/factory reset”. Use the Power button to select everything while in the Recovery Mode.
Step 8 – Then, perform a cache wipe by selecting “wipe cache partition” .
Step 9 – Now this is optional, but it is recommended to perform a wipe of your dalvik cache as well. You will not get into boot loops or any other errors. From CWM recovery, go to ‘advanced’ and then select “wipe dalvik cache”.
Step 10 – Then go back to the main recovery screen and select “install zip from SD card”.
Step 11 – Now select “choose zip from sdcard”. Using your volume keys, navigate to the Android 6.0.1 ROM zip file that you copied to your SD card and select it using the Power button. Confirm the installation on the next screen and the installation procedure should start now.
Step 12 – After the installation completes, go to “+++++Go Back+++++” and reboot the phone by selecting “reboot system now” from the recovery menu .
Your Nexus 5 will boot now and it might take about 5 minutes to boot on your first time. So, please wait.
That’s it! Your Nexus 5 should now have Android 6.0.1 Pure White Marshmallow custom ROM installed on your phone! Go to Settings > About phone to verify.
For More Nexus 5 Updates Keep Checking Android Custom ROM Fix ™®
That’s all. We hope this guide serves you well. If there’s anything you’d like to be added/changed on this page, PLZ Use the comment box below to contribute more ideas & Suggestions .
Like this post? PLZ Hit the share buttons below to share this article with your friends on Facebook, Google + and Twitter.
Want the latest Updates Sign up for our newsletters!
PLZ Follow Us On Flipboard 4 More Latest Updates.
Best Regards.™
Available link for download
Sunday, December 11, 2016
How to set up a 5 1 home theater system with Sonos for Android
How to set up a 5 1 home theater system with Sonos for Android
Get BIG home theater sound with Sonos!
Sonos speakers are smart. "How smart?" you ask.
So smart that, when you combine a Sonos Playbar, Sub, and either two Play:1s, two Play:3s, or two Play:5s (gen 2), you can turn all the individual components into a bumpin home theater system!
Note: Your rear surround speakers must both be the same model or this just wont work.
There are a couple different ways to do this, especially if you have an existing system that youre adding to. Were going to show you the easiest way to set this up. Here we go!
How to set up a 5.1 surround home theater system with Sonos for Android
To make life easier, youre going to want to factory reset all of the speakers that you have set up already.
Once thats done were going to start by setting up the Playbar, which will prompt the setup of the rest of your home theater system.
- Launch the Sonos Controller app from your Home screen or from the app drawer.
- Tap Set Up a New Sonos System.
- Tap Next on the welcome screen.
-
Tap Standard Setup so everything stays wireless.
- Tap Next on the "Standard Setup" screen.
- Tap Set up this player. Choose the Playbar from the list, if it prompts you.
- Follow the on-screen instructions.
-
Tap Next.
- Tap I see an orange light once you see the orange light flashing on the side of the Playbar.
- Tap Next on the "Wireless Setup" screen.
- Enter your Wi-Fi password into the field.
-
Tap Continue.
- Tap Next once the Playbar has been added to your network.
- Tap the dropdown menu.
- Tap the room in which youll have your home theater setup.
-
Tap Next.
- Tap Next once your TV is turned off.
- Tap Add a Sub.
-
Tap Next once you have plugged in your Sub. As the screen says, it can take up to 30 seconds for it to register (its not kidding).
- Follow the on-screen instructions.
- Tap Next once the Sub has been added.
-
Tap Add Surrounds.
- Swipe left and right to choose which players you have.
- Tap Set up these players, once youve chosen the Sonos model that you have.
- Tap Next on the "Add Left Surround" screen, once youve placed the speaker where you like it.
-
Follow the on-screen instructions.
- Tap Next on the "Added Left Surround" screen.
- Tap Next on the "Add Right Surround" screen.
-
Follow the on-screen instructions.
- Tap Next on the "Added Right Surround" screen.
- Tap Next on the "Audio Setup" screen.
-
Tap Next once you have moved to a central location in the room from which you will watch TV.
- Tap the play button to start the Sub test sounds.
- Tap No Difference if the alternating tones dont change in volume.
- Tap A is louder if the Sub sounds louder when the letter "A" is highlighted.
- Tap B is louder if the Sub sounds louder when the letter "B" is highlighted.
- Tap the play button to start the bass tones.
- Tap the bass setting that is most pleasing to your ear.
-
Tap Next.
- You will be asked how far away from you your left and right surround speakers are. Tap one of the following options:
- Less than 2 feet
- 2 feet to 10 feet
- More than 10 feet
- Tap Next on the "Audio Setup" screen.
-
Tap Next on the "TV Sound" screen, once your Playbar is connected to your television via optical cable.
- Tap Next once you have your TV turned on to a movie or show.
- Tap Next after setting your TV speakers to external. This can be done using your remote in your TVs sound settings.
-
Tap Next.
- Tap Successfully disabled, once you have your audio output set to external speakers.
- Tap Next.
-
Tap Next on the "Remote Control Setup" screen.
- Follow the on-screen instructions.
- Tap Next once your remote is set up.
-
Press the volume button on your TV remote and tap an option.
- A message is displayed
- A volume level is displayed
-
Nothing is displayed
- Tap Next on the "TV Messages" screen.
- Tap Add Another Player if you wish to do so and follow steps 3-13. Otherwise, tap Not Now.
-
Tap Next on the "Sonos Registration" screen.
- Enter your email address.
- Check or uncheck the checkoxes, depending on whether or not youd like to receive software and company emails from Sonos.
-
Tap Next.
- Tap Use Current Location to allow Sonos to use your location as part of the registration process.
- Enter your zip/postal code.
- Tap Next.
-
Check or uncheck the checkbox, depending on whether or not youd like to send usage data to Sonos.
- Tap Next.
- Tap Next on the "Registration Complete** screen.
-
Tap Set Up Music Services if you wish to set up a music service. Otherwise, tap Skip to Sonos Menu.
It was a long road, but we got there! Now you can enjoy immersive 5.1 surround sound thanks to Sonos!
from Android Central - Android Forums, News, Reviews, Help and Android Wallpapers http://ift.tt/2a0bXF1
via IFTTT
Available link for download