Showing posts with label oneplus. Show all posts
Showing posts with label oneplus. Show all posts
Sunday, February 19, 2017
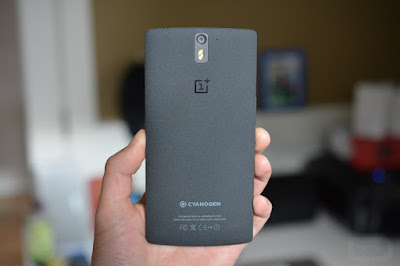
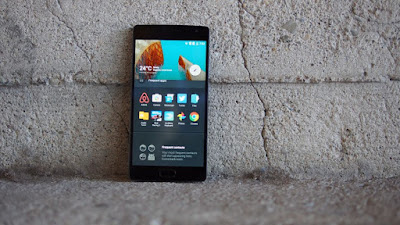
How to Update OnePlus to Cyanogen OS 13 1 ZNH2KAS1KN Android 6 0 1 Marshmallow Official Firmware
How to Update OnePlus to Cyanogen OS 13 1 ZNH2KAS1KN Android 6 0 1 Marshmallow Official Firmware

OnePlus One Cyanogen OS 13.1 custom ROM comes with tons of new features and is based on Android 6.0.1 Marshmallow with the all new Material Design. Several new apps have been redesigned and perform a lot faster on this phone. This update brings the following changes to your OnePlus One software:
View trending tweets on your lockscreen
Skype features built into the Phone app
New Cortana features
OneNote mod to take notes from anywhere in the OS
Microsoft Hyperlapse is also part of Cyanogen OS now..
Don’t worry we are going to share step by step guide to safely Update your OnePlus to Cyanogen OS 13.1 ZNH2KAS1KN Android 6.0.1 Marshmallow Official Firmware.
View my Flipboard Magazine.
÷ Prerequisites:
•This tutorial is only for installing Cyanogen OS 13.1 ZNH2KAS1KN software update on OnePlus One.
•You can also install this software update using stock recovery.
•This tutorial will wipe out all your data. Make sure you backup all your data in your phone before proceeding. If you do not want to wipe any data, skip step 6.

*Disclaimer:
Android Custom ROM fix ® provide various Firmware Updates and Rooting process along with Custom ROM,Modes,file are all belong to their owners/developers. The autor of this site or the developers are not responsible, if you damage or brick your device.Do it on your own risk and follow the instruction properly.
* Important:
Backup important files stored on your device before proceeding with the steps below, so that in case something goes wrong you’ll have backup of all your important files.
÷ How to Update OnePlus to Cyanogen OS 13.1 ZNH2KAS1KN Android 6.0.1 Marshmallow Official Firmware:÷ Prerequisites:
•This tutorial is only for installing Cyanogen OS 13.1 ZNH2KAS1KN software update on OnePlus One.
•You can also install this software update using stock recovery.
•This tutorial will wipe out all your data. Make sure you backup all your data in your phone before proceeding. If you do not want to wipe any data, skip step 6.
*Disclaimer:
Android Custom ROM fix ® provide various Firmware Updates and Rooting process along with Custom ROM,Modes,file are all belong to their owners/developers. The autor of this site or the developers are not responsible, if you damage or brick your device.Do it on your own risk and follow the instruction properly.
* Important:
Backup important files stored on your device before proceeding with the steps below, so that in case something goes wrong you’ll have backup of all your important files.
Step 1 – Download Cyanogen OS 13.1 ZNH2KAS1KN ROM for One to your computer.
Step 2 – Connect and mount your One USB memory to your computer using the USB cable.
Step 3 – Now copy/paste the downloaded Cyanogen OS 13.1 ROM zip file to your phone memory / SD card. Make sure the file is in the phone memory / SD card root (not in any folder).
Step 4 – Then turn OFF your phone and disconnect from the USB cable.
Step 5 – Now to get in the Recovery Mode. Switch ON the phone while pressing and holding Volume Down + Power buttons together.
Step 6 – Once you are in TWRP Recovery, perform a full data wipe by tapping on the ‘Wipe’ button. Then swipe on the “Swipe to Factory Reset” option at the bottom.
Step 7 – Now go back to the main menu and then tap on the ‘Install’ button. From the list, choose the ZIP file that you copied to your phone memory in Step 3.
Step 8 – Confirm installation on the next screen by swiping on the “Swipe to Confirm Flash” option. The installation procedure should start now.
Step 9 – Once the installation is completed.
Step 10 – You can now reboot your phone by selecting the “Reboot System” button.
Your One will boot now and it might take about 5 minutes to boot on your first time. So, please wait.
That’s it! Your OnePlus One should now have Cyanogen OS 13.1 ZNH2KAS1KN Android 6.0.1 Marshmallow official software update installed on your phone! Go to Settings > About phone to verify.
For More OnePlus One Updates Keep Checking Android Custom ROM Fix ™®
That’s all. We hope this guide serves you well. If there’s anything you’d like to be added/changed on this page, PLZ Use the comment box below to contribute more ideas & Suggestions .
Like this post? PLZ Hit the share buttons below to share this article with your friends on Facebook, Google + and Twitter.
Want the latest Updates Sign up for our newsletters!
PLZ Follow Us On Flipboard 4 More Latest Updates.
Best Regards.™
Available link for download
Thursday, February 9, 2017
How to Update OnePlus One to Android 6 0 1 Marshmallow SmartisanOS ROM
How to Update OnePlus One to Android 6 0 1 Marshmallow SmartisanOS ROM
OnePlus One SmartisanOS custom ROM comes with tons of new features and is based on Android 6.0.1 Marshmallow. A quick list of the main features in SmartisanOS is given below and we are sure you’d love to use this on your OnePlus One:
Android 6.0.1 Marshmallow.
Beautiful UI.
Fast & Smooth.
Stable....
Don’t worry we are going to share step by step guide to safely Update your OnePlus One to Android 6.0.1 Marshmallow SmartisanOS ROM:
Android 6.0.1 Marshmallow.
Beautiful UI.
Fast & Smooth.
Stable....
Don’t worry we are going to share step by step guide to safely Update your OnePlus One to Android 6.0.1 Marshmallow SmartisanOS ROM:
View my Flipboard Magazine.
÷ Prerequisites:
•This tutorial is only for installing Android 6.0.1 SmartisanOS ROM on OnePlus One. Please do not try on any other One variants.
•Your phone should have a custom recovery installed in order to install this SmartisanOS ROM on your phone.
•We will be using TWRP Recovery for this tutorial.
•This tutorial will wipe out all your data. Make sure you backup all your data in your phone before proceeding.
•Perform a Dalvik Cache wipe before proceeding from the Recovery Mode.
*Disclaimer:
Android Custom ROM fix ® provide various Firmware Updates and Rooting process along with Custom ROM,Modes,file are all belong to their owners/developers. The autor of this site or the developers are not responsible, if you damage or brick your device.Do it on your own risk and follow the instruction properly.
* Important:
Backup important files stored on your device before proceeding with the steps below, so that in case something goes wrong you’ll have backup of all your important files.
How to: Update OnePlus One to Android 6.0.1 Marshmallow SmartisanOS ROM:
Step 1 – Download Android 6.0.1 SmartisanOS ROM for One to your computer.
Step 2 – Connect and mount your OnePlus One USB memory to your computer using the USB cable.
Step 3 – Now copy/paste the downloaded Android 6.0.1 ROM zip file to your phone memory / SD card. Make sure the file is in the phone memory / SD card root (not in any folder).
Step 4 – Then turn OFF your phone and disconnect from the USB cable.
Step 5 – Now to get in the Recovery Mode. Switch ON the phone while pressing and holding Volume Down + Power buttons together.
Step 6 – Once you are in TWRP Recovery, perform a full data wipe by tapping on the ‘Wipe’ button. Then swipe on the “Swipe to Factory Reset” option at the bottom.
Step 7 – Now go back to the main menu and then tap on the ‘Install’ button. From the list, choose the ZIP file that you copied to your phone memory in Step 3.
Step 8 – Confirm installation on the next screen by swiping on the “Swipe to Confirm Flash” option. The installation procedure should start now.
Step 9 – Once the installation is completed.
Step 10 – Tap on the “Wipe cache/dalvik” button if you get into any boot loops or other issues.
Step 11 – You can now reboot your phone by selecting the “Reboot System” button.
Your One will boot now and it might take about 5 minutes to boot on your first time after flashing a new ROM. So, please wait.

That’s it! Your OnePlus One should now have Android 6.0.1 SmartisanOS Marshmallow custom ROM installed on your phone! Go to Settings > About phone to verify.
For More OnePlus One Updates Keep Checking Android Custom ROM Fix ™®
That’s all. We hope this guide serves you well. If there’s anything you’d like to be added/changed on this page, PLZ Use the comment box below to contribute more ideas & Suggestions .
Like this post? PLZ Hit the share buttons below to share this article with your friends on Facebook, Google + and Twitter.
Want the latest Updates Sign up for our newsletters!
PLZ Follow Us On Flipboard 4 More Latest Updates.
Best Regards.™
÷ Prerequisites:
•This tutorial is only for installing Android 6.0.1 SmartisanOS ROM on OnePlus One. Please do not try on any other One variants.
•Your phone should have a custom recovery installed in order to install this SmartisanOS ROM on your phone.
•We will be using TWRP Recovery for this tutorial.
•This tutorial will wipe out all your data. Make sure you backup all your data in your phone before proceeding.
•Perform a Dalvik Cache wipe before proceeding from the Recovery Mode.
*Disclaimer:
Android Custom ROM fix ® provide various Firmware Updates and Rooting process along with Custom ROM,Modes,file are all belong to their owners/developers. The autor of this site or the developers are not responsible, if you damage or brick your device.Do it on your own risk and follow the instruction properly.
* Important:
Backup important files stored on your device before proceeding with the steps below, so that in case something goes wrong you’ll have backup of all your important files.
How to: Update OnePlus One to Android 6.0.1 Marshmallow SmartisanOS ROM:
Step 1 – Download Android 6.0.1 SmartisanOS ROM for One to your computer.
Step 2 – Connect and mount your OnePlus One USB memory to your computer using the USB cable.
Step 3 – Now copy/paste the downloaded Android 6.0.1 ROM zip file to your phone memory / SD card. Make sure the file is in the phone memory / SD card root (not in any folder).
Step 4 – Then turn OFF your phone and disconnect from the USB cable.
Step 5 – Now to get in the Recovery Mode. Switch ON the phone while pressing and holding Volume Down + Power buttons together.
Step 6 – Once you are in TWRP Recovery, perform a full data wipe by tapping on the ‘Wipe’ button. Then swipe on the “Swipe to Factory Reset” option at the bottom.
Step 7 – Now go back to the main menu and then tap on the ‘Install’ button. From the list, choose the ZIP file that you copied to your phone memory in Step 3.
Step 8 – Confirm installation on the next screen by swiping on the “Swipe to Confirm Flash” option. The installation procedure should start now.
Step 9 – Once the installation is completed.
Step 10 – Tap on the “Wipe cache/dalvik” button if you get into any boot loops or other issues.
Step 11 – You can now reboot your phone by selecting the “Reboot System” button.
Your One will boot now and it might take about 5 minutes to boot on your first time after flashing a new ROM. So, please wait.
That’s it! Your OnePlus One should now have Android 6.0.1 SmartisanOS Marshmallow custom ROM installed on your phone! Go to Settings > About phone to verify.
For More OnePlus One Updates Keep Checking Android Custom ROM Fix ™®
That’s all. We hope this guide serves you well. If there’s anything you’d like to be added/changed on this page, PLZ Use the comment box below to contribute more ideas & Suggestions .
Like this post? PLZ Hit the share buttons below to share this article with your friends on Facebook, Google + and Twitter.
Want the latest Updates Sign up for our newsletters!
PLZ Follow Us On Flipboard 4 More Latest Updates.
Best Regards.™
Available link for download
Saturday, February 4, 2017
How to Install TWRP Image on OnePlus 3
How to Install TWRP Image on OnePlus 3
OnePlus 3 was released on June 14th, 2016.The phone sports all the high-end features and specification but has a very budget friendly price tag which definitely attracts buyers.Now OnePlus 3 has a full metal body and one of the most important updates is RAM.OnePlus 3 now has 6GB of RAM which is unbelievable
Thanks to XDA Developer "Naman Bhalla" for sharing the recovery file.Now users can easily flash the TWRP recovery file using fastboot commands.Then they can flash the latest SuperSu root file to get root access on OnePlus 3.Donot worry we are going to share step by step guide on How to Install TWRP Recovery on OnePlus 3.
View my Flipboard Magazine.
÷ Prerequisites:
•Make sure bootloader of OnePlus 3 is unlocked
•Warranty may be void of your device if you follow the procedures given on this page. You only are responsible for your device. We won’t be liable if any damage occurs to your device and/or its components.
•Make sure your device has more than 50% battery life
•The TWRP version is not tested yet.

*Disclaimer:
Android Custom ROM fix ® provide various Firmware Updates and Rooting process along with Custom ROM,Modes,file are all belong to their owners/developers. The autor of this site or the developers are not responsible, if you damage or brick your device.Do it on your own risk and follow the instruction properly.
* Important:
Backup important files stored on your device before proceeding with the steps below, so that in case something goes wrong you’ll have backup of all your important files.
÷ How to Install TWRP Image on OnePlus 3:
1- First Download a TWRP recovery .img file for your for OnePlus 3.
2- Setup ADB and Fastboot on your PC.
3- Enable USB debugging on your device.
4- Open the folder where your TWRP Recovery .img file is saved.
5- Now open a command window inside that folder. To do that, “Shift + Right click” on any empty white space inside the folder and then select “Open command window here” from the context menu.
6- Connect your device to the PC. And type the following into the command window we opened in step 4 above to boot your device into bootloader/fastboot mode:
adb reboot bootloader
? If your asks for permission to “Allow USB debugging”, tap OK.
7- Once your device boots into bootloader mode, issue the following command into command window to flash the TWRP recovery .img file:
fastboot flash recovery twrp-2.8.x.x-xxx.img
? Here modify twrp.img with the name of your TWRP recovery .img file, OR change your TWRP recovery filename to twrp.img and use the ]
command above.
8- Once TWRP is successfully flashed on your device, issue the following command to reboot:
fastboot reboot
Done!!! Now you have TWRP on your OnePlus 3.
For More OnePlus 3 Updates Keep Checking Android Custom ROM Fix ™®
That’s all. We hope this guide serves you well. If there’s anything you’d like to be added/changed on this page, PLZ Use the comment box below to contribute more ideas & Suggestions .
Like this post? PLZ Hit the share buttons below to share this article with your friends on Facebook, Google + and Twitter.
Want the latest Updates Sign up for our newsletters!
PLZ Follow Us On Flipboard 4 More Latest Updates.
Best Regards.™
÷ Prerequisites:
•Make sure bootloader of OnePlus 3 is unlocked
•Warranty may be void of your device if you follow the procedures given on this page. You only are responsible for your device. We won’t be liable if any damage occurs to your device and/or its components.
•Make sure your device has more than 50% battery life
•The TWRP version is not tested yet.
*Disclaimer:
Android Custom ROM fix ® provide various Firmware Updates and Rooting process along with Custom ROM,Modes,file are all belong to their owners/developers. The autor of this site or the developers are not responsible, if you damage or brick your device.Do it on your own risk and follow the instruction properly.
* Important:
Backup important files stored on your device before proceeding with the steps below, so that in case something goes wrong you’ll have backup of all your important files.
÷ How to Install TWRP Image on OnePlus 3:
1- First Download a TWRP recovery .img file for your for OnePlus 3.
2- Setup ADB and Fastboot on your PC.
3- Enable USB debugging on your device.
4- Open the folder where your TWRP Recovery .img file is saved.
5- Now open a command window inside that folder. To do that, “Shift + Right click” on any empty white space inside the folder and then select “Open command window here” from the context menu.
6- Connect your device to the PC. And type the following into the command window we opened in step 4 above to boot your device into bootloader/fastboot mode:
adb reboot bootloader
? If your asks for permission to “Allow USB debugging”, tap OK.
7- Once your device boots into bootloader mode, issue the following command into command window to flash the TWRP recovery .img file:
fastboot flash recovery twrp-2.8.x.x-xxx.img
? Here modify twrp.img with the name of your TWRP recovery .img file, OR change your TWRP recovery filename to twrp.img and use the ]
command above.
8- Once TWRP is successfully flashed on your device, issue the following command to reboot:
fastboot reboot
Done!!! Now you have TWRP on your OnePlus 3.
For More OnePlus 3 Updates Keep Checking Android Custom ROM Fix ™®
That’s all. We hope this guide serves you well. If there’s anything you’d like to be added/changed on this page, PLZ Use the comment box below to contribute more ideas & Suggestions .
Like this post? PLZ Hit the share buttons below to share this article with your friends on Facebook, Google + and Twitter.
Want the latest Updates Sign up for our newsletters!
PLZ Follow Us On Flipboard 4 More Latest Updates.
Best Regards.™
Available link for download
Friday, December 16, 2016
How to Install Official TWRP 3 0 2 Custom Recovery Image on OnePlus 3
How to Install Official TWRP 3 0 2 Custom Recovery Image on OnePlus 3
Official TWRP 3.0.2 custom recovery image is now available for the OnePlus 3. The official build is based off of TWRP 3.0.2 which means it is fully compatible with Android Marshmallow and has all the latest documented features like built-in root support and a revamped UI.

You can install it immediately on your phone via this quick and simple guide.
You can install it immediately on your phone via this quick and simple guide.
View my Flipboard Magazine.
÷ Prerequisites:
•This TWRP Recovery tutorial is only for unlocked OnePlus 3. Please don’t try this on any other variants of the phone.
•Make sure you backup all your data in your phone before proceeding.
•This will void your warranty.
•You need to have working Fastboot / ADB on your computer.
•Bootloader should be unlocked.
*Disclaimer:
Android Custom ROM fix ® provide various Firmware Updates and Rooting process along with Custom ROM,Modes,file are all belong to their owners/developers. The autor of this site or the developers are not responsible, if you damage or brick your device.Do it on your own risk and follow the instruction properly.
* Important:
Backup important files stored on your device before proceeding with the steps below, so that in case something goes wrong you’ll have backup of all your important files.

÷ How to Install Official TWRP 3.0.2 Custom Recovery Image on OnePlus 3:
Step 1 – Download Fastboot / ADB package and extract it anywhere in your computer.
Step 2 – Turn OFF your phone.
Step 3 – Connect your OnePlus 3 to your computer using a USB cable.
Step 4 – Download TWRP (oneplus3-twrp-recovery.img) and save it into the same directory as the extracted Fastboot/ADB package files.
Step 5 – Now go into Fastboot/Bootloader Mode on OnePlus 3. How? Press Volume Up + Power keys for a few seconds till you see some text on the screen. This is Bootloader Mode.
Step 6 – Navigate to the same directory now as where you have Fastboot (i.e. Step 1) and on Windows: Open Command Prompt (Shift + Right-click > Open Command Prompt). For Mac OS X and Linux, use Terminal to navigate to this directory.
Step 7 – Type in the following command and press Enter.
fastboot flash recovery twrp-3.0.2-0-oneplus3.img
Step 8 – Enter Recovery Mode (TWRP recovery) now. Turn OFF your phone. Now press and hold the Volume Down + Power keys together until the OnePlus logo shows up. Once it does, release the Power button while still holding the Volume Down button until a screen similar to the following screenshot shows up.

That’s it! You should now be in the TWRP Recovery from where you can choose whatever function you want to perform.
For More One Plus 3 latest Updates Keep Checking Android Custom ROM Fix ™®
That’s all. We hope this guide serves you well. If there’s anything you’d like to be added/changed on this page, PLZ Use the comment box below to contribute more ideas & Suggestions .
Like this post? PLZ Hit the share buttons below to share this article with your friends on Facebook, Google + and Twitter.
Want the latest Updates Sign up for our newsletters!
PLZ Follow Us On Flipboard 4 More Latest Updates.
Best Regards.™
÷ Prerequisites:
•This TWRP Recovery tutorial is only for unlocked OnePlus 3. Please don’t try this on any other variants of the phone.
•Make sure you backup all your data in your phone before proceeding.
•This will void your warranty.
•You need to have working Fastboot / ADB on your computer.
•Bootloader should be unlocked.
*Disclaimer:
Android Custom ROM fix ® provide various Firmware Updates and Rooting process along with Custom ROM,Modes,file are all belong to their owners/developers. The autor of this site or the developers are not responsible, if you damage or brick your device.Do it on your own risk and follow the instruction properly.
* Important:
Backup important files stored on your device before proceeding with the steps below, so that in case something goes wrong you’ll have backup of all your important files.
÷ How to Install Official TWRP 3.0.2 Custom Recovery Image on OnePlus 3:
Step 1 – Download Fastboot / ADB package and extract it anywhere in your computer.
Step 2 – Turn OFF your phone.
Step 3 – Connect your OnePlus 3 to your computer using a USB cable.
Step 4 – Download TWRP (oneplus3-twrp-recovery.img) and save it into the same directory as the extracted Fastboot/ADB package files.
Step 5 – Now go into Fastboot/Bootloader Mode on OnePlus 3. How? Press Volume Up + Power keys for a few seconds till you see some text on the screen. This is Bootloader Mode.
Step 6 – Navigate to the same directory now as where you have Fastboot (i.e. Step 1) and on Windows: Open Command Prompt (Shift + Right-click > Open Command Prompt). For Mac OS X and Linux, use Terminal to navigate to this directory.
Step 7 – Type in the following command and press Enter.
fastboot flash recovery twrp-3.0.2-0-oneplus3.img
Step 8 – Enter Recovery Mode (TWRP recovery) now. Turn OFF your phone. Now press and hold the Volume Down + Power keys together until the OnePlus logo shows up. Once it does, release the Power button while still holding the Volume Down button until a screen similar to the following screenshot shows up.
That’s it! You should now be in the TWRP Recovery from where you can choose whatever function you want to perform.
For More One Plus 3 latest Updates Keep Checking Android Custom ROM Fix ™®
That’s all. We hope this guide serves you well. If there’s anything you’d like to be added/changed on this page, PLZ Use the comment box below to contribute more ideas & Suggestions .
Like this post? PLZ Hit the share buttons below to share this article with your friends on Facebook, Google + and Twitter.
Want the latest Updates Sign up for our newsletters!
PLZ Follow Us On Flipboard 4 More Latest Updates.
Best Regards.™
Available link for download
Friday, November 11, 2016
How to Boost OnePlus 3 Performance Fix Memory Issues
How to Boost OnePlus 3 Performance Fix Memory Issues
The OnePlus 3 is the best phone buy in the world right now, and deserves to be at the top of your list if you want a great smartphone, but cant quite afford those flagship prices. At £309, this phone deserves to cost Samsung and Apple at least a few million sales.
OnePlus 3 memory management is such that it’s optimized for better battery life, and thereby not making the full use of its powerful 6GB RAM module. That strategy is good for the average user, but for those who want to get the most of that huge memory available on the OnePlus 3, the folks over at xda have a fix for you.
To fix/adjust OnePlus 3 memory management or say boost its performance, you just need to change value of a single line — ro.sys.fw.bg_apps_limit in device’ build.prop file from 20 to 42.
You Can Find out How to Apply it Right Now via This Easy Tutorial:
View my Flipboard Magazine.
*Disclaimer:
Android Custom ROM fix ® provide various Firmware Updates and Rooting process along with Custom ROM,Modes,file are all belong to their owners/developers. The autor of this site or the developers are not responsible, if you damage or brick your device.Do it on your own risk and follow the instruction properly.
* Important:
Backup important files stored on your device before proceeding with the steps below, so that in case something goes wrong you’ll have backup of all your important files.
÷ How to Boost OnePlus 3 Performance & Fix Memory Issues:
1- Root your OnePlus 3.
? Root access is required to be able to modify build.prop file.
2- Download/install BuildProp Editor app from the Play Store to your OnePlus 3.
3- Open BuildProp Editor app » tap the search icon on top bar » and type in ro.sys.fw » select ro.sys.fw.bg_apps_limit » change the value to 42 and tap on save.
? When it asks for root permission, GRANT it.
4- Reboot your OnePlus 3.
That’s it. You should now see a performance boost on your OnePlus 3 and be able to run more apps in the background without any issues.

For More OnePlus 3 Updates Keep Checking Android Custom ROM Fix ™®
That’s all. We hope this guide serves you well. If there’s anything you’d like to be added/changed on this page, PLZ Use the comment box below to contribute more ideas & Suggestions .
Like this post? PLZ Hit the share buttons below to share this article with your friends on Facebook, Google + and Twitter.
Want the latest Updates Sign up for our newsletters!
PLZ Follow Us On Flipboard 4 More Latest Updates.
Best Regards.™
*Disclaimer:
Android Custom ROM fix ® provide various Firmware Updates and Rooting process along with Custom ROM,Modes,file are all belong to their owners/developers. The autor of this site or the developers are not responsible, if you damage or brick your device.Do it on your own risk and follow the instruction properly.
* Important:
Backup important files stored on your device before proceeding with the steps below, so that in case something goes wrong you’ll have backup of all your important files.
÷ How to Boost OnePlus 3 Performance & Fix Memory Issues:
1- Root your OnePlus 3.
? Root access is required to be able to modify build.prop file.
2- Download/install BuildProp Editor app from the Play Store to your OnePlus 3.
3- Open BuildProp Editor app » tap the search icon on top bar » and type in ro.sys.fw » select ro.sys.fw.bg_apps_limit » change the value to 42 and tap on save.
? When it asks for root permission, GRANT it.
4- Reboot your OnePlus 3.
That’s it. You should now see a performance boost on your OnePlus 3 and be able to run more apps in the background without any issues.
For More OnePlus 3 Updates Keep Checking Android Custom ROM Fix ™®
That’s all. We hope this guide serves you well. If there’s anything you’d like to be added/changed on this page, PLZ Use the comment box below to contribute more ideas & Suggestions .
Like this post? PLZ Hit the share buttons below to share this article with your friends on Facebook, Google + and Twitter.
Want the latest Updates Sign up for our newsletters!
PLZ Follow Us On Flipboard 4 More Latest Updates.
Best Regards.™
Available link for download
Tuesday, November 8, 2016
How to Root Easily OnePlus 3
How to Root Easily OnePlus 3
Thanks to XDA Member "Naman Bhallas" Now OnePlus 3 users they can easily flash the latest SuperSu root file to get root access on OnePlus 3.Dont worry we are going to share step by step guide on How to Root OnePlus 3.

View my Flipboard Magazine.
÷ Prerequisites:
•Make sure TWRP Installed on your OnePlus 3.
•Warranty may be void of your device if you follow the procedures given on this page. You only are responsible for your device. We won’t be liable if any damage occurs to your device and/or its components.
•Make sure your device has more than 50% battery life
*Disclaimer:
Android Custom ROM fix ® provide various Firmware Updates and Rooting process along with Custom ROM,Modes,file are all belong to their owners/developers. The autor of this site or the developers are not responsible, if you damage or brick your device.Do it on your own risk and follow the instruction properly.
* Important:
Backup important files stored on your device before proceeding with the steps below, so that in case something goes wrong you’ll have backup of all your important files.
÷ How to Root Easily OnePlus 3:
1- Download SuperSU v2.74 to your device internal memory.
2- Now Boot your device into TWRP recovery.
3- Then Just Select Install and flash the SuperSUfile that you transferred in the Previous step
4- Once flashing is done. Reboot your device.
Done!!!
Your OnePlus 3 is now rooted.
For confirmation, install Root Checker from Google Play Store and confirm the root privileges in your smartphone.

For More OnePlus 3 Updates Keep Checking Android Custom ROM Fix ™®
That’s all. We hope this guide serves you well. If there’s anything you’d like to be added/changed on this page, PLZ Use the comment box below to contribute more ideas & Suggestions .
Like this post? PLZ Hit the share buttons below to share this article with your friends on Facebook, Google + and Twitter.
Want the latest Updates Sign up for our newsletters!
PLZ Follow Us On Flipboard 4 More Latest Updates.
Best Regards.™
÷ Prerequisites:
•Make sure TWRP Installed on your OnePlus 3.
•Warranty may be void of your device if you follow the procedures given on this page. You only are responsible for your device. We won’t be liable if any damage occurs to your device and/or its components.
•Make sure your device has more than 50% battery life
*Disclaimer:
Android Custom ROM fix ® provide various Firmware Updates and Rooting process along with Custom ROM,Modes,file are all belong to their owners/developers. The autor of this site or the developers are not responsible, if you damage or brick your device.Do it on your own risk and follow the instruction properly.
* Important:
Backup important files stored on your device before proceeding with the steps below, so that in case something goes wrong you’ll have backup of all your important files.
÷ How to Root Easily OnePlus 3:
1- Download SuperSU v2.74 to your device internal memory.
2- Now Boot your device into TWRP recovery.
3- Then Just Select Install and flash the SuperSUfile that you transferred in the Previous step
4- Once flashing is done. Reboot your device.
Done!!!
Your OnePlus 3 is now rooted.
For confirmation, install Root Checker from Google Play Store and confirm the root privileges in your smartphone.
For More OnePlus 3 Updates Keep Checking Android Custom ROM Fix ™®
That’s all. We hope this guide serves you well. If there’s anything you’d like to be added/changed on this page, PLZ Use the comment box below to contribute more ideas & Suggestions .
Like this post? PLZ Hit the share buttons below to share this article with your friends on Facebook, Google + and Twitter.
Want the latest Updates Sign up for our newsletters!
PLZ Follow Us On Flipboard 4 More Latest Updates.
Best Regards.™
Available link for download
Saturday, October 22, 2016
How to Update Manually OnePlus 3 to OxygenOS 3 2 1
How to Update Manually OnePlus 3 to OxygenOS 3 2 1
OxygenOS 3.2.1 update for OnePlus3 just released by OnePlus team , which is basically the 3.2.0 update with bugs fixed. Earlier, the team had halted the 3.2.0 update because of issues reported by OnePlus 3 users.

The changelog for the OxygenOS 3.2.1 is nearly the same as that of 3.2.0, but has two new items of its own too. Apparently, the 3.2.1 update fixes issues with notification and SIM recognition, the first 2 items in the changelog list below:
•Fixed some notification issues
•Addressed SIM recognition issue
•Enabled sRGB mode in developer options
•Improved RAM management
•Improved GPS performance
•Enhanced audio playback quality
•Updated custom icon packs
•Improved camera quality/functionality
•Fixed some issues in Gallery
•Implemented latest Google security patches
•Fixed bugs in Clock/Music apps

Don’t worry we are going to share step by step guide to safely Update your OnePlus 3 to OxygenOS 3.2.1
The changelog for the OxygenOS 3.2.1 is nearly the same as that of 3.2.0, but has two new items of its own too. Apparently, the 3.2.1 update fixes issues with notification and SIM recognition, the first 2 items in the changelog list below:
•Fixed some notification issues
•Addressed SIM recognition issue
•Enabled sRGB mode in developer options
•Improved RAM management
•Improved GPS performance
•Enhanced audio playback quality
•Updated custom icon packs
•Improved camera quality/functionality
•Fixed some issues in Gallery
•Implemented latest Google security patches
•Fixed bugs in Clock/Music apps
Don’t worry we are going to share step by step guide to safely Update your OnePlus 3 to OxygenOS 3.2.1
View my Flipboard Magazine.
÷ Prerequisites:
•The above Requires you to be on OxygenOS 3.2.0.
*Disclaimer:
Android Custom ROM fix ® provide various Firmware Updates and Rooting process along with Custom ROM,Modes,file are all belong to their owners/developers. The autor of this site or the developers are not responsible, if you damage or brick your device.Do it on your own risk and follow the instruction properly.
* Important:
Backup important files stored on your device before proceeding with the steps below, so that in case something goes wrong you’ll have backup of all your important files.
÷ How to Update OnePlus 3 to OxygenOS 3.2.1.
Step -1 Download OxygenOS 3.2.1 for your OnePlus 3 .
Step-2 Transfer the OTA to internal storage.
Step -3 Then reboot into OnePlus 3’s stock recovery and choose Install menu.
Step-4 Select the update file from storage.
Step- 5 Once done, reboot the device. That’s it.
That’s it! Your OnePlus 3 should have OxygenOS 3.2.1 update on your phone! Go to Settings > About phone to verify.

For More OnePlus 3 Updates Keep Checking Android Custom ROM Fix ™®
That’s all. We hope this guide serves you well. If there’s anything you’d like to be added/changed on this page, PLZ Use the comment box below to contribute more ideas & Suggestions .
Like this post? PLZ Hit the share buttons below to share this article with your friends on Facebook, Google + and Twitter.
Want the latest Updates Sign up for our newsletters!
PLZ Follow Us On Flipboard 4 More Latest Updates.
Best Regards.™
÷ Prerequisites:
•The above Requires you to be on OxygenOS 3.2.0.
*Disclaimer:
Android Custom ROM fix ® provide various Firmware Updates and Rooting process along with Custom ROM,Modes,file are all belong to their owners/developers. The autor of this site or the developers are not responsible, if you damage or brick your device.Do it on your own risk and follow the instruction properly.
* Important:
Backup important files stored on your device before proceeding with the steps below, so that in case something goes wrong you’ll have backup of all your important files.
÷ How to Update OnePlus 3 to OxygenOS 3.2.1.
Step -1 Download OxygenOS 3.2.1 for your OnePlus 3 .
Step-2 Transfer the OTA to internal storage.
Step -3 Then reboot into OnePlus 3’s stock recovery and choose Install menu.
Step-4 Select the update file from storage.
Step- 5 Once done, reboot the device. That’s it.
That’s it! Your OnePlus 3 should have OxygenOS 3.2.1 update on your phone! Go to Settings > About phone to verify.
For More OnePlus 3 Updates Keep Checking Android Custom ROM Fix ™®
That’s all. We hope this guide serves you well. If there’s anything you’d like to be added/changed on this page, PLZ Use the comment box below to contribute more ideas & Suggestions .
Like this post? PLZ Hit the share buttons below to share this article with your friends on Facebook, Google + and Twitter.
Want the latest Updates Sign up for our newsletters!
PLZ Follow Us On Flipboard 4 More Latest Updates.
Best Regards.™
Available link for download
Monday, October 10, 2016
How to Update OnePlus 3 to Android 6 0 1 Unofficial CyanogenMod 13 CM13
How to Update OnePlus 3 to Android 6 0 1 Unofficial CyanogenMod 13 CM13
According to XDA member Grarak , unofficial build of CM 13 is now available for OnePlus 3 (all variants).

This ROM is not developed by team CM but based on their CM 13 source code and latest Android 6.0.1 Marshmallow.It is a very clean ROM and features rich Custom ROM.You will also get the DOZE Mode resulting in good battery life.
÷ Known issues:
Camera: HDR works, but you it closes after you took a picture.
F2FS: Not supported yet.
Battery life: Is not really as good as stock.
MSM8996: It‘s a new platform. Don‘t expect that CM 13 will run as good as stock.
* Don‘t flash gapps after you booted up CM 13! This will kill your device. If you want gapps, then flash it right after you wiped your phone and flashed CM 13.
÷ Prerequisites:
•This tutorial is only for installing Unofficial build of CM 13 is now available on OnePlus 3. Please do not try on any other one plus variants.
•Your phone should be rooted and haveClockworkMod recovery installed from before.
•This tutorial will wipe out all your data.Proceed at your own risk.Perform a Dalvik Cache wipe before proceeding from the recovery mode.
•Make sure you backup all your data in your phone before proceeding.
View my Flipboard Magazine.
*Disclaimer:
Android Custom ROM fix ® provide various Firmware Updates and Rooting process along with Custom ROM,Modes,file are all belong to their owners/developers. The autor of this site or the developers are not responsible, if you damage or brick your device.Do it on your own risk and follow the instruction properly.
* Important:
Backup important files stored on your device before proceeding with the steps below, so that in case something goes wrong you’ll have backup of all your important files.
ROM Download & Installation Instructions via XDA

For More OnePlus 3 updates Keep Checking Android Custom ROM Fix™®
Like this post? PLZ Hit the share buttons below to share this article with your friends on Facebook, Google + and Twitter.
PLZ Follow Us On Flipboard 4 More Latest Updates.
PLZ Use the comment box below to contribute more ideas & Suggestions .
Best Regards.
*Disclaimer:
Android Custom ROM fix ® provide various Firmware Updates and Rooting process along with Custom ROM,Modes,file are all belong to their owners/developers. The autor of this site or the developers are not responsible, if you damage or brick your device.Do it on your own risk and follow the instruction properly.
* Important:
Backup important files stored on your device before proceeding with the steps below, so that in case something goes wrong you’ll have backup of all your important files.
ROM Download & Installation Instructions via XDA
For More OnePlus 3 updates Keep Checking Android Custom ROM Fix™®
Like this post? PLZ Hit the share buttons below to share this article with your friends on Facebook, Google + and Twitter.
PLZ Follow Us On Flipboard 4 More Latest Updates.
PLZ Use the comment box below to contribute more ideas & Suggestions .
Best Regards.
Available link for download
Thursday, September 29, 2016
Download OnePlus 3 HD Wallpapers Now
Download OnePlus 3 HD Wallpapers Now
OnePlus 3 was released on June 14th, 2016.The phone sports all the high-end features and specification but has a very budget friendly price tag which definitely attracts buyers.Now OnePlus 3 has a full metal body and one of the most important updates is RAM.OnePlus 3 now has 6GB of RAM which is unbelievable.

Get all the OnePlus 3 wallpapers in High-Definition from here: Download OnePlus 3 HD Wallpapers

View my Flipboard Magazine.
For More Keep OnePlus 3 Updates Checking Android Custom ROM Fix ™©
That’s all. We hope this guide serves you well. If there’s anything you’d like to be added/changed on this page, PLZ Use the comment box below to contribute more ideas & Suggestions .
Like this post? PLZ Hit the share buttons below to share this article with your friends on Facebook, Google + and Twitter.
Want the latest Updates Sign up for our newsletters!
PLZ Follow Us On Flipboard 4 More Latest Updates.
Best Regards.™
Available link for download
Friday, September 16, 2016
How to Install Android 6 0 1 Marshmallow CM13 Teamsek V9 3 Unofficial ROM on OnePlus 3
How to Install Android 6 0 1 Marshmallow CM13 Teamsek V9 3 Unofficial ROM on OnePlus 3
According to XDA Member bauita, Android 6.0.1 Marshmallow CyanogenMod CM13 Teamsek V9.3 Unofficial ROM is now available for OnePlus 3.

These builds are based on CM-13 nightlies with features cherry-picked from many sources including crDroid, SlimKAT, Omni, LiquidSmooth, Carbon, Nameless, Beanstalk etc....
Follow our guide below to download the Unofficial CM13.0 Nightly and install it yourself.
View my Flipboard Magazine.
÷ Prerequisites:
•This tutorial is only for installing Android 6.0.1 Marshmallow CM13 Teamsek V9.3 Unofficial ROM on OnePlus 3. Please do not try on any other One Plus variants.
•Your phone should be rooted and haveClockworkMod recovery installed from before.
•This tutorial will wipe out all your data.Proceed at your own risk.Perform a Dalvik Cache wipe before proceeding from the recovery mode.
•Make sure you backup all your data in your phone before proceeding.
*Disclaimer:
Android Custom ROM fix ® provide various Firmware Updates and Rooting process along with Custom ROM,Modes,file are all belong to their owners/developers. The autor of this site or the developers are not responsible, if you damage or brick your device.Do it on your own risk and follow the instruction properly.
* Important:
Backup important files stored on your device before proceeding with the steps below, so that in case something goes wrong you’ll have backup of all your important files.

÷ How to Install Android 6.0.1 Marshmallow CM13 Teamsek V9.3 Unofficial ROM on OnePlus 3
Step 1 – Download CM13.0 Android 6.0.1 Teamsek Unofficial ROM and Google Apps for your OnePlus 3 to your computer.
Step 2 – Connect and mount your OnePlus 3 USB memory on your computer using the USB cable.
Step 3 – Now copy/paste the downloaded Android 6.0.1 ROM zip file and Google Appszip files to your SD card. Make sure the files are in the SD card root (not in any folder).
Step 4 – Then turn OFF your phone and disconnect from the USB cable.
Step 5 – Now to get in the Recovery Mode. Switch ON the phone while pressing and holding Volume Up + Home + Power buttons together
Step 6 – Once you are in ClockworkModRecovery, select perform a full data wipe by selecting “wipe data/factory reset”. Use the Power button to select everything while in the Recovery Mode.
Step 7 – Then, perform a cache wipe by selecting “wipe cache partition” .
Step 8 – Now this is optional, but it is recommended to perform a wipe of your dalvik cache as well. You will not get into boot loops or any other errors. From CWM recovery, go to ‘advanced’ and then select “wipe dalvik cache”.
Step 9 – Then go back to the main recovery screen and select “install zip from SD card”.
Step 10 – Now select “choose zip from sdcard”. Using your volume keys, navigate to the Android 6.0.1 ROM zip file that you copied to your SD card and select it using the Power button. Confirm the installation on the next screen and the installation procedure should start now.
Google Apps: Repeat the above step for the Gapps zip file as well and install it on your phone.
Step 11 – After the installation completes, go to “+++++Go Back+++++” and reboot the phone by selecting “reboot system now” from the recovery menu.
Your OnePlus 3 will boot now and it might take about 5 minutes to boot on your first time. So, please wait.

That’s it Your OnePlus 3 should now have Android 6.0.1 Marshmallow CM13 Teamsek V9.3 Unofficial ROM installed on your phone! Go to Settings > About phone to verify.
Via: XDA
For More One Plus3 Brand New Firmware & Custom ROM keep checking AndroidCustomROM Fix ™®
Like this post? PLZ Hit the share buttons below to share this article with your friends on Facebook, Google + and Twitter.
PLZ Follow Us On Flipboard 4 More latest custom ROM fix.
PLZ Use the comment box below to contribute more ideas & Suggestions .
Best Regards.
÷ Prerequisites:
•This tutorial is only for installing Android 6.0.1 Marshmallow CM13 Teamsek V9.3 Unofficial ROM on OnePlus 3. Please do not try on any other One Plus variants.
•Your phone should be rooted and haveClockworkMod recovery installed from before.
•This tutorial will wipe out all your data.Proceed at your own risk.Perform a Dalvik Cache wipe before proceeding from the recovery mode.
•Make sure you backup all your data in your phone before proceeding.
*Disclaimer:
Android Custom ROM fix ® provide various Firmware Updates and Rooting process along with Custom ROM,Modes,file are all belong to their owners/developers. The autor of this site or the developers are not responsible, if you damage or brick your device.Do it on your own risk and follow the instruction properly.
* Important:
Backup important files stored on your device before proceeding with the steps below, so that in case something goes wrong you’ll have backup of all your important files.
÷ How to Install Android 6.0.1 Marshmallow CM13 Teamsek V9.3 Unofficial ROM on OnePlus 3
Step 1 – Download CM13.0 Android 6.0.1 Teamsek Unofficial ROM and Google Apps for your OnePlus 3 to your computer.
Step 2 – Connect and mount your OnePlus 3 USB memory on your computer using the USB cable.
Step 3 – Now copy/paste the downloaded Android 6.0.1 ROM zip file and Google Appszip files to your SD card. Make sure the files are in the SD card root (not in any folder).
Step 4 – Then turn OFF your phone and disconnect from the USB cable.
Step 5 – Now to get in the Recovery Mode. Switch ON the phone while pressing and holding Volume Up + Home + Power buttons together
Step 6 – Once you are in ClockworkModRecovery, select perform a full data wipe by selecting “wipe data/factory reset”. Use the Power button to select everything while in the Recovery Mode.
Step 7 – Then, perform a cache wipe by selecting “wipe cache partition” .
Step 8 – Now this is optional, but it is recommended to perform a wipe of your dalvik cache as well. You will not get into boot loops or any other errors. From CWM recovery, go to ‘advanced’ and then select “wipe dalvik cache”.
Step 9 – Then go back to the main recovery screen and select “install zip from SD card”.
Step 10 – Now select “choose zip from sdcard”. Using your volume keys, navigate to the Android 6.0.1 ROM zip file that you copied to your SD card and select it using the Power button. Confirm the installation on the next screen and the installation procedure should start now.
Google Apps: Repeat the above step for the Gapps zip file as well and install it on your phone.
Step 11 – After the installation completes, go to “+++++Go Back+++++” and reboot the phone by selecting “reboot system now” from the recovery menu.
Your OnePlus 3 will boot now and it might take about 5 minutes to boot on your first time. So, please wait.
That’s it Your OnePlus 3 should now have Android 6.0.1 Marshmallow CM13 Teamsek V9.3 Unofficial ROM installed on your phone! Go to Settings > About phone to verify.
Via: XDA
For More One Plus3 Brand New Firmware & Custom ROM keep checking AndroidCustomROM Fix ™®
Like this post? PLZ Hit the share buttons below to share this article with your friends on Facebook, Google + and Twitter.
PLZ Follow Us On Flipboard 4 More latest custom ROM fix.
PLZ Use the comment box below to contribute more ideas & Suggestions .
Best Regards.
Available link for download
Saturday, September 3, 2016
How to Update Rooted OnePlus 3 to Oxygen OS 3 1 3 Firmware Camera HDR Performance Tuning
How to Update Rooted OnePlus 3 to Oxygen OS 3 1 3 Firmware Camera HDR Performance Tuning
OnePlus has started rolling out Official OnePlus 3 Oxygen OS 3.1.3 Firmware Update.This OTA Update comes with loads of bug fixes and stability improvement.The Update is available via OTA (Over-the-air).You can manually check for the update.We highly recommend upgrading your device to this firmware.
÷ NEW FEATURES IN OXYGEN OS 3.1.3:
•Camera HDR performance tuning
•Bluetooth and NFC connectivity improvements
•Bug fixes in general telephony
•Bug fixes in Google and OnePlus apps
More Info via OnePlus Forum .
View my Flipboard Magazine.
÷ Prerequisites:
•This tutorial is only for installing Oxygen OS 3.1.3 Firmware on Rooted OnePlus 3. Please do not try on any other One Plus variants.
•Your phone should be rooted and haveClockworkMod recovery installed from before.
•This tutorial will wipe out all your data.Proceed at your own risk.Perform a Dalvik Cache wipe before proceeding from the recovery mode.
•Make sure you backup all your data in your phone before proceeding.
*Disclaimer:
Android Custom ROM fix ® provide various Firmware Updates and Rooting process along with Custom ROM,Modes,file are all belong to their owners/developers. The autor of this site or the developers are not responsible, if you damage or brick your device.Do it on your own risk and follow the instruction properly.
* Important:
Backup important files stored on your device before proceeding with the steps below, so that in case something goes wrong you’ll have backup of all your important files.

÷ How to: Update Rooted OnePlus 3 to Oxygen OS 3.1.3 Firmware [ Camera HDR Performance Tuning].
Step 1 – Download Oxygen OS 3.1.3 Firmware for your OnePlus 3 to your computer.
Step 2 – Connect and mount your OnePlus 3 USB memory on your computer using the USB cable.
Step 3 – Now copy/paste the downloaded Android 6.0.1 ROM zip file and Google Appszip files to your SD card. Make sure the files are in the SD card root (not in any folder).
Step 4 – Then turn OFF your phone and disconnect from the USB cable.
Step 5 – Now to get in the Recovery Mode. Switch ON the phone while pressing and holding Volume Up + Home + Power buttons together
Step 6 – Once you are in ClockworkModRecovery, select perform a full data wipe by selecting “wipe data/factory reset”. Use the Power button to select everything while in the Recovery Mode.
Step 7 – Then, perform a cache wipe by selecting “wipe cache partition” .

Step 8 – Now this is optional, but it is recommended to perform a wipe of your dalvik cache as well. You will not get into boot loops or any other errors. From CWM recovery, go to ‘advanced’ and then select “wipe dalvik cache”.
Step 9 – Then go back to the main recovery screen and select “install zip from SD card”.
Step 10 – Now select “choose zip from sdcard”. Using your volume keys, navigate to the Android 6.0.1 ROM zip file that you copied to your SD card and select it using the Power button. Confirm the installation on the next screen and the installation procedure should start now.
Step 11 – After the installation completes, go to “+++++Go Back+++++” and reboot the phone by selecting “reboot system now” from the recovery menu.
Your OnePlus 3 will boot now and it might take about 5 minutes to boot on your first time. So, please wait.
That’s it Your OnePlus 3 should now have Oxygen OS 3.1.3 Firmware installed on your phone! Go to Settings > About phone to verify.
For More One Plus3 Brand New Firmware & Custom ROM keep checking AndroidCustomROM Fix ™®
Like this post? PLZ Hit the share buttons below to share this article with your friends on Facebook, Google + and Twitter.
PLZ Follow Us On Flipboard 4 More latest custom ROM fix.
PLZ Use the comment box below to contribute more ideas & Suggestions .
Best Regards.
÷ Prerequisites:
•This tutorial is only for installing Oxygen OS 3.1.3 Firmware on Rooted OnePlus 3. Please do not try on any other One Plus variants.
•Your phone should be rooted and haveClockworkMod recovery installed from before.
•This tutorial will wipe out all your data.Proceed at your own risk.Perform a Dalvik Cache wipe before proceeding from the recovery mode.
•Make sure you backup all your data in your phone before proceeding.
*Disclaimer:
Android Custom ROM fix ® provide various Firmware Updates and Rooting process along with Custom ROM,Modes,file are all belong to their owners/developers. The autor of this site or the developers are not responsible, if you damage or brick your device.Do it on your own risk and follow the instruction properly.
* Important:
Backup important files stored on your device before proceeding with the steps below, so that in case something goes wrong you’ll have backup of all your important files.
÷ How to: Update Rooted OnePlus 3 to Oxygen OS 3.1.3 Firmware [ Camera HDR Performance Tuning].
Step 1 – Download Oxygen OS 3.1.3 Firmware for your OnePlus 3 to your computer.
Step 2 – Connect and mount your OnePlus 3 USB memory on your computer using the USB cable.
Step 3 – Now copy/paste the downloaded Android 6.0.1 ROM zip file and Google Appszip files to your SD card. Make sure the files are in the SD card root (not in any folder).
Step 4 – Then turn OFF your phone and disconnect from the USB cable.
Step 5 – Now to get in the Recovery Mode. Switch ON the phone while pressing and holding Volume Up + Home + Power buttons together
Step 6 – Once you are in ClockworkModRecovery, select perform a full data wipe by selecting “wipe data/factory reset”. Use the Power button to select everything while in the Recovery Mode.
Step 7 – Then, perform a cache wipe by selecting “wipe cache partition” .
Step 8 – Now this is optional, but it is recommended to perform a wipe of your dalvik cache as well. You will not get into boot loops or any other errors. From CWM recovery, go to ‘advanced’ and then select “wipe dalvik cache”.
Step 9 – Then go back to the main recovery screen and select “install zip from SD card”.
Step 10 – Now select “choose zip from sdcard”. Using your volume keys, navigate to the Android 6.0.1 ROM zip file that you copied to your SD card and select it using the Power button. Confirm the installation on the next screen and the installation procedure should start now.
Step 11 – After the installation completes, go to “+++++Go Back+++++” and reboot the phone by selecting “reboot system now” from the recovery menu.
Your OnePlus 3 will boot now and it might take about 5 minutes to boot on your first time. So, please wait.
That’s it Your OnePlus 3 should now have Oxygen OS 3.1.3 Firmware installed on your phone! Go to Settings > About phone to verify.
For More One Plus3 Brand New Firmware & Custom ROM keep checking AndroidCustomROM Fix ™®
Like this post? PLZ Hit the share buttons below to share this article with your friends on Facebook, Google + and Twitter.
PLZ Follow Us On Flipboard 4 More latest custom ROM fix.
PLZ Use the comment box below to contribute more ideas & Suggestions .
Best Regards.
Available link for download
Tuesday, August 16, 2016
How to Update OnePlus One to Android 6 0 1 Marshmallow NucleaRom ROM
How to Update OnePlus One to Android 6 0 1 Marshmallow NucleaRom ROM
OnePlus One NucleaRom custom ROM comes with tons of new features and is based on Android 6.0.1 Marshmallow. A quick list of the main features in NucleaRom is given below and we are sure you’d love to use this on your OnePlus One:

Based on CyanogenMod 13
Radioactive Kernel
Android 6.0.1_r46
Compiled with Uber 4.9 toolchain
Nuclear Settings
Customizable status bar (clock position, date, network indicators, battery style…)
Gestures Anywhere
Exclusive Nuclear Boot
Switch from 1 column Setting to 2 column
Switch To Hide SuperSu from Status Bar
Lockscreen quick unlock
Network traffic indicator
Show name of apps when optimizing at boot
All cm goodies...
View my Flipboard Magazine.
÷ Prerequisites:
•This tutorial is only for installing Android 6.0.1 NucleaRom ROM on OnePlus One. Please do not try on any other One variants.
•Your phone should have a custom recovery installed in order to install this NucleaRom ROM on your phone.
•We will be using TWRP Recovery for this tutorial.
•This tutorial will wipe out all your data. Make sure you backup all your data in your phone before proceeding.
•Perform a Dalvik Cache wipe before proceeding from the Recovery Mode.
*Disclaimer:
Android Custom ROM fix ® provide various Firmware Updates and Rooting process along with Custom ROM,Modes,file are all belong to their owners/developers. The autor of this site or the developers are not responsible, if you damage or brick your device.Do it on your own risk and follow the instruction properly.
* Important:
Backup important files stored on your device before proceeding with the steps below, so that in case something goes wrong you’ll have backup of all your important files.

÷ How to Update OnePlus One to Android 6.0.1 Marshmallow NucleaRom ROM:
Step 1 – Download Android 6.0.1 NucleaRom ROM and Google Apps for One to your computer.
Step 2 – Connect and mount your OnePlus One USB memory to your computer using the USB cable.
Step 3 – Now copy/paste the downloaded Android 6.0.1 ROM zip and Google Apps zip files to your phone memory / SD card. Make sure the files are in the phone memory / SD card root (not in any folder).
Step 4 – Then turn OFF your phone and disconnect from the USB cable.
Step 5 – Now to get in the Recovery Mode. Switch ON the phone while pressing and holding Volume Down + Power buttons together.
Step 6 – Once you are in TWRP Recovery, perform a full data wipe by tapping on the ‘Wipe’ button. Then swipe on the “Swipe to Factory Reset” option at the bottom.
Step 7 – Now go back to the main menu and then tap on the ‘Install’ button. From the list, choose the ZIP file that you copied to your phone memory in Step 3.
Step 8 – Confirm installation on the next screen by swiping on the “Swipe to Confirm Flash” option. The installation procedure should start now.
Step 9 – Once the installation is completed.
Google Apps: Repeat the above steps from Step 7 to Step 9 for the Google Apps zip file as well and install it on your phone.
Step 10 – Tap on the “Wipe cache/dalvik” button if you get into any boot loops or other issues.
Step 11 – You can now reboot your phone by selecting the “Reboot System” button.
Your One will boot now and it might take about 5 minutes to boot on your first time after flashing a new ROM. So, please wait.

That’s it! Your OnePlus One should now have Android 6.0.1 NucleaRom Marshmallow custom ROM installed on your phone! Go to Settings > About phone to verify.
For More OnePlus One Updates Keep Checking Android Custom ROM Fix ™®
That’s all. We hope this guide serves you well. If there’s anything you’d like to be added/changed on this page, PLZ Use the comment box below to contribute more ideas & Suggestions .
Like this post? PLZ Hit the share buttons below to share this article with your friends on Facebook, Google + and Twitter.
Want the latest Updates Sign up for our newsletters!
PLZ Follow Us On Flipboard 4 More Latest Updates.
Best Regards.™
÷ Prerequisites:
•This tutorial is only for installing Android 6.0.1 NucleaRom ROM on OnePlus One. Please do not try on any other One variants.
•Your phone should have a custom recovery installed in order to install this NucleaRom ROM on your phone.
•We will be using TWRP Recovery for this tutorial.
•This tutorial will wipe out all your data. Make sure you backup all your data in your phone before proceeding.
•Perform a Dalvik Cache wipe before proceeding from the Recovery Mode.
*Disclaimer:
Android Custom ROM fix ® provide various Firmware Updates and Rooting process along with Custom ROM,Modes,file are all belong to their owners/developers. The autor of this site or the developers are not responsible, if you damage or brick your device.Do it on your own risk and follow the instruction properly.
* Important:
Backup important files stored on your device before proceeding with the steps below, so that in case something goes wrong you’ll have backup of all your important files.
÷ How to Update OnePlus One to Android 6.0.1 Marshmallow NucleaRom ROM:
Step 1 – Download Android 6.0.1 NucleaRom ROM and Google Apps for One to your computer.
Step 2 – Connect and mount your OnePlus One USB memory to your computer using the USB cable.
Step 3 – Now copy/paste the downloaded Android 6.0.1 ROM zip and Google Apps zip files to your phone memory / SD card. Make sure the files are in the phone memory / SD card root (not in any folder).
Step 4 – Then turn OFF your phone and disconnect from the USB cable.
Step 5 – Now to get in the Recovery Mode. Switch ON the phone while pressing and holding Volume Down + Power buttons together.
Step 6 – Once you are in TWRP Recovery, perform a full data wipe by tapping on the ‘Wipe’ button. Then swipe on the “Swipe to Factory Reset” option at the bottom.
Step 7 – Now go back to the main menu and then tap on the ‘Install’ button. From the list, choose the ZIP file that you copied to your phone memory in Step 3.
Step 8 – Confirm installation on the next screen by swiping on the “Swipe to Confirm Flash” option. The installation procedure should start now.
Step 9 – Once the installation is completed.
Google Apps: Repeat the above steps from Step 7 to Step 9 for the Google Apps zip file as well and install it on your phone.
Step 10 – Tap on the “Wipe cache/dalvik” button if you get into any boot loops or other issues.
Step 11 – You can now reboot your phone by selecting the “Reboot System” button.
Your One will boot now and it might take about 5 minutes to boot on your first time after flashing a new ROM. So, please wait.
That’s it! Your OnePlus One should now have Android 6.0.1 NucleaRom Marshmallow custom ROM installed on your phone! Go to Settings > About phone to verify.
For More OnePlus One Updates Keep Checking Android Custom ROM Fix ™®
That’s all. We hope this guide serves you well. If there’s anything you’d like to be added/changed on this page, PLZ Use the comment box below to contribute more ideas & Suggestions .
Like this post? PLZ Hit the share buttons below to share this article with your friends on Facebook, Google + and Twitter.
Want the latest Updates Sign up for our newsletters!
PLZ Follow Us On Flipboard 4 More Latest Updates.
Best Regards.™
Available link for download
Subscribe to:
Posts (Atom)