Sunday, December 25, 2016
Install CM13 0 Nightly Android 6 0 1 Marshmallow on Moto X Pure 2015 Latest Build
Install CM13 0 Nightly Android 6 0 1 Marshmallow on Moto X Pure 2015 Latest Build

The Moto X line is a smartphone thats always been dancing around greatness.
In other hand The Moto X Pure Edition is as amazing as it looks, with water- repellent coating and a 21 MP camera.
If you are looking to install a new custom ROM on your Moto X Pure (2015) then we have here as usual the best Custom ROMs for you.
CyanogenMod 13 [CM13.0] Nightly ROM latest build cm-13.0-20160520-NIGHTLY-osprey.zip is released for Moto X Pure (2015) clark
CM13.0 will let Moto X Pure (2015) clark users taste the sweetness of Marshmallow 6.0.1 such as the battery saving ‘doze’ functionality and new permissions model, alongside the CM features you’d expect.
Follow our guide below to download the Unofficial CM13.0 and install it yourself.
÷ Prerequisites:
•This tutorial is only for installing CyanogenMod 13 [CM13.0] Nightly ROM on Moto X Pure (2015) clark. Please do not try on any other Moto X variants.
•Your phone should be rooted and haveClockworkMod recovery installed from before.
•This tutorial will wipe out all your data.Proceed at your own risk.Perform a Dalvik Cache wipe before proceeding from the recovery mode.
•Make sure you backup all your data in your phone before proceeding.

*Disclaimer:
Android Custom ROM fix ® provide various Firmware Updates and Rooting process along with Custom ROM,Modes,file are all belong to their owners/developers. The autor of this site or the developers are not responsible, if you damage or brick your device.Do it on your own risk and follow the instruction properly.
* Important:
Backup important files stored on your device before proceeding with the steps below, so that in case something goes wrong you’ll have backup of all your important files.
÷ How to Install CM13.0 Nightly Android 6.0.1 Marshmallow on Moto X Pure (2015)
Step 1 – Download CM13.0 Android 6.0.1 Marshmallow and Google Apps for your Moto X Pure (2015) to your computer.
Step 2 – Connect and mount your Moto X Pure (2015) USB memory on your computer using the USB cable.
Step 3 – Now copy/paste the downloaded Android 6.0.1 ROM zip file and Google Appszip files to your SD card. Make sure the files are in the SD card root (not in any folder).
Step 4 – Then turn OFF your phone and disconnect from the USB cable.
Step 5 – Now to get in the Recovery Mode. Switch ON the phone while pressing and holding Volume Up + Home + Power buttons together
Step 6 – Once you are in ClockworkModRecovery, select perform a full data wipe by selecting “wipe data/factory reset”. Use the Power button to select everything while in the Recovery Mode.
Step 7 – Then, perform a cache wipe by selecting “wipe cache partition” .
Step 8 – Now this is optional, but it is recommended to perform a wipe of your dalvik cache as well. You will not get into boot loops or any other errors. From CWM recovery, go to ‘advanced’ and then select “wipe dalvik cache”.
Step 9 – Then go back to the main recovery screen and select “install zip from SD card”.
Step 10 – Now select “choose zip from sdcard”. Using your volume keys, navigate to the Android 6.0.1 ROM zip file that you copied to your SD card and select it using the Power button. Confirm the installation on the next screen and the installation procedure should start now.
Google Apps: Repeat the above step for the Gapps zip file as well and install it on your phone.
Step 11 – After the installation completes, go to “+++++Go Back+++++” and reboot the phone by selecting “reboot system now” from the recovery menu.

Your Moto X Pure (2015) will boot now and it might take about 5 minutes to boot on your first time. So, please wait.
That’s it Your Moto X Pure (2015) should now have CM13.0 Nightly Android 6.0.1 Marshmallow latest build installed on your phone! Go to Settings > About phone to verify.
For More Moto X Pure (2015) Brand New Firmware & Custom ROM keep checking AndroidCustomROM Fix ™®
Like this post? PLZ Hit the share buttons below to share this article with your friends on Facebook, Google + and Twitter.
PLZ Follow Us On Flipboard 4 More latest custom ROM fix.
PLZ Use the comment box below to contribute more ideas & Suggestions .
Best Regards.<
Available link for download
Friday, November 11, 2016
HTC One X Stock ROM Stock Firmware Free Download
HTC One X Stock ROM Stock Firmware Free Download

Now you can download HTC One X Stock ROM firmware from below downloading links. The downloading links are tested and 100% working as well. If downloading links are not working or you are unable to download your flash files please contact us via commenting we will update downloading links.
Downloading links
HCT One X Stock ROM Firmware (Official Site)
Available link for download
Saturday, October 8, 2016
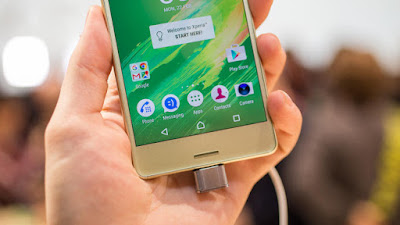
Deal Alert Grab an unlocked Xperia X Performance for 579 99 on eBay
Deal Alert Grab an unlocked Xperia X Performance for 579 99 on eBay
When Ryan looked at the Xperia X Performance last month, his verdict was that it had a nice display, decent specs, but deal breakers like the lack of a fingerprint scanner and the poor camera left a sour taste in his mouth. That was nothing though compared to the shock of the price of the phone. $700. There are many, many better phones selling for that much and even less, so Sonys value proposition just seems ridiculous.
Read More[Deal Alert] Grab an unlocked Xperia X Performance for $579.99 on eBay was written by the awesome team at Android Police.
from Android Police – Android News, Apps, Games, Phones, Tablets http://ift.tt/2a5JGNn
via IFTTT
Available link for download
Tuesday, September 6, 2016
How to Install Android 6 0 1 Marshmallow Xstasy ROM on Xperia Z2 Xperia X UI
How to Install Android 6 0 1 Marshmallow Xstasy ROM on Xperia Z2 Xperia X UI
Sony Xperia Z2 Xstasy custom ROM comes with tons of new features and is based on Android 6.0.1 Marshmallow. A quick list of the main features in Xstasy is given below and we are sure you’d love to use this on your Xperia Z2:

Android 6.0.1 Marshmallow.
Xperia X UI.
Fast and Smooth.
Stable...
Don’t worry we are going to share step by step guide to safely Install Android 6.0.1 Marshmallow Xstasy ROM on Xperia Z2 [Xperia X UI].
÷ Prerequisites:
•This tutorial is only for installing Android 6.0.1 Xstasy ROM on Sony Xperia Z2. Please do not try on any other Xperia Z variants.
•Your phone should be rooted and have ClockworkMod recovery installed from before.
•This tutorial will wipe out all your data. Proceed at your own risk.
•Perform a Dalvik Cache wipe before proceeding from the recovery mode.
•Sony PC Companion will NOT detect your phone after installing this ROM because it is a custom firmware.
•Bootloader should be unlocked or you will not
be able to install this ROM.
•Make sure you backup all your data in your phone before proceeding.
*Disclaimer:
Android Custom ROM fix ® provide various Firmware Updates and Rooting process along with Custom ROM,Modes,file are all belong to their owners/developers. The autor of this site or the developers are not responsible, if you damage or brick your device.Do it on your own risk and follow the instruction properly.
* Important:
Backup important files stored on your device before proceeding with the steps below, so that in case something goes wrong you’ll have backup of all your important files.

Step 1 – Download Xstasy Android 6.0.1 ROM for Sony Xperia Z2 to your computer and extract boot.img from the zip file separately.
Step 2 – Connect and mount your Sony Xperia Z2 USB (mass) memory on your computer using the USB cable.
Step 3 – Now copy/paste the downloaded Android 6.0.1 ROM zip file to your SD card. Make sure the file is in the SD card root.
Step 4 – Copy/paste the boot.img file to android-sdk-windowsplatform-tools directory.
Step 5 – Then turn OFF your phone.
Step 6 – Now to get into the Bootloader Mode. Press and hold the Volume Up button while connecting it again with the USB cable. Your phone LED will turn blue and it will get into the Bootloader Mode.
Step 7 – Once in the Fastboot mode (on your phone), navigate to android-sdk-windowsplatform-tools directory (on your computer) and open Command Prompt (Shift + Right-click > Open Command Prompt).
Step 8 – Type the following command and press Enter.
fastboot flash boot boot.img
Step 9 – Then, type the following command and press Enter.
fastboot reboot
Step 10 – Now to get in the Recovery Mode.
Switch ON the phone while pressing the Volume Up or Volume Down buttons a few times when you see the LED light turn pink or any other colour.
Step 11 – Once you are in ClockworkMod Recovery, select perform a full data wipe by selecting “wipe data/factory reset” as shown below. Use the Power button to select everything while in the Recovery Mode.
Step 12 – Then, perform a cache wipe by selecting “wipe cache partition”.
Step 13 – Now this is optional, but it is recommended to perform a wipe of your dalvik cache as well. You will not get into boot loops or any other errors. From CWM recovery, go to ‘advanced’ and then select “wipe dalvik cache”.
Step 14 – Then go back to the main recovery screen and select “install zip from SD card”.
Step 15 – Now select “choose zip from sdcard”. Using your volume keys, navigate to the Android 6.0.1 ROM zip file that you copied to your SD card and select it using the Power button. Confirm the installation on the next screen and the installation procedure should start now.

Step 16 – After the installation completes, go to “+++++Go Back+++++” and reboot the phone by selecting “reboot system now” from the recovery menu .
Your Xperia Z2 will boot now and it might take about 5 minutes to boot on your first time. So, please wait.
That’s it! Your Xperia Z2 should now have Android 6.0.1 Xstasy Marshmallow custom ROM installed on your phone! Go to Settings > About phone to verify.
For More Sony Xperia Z2 Updates Keep Checking Android Custom ROM Fix ™®
That’s all. We hope this guide serves you well. If there’s anything you’d like to be added/changed on this page, PLZ Use the comment box below to contribute more ideas & Suggestions .
Like this post? PLZ Hit the share buttons below to share this article with your friends on Facebook, Google + and Twitter.
Want the latest Updates Sign up for our newsletters!
PLZ Follow Us On Flipboard 4 More Latest Updates.
Best Regards.™
Available link for download
Saturday, August 27, 2016
How to Enable 4K Recording on Xperia X For Some Pixel Perfect Videos
How to Enable 4K Recording on Xperia X For Some Pixel Perfect Videos
Thanks to xda user AndroPlus for finding this out.

There’s a 4K recording app in the system files on Xperia X. And if you’ve root access on the device, you can enable the 4K recording app and go for shooting some pixel perfect videos of birds flying, swinging trees, babies crying, etc from your Xperia X.
Enabling 4K recording on Xperia X doesn’t take much effort, all you have to do is open the /system/vendor/overlay/ directory and DELETE the SuperVideoCamera-Enable-4K-Overlay-275-release.apk.
÷ Prerequisites:
•This tutorial is only for Sony Xperia X. Please do not try on any other Xperia variants.
•Your phone should be Rooted .
*Disclaimer:
Android Custom ROM fix ® provide various Firmware Updates and Rooting process along with Custom ROM,Modes,file are all belong to their owners/developers. The autor of this site or the developers are not responsible, if you damage or brick your device.Do it on your own risk and follow the instruction properly.
* Important:
Backup important files stored on your device before proceeding with the steps below, so that in case something goes wrong you’ll have backup of all your important files.
÷ How to Enable 4K Recording on Xperia X For Some Pixel Perfect Videos:
1- Download and install a file manager with root explorer (we prefer ES File explorer) on your Xperia X.
2- Open the file explorer, enable/grant it root permissions.
3- Go to /system/vendor/overlay/ directory, and look for the SuperVideoCamera-Enable-4K-Overlay-275-release.apk file inside the directory.
4- Either DELETE the SuperVideoCamera-Enable-4K-Overlay-275-release.apk file OR RENAME it to something else to disable it.
5- Reboot your Xperia X and then open the Camera app, 4K recording option should be there.
TIP: In case the 4K video recording option isn’t visible on your Xperia X camera app after rebooting, then download/install an activity launcher from Play Store (like QuickShortcutMaker) and find/add a shortcut for 4k Video using the app.

For More Sony Xperia X Updates Keep Checking Android Custom ROM Fix ™®
That’s all. We hope this guide serves you well. If there’s anything you’d like to be added/changed on this page, PLZ Use the comment box below to contribute more ideas & Suggestions .
Like this post? PLZ Hit the share buttons below to share this article with your friends on Facebook, Google + and Twitter.
Want the latest Updates Sign up for our newsletters!
PLZ Follow Us On Flipboard 4 More Latest Updates.
Best Regards.™
Available link for download
Wednesday, August 17, 2016
LG K10 and LG G Pad X 8 0 landing at AT T later this week
LG K10 and LG G Pad X 8 0 landing at AT T later this week

Later this week, AT&T will be adding two new LG Android devices to their roster.
First up, the LG K10 will be available for 30 monthly payments of $6.00 apiece with AT&T Next. The K10 runs Android 6.0 on a 5.3-inch 1280x720 display and features 8-megapixel rear and 5-megapixel front cameras, 32GB of storage, a microSD slot for adding more storage, a quad-core processor, and a removable 2300mAh battery.
from PhoneDog.com - Latest videos, reviews, articles, news and posts http://ift.tt/2a6h4Qc
via IFTTT
Available link for download